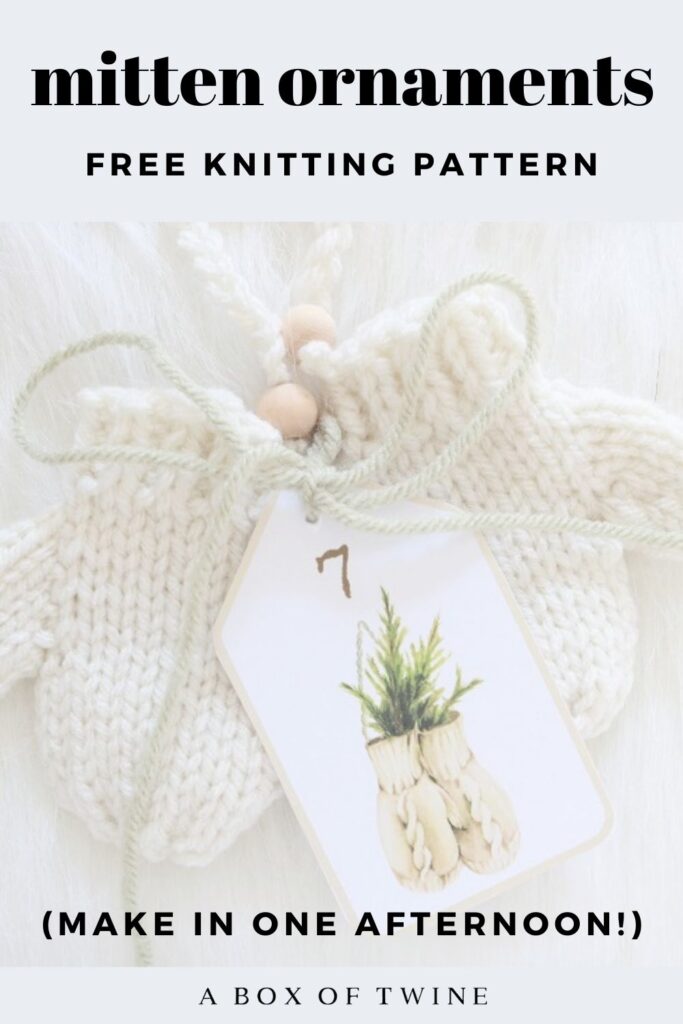
How to Knit Mittens Ornament {so cute!}
Looking for something quick and cute to knit this Christmas? Wondering how easy it is to knit mini ornaments? There are so many adorable ornaments to knit for Christmas, it may be hard to choose what to make. If you are thinking of making mini mittens, you may feel a little intimidated by having to work in the round with small double pointed needles. What if I told you there is an easier way? How about knitting mini mittens ornaments on straight needles (back and forth)? You only need to sew up a side seam when you’re done. Keep reading for the tutorial on how to make a sweet knit mittens ornament…
This post may contain affiliate links. That means if you click and buy, I may make a commission at no cost to you. Please see my full disclosure policy for more details.
FREE MINI MITTENS KNITTING PATTERN
How do you make mini mittens?
This tutorial will show you how to knit little mittens on straight needles, increasing in the middle to make a thumb. Once you’re finished with the body and thumb, you just close your seams. Easy!
You will need the following supplies to make the mini knitted ornaments:
Supplies
- Size 5 (3.75 mm) knitting needles
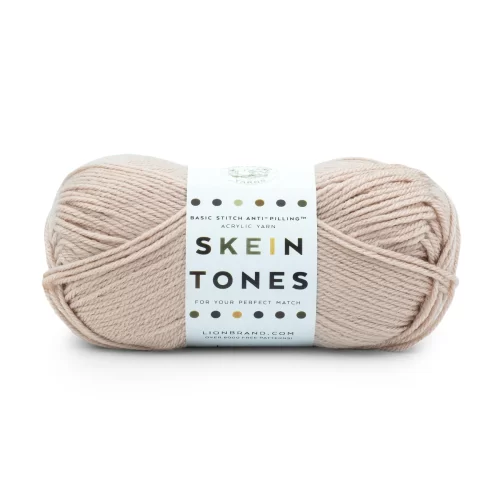
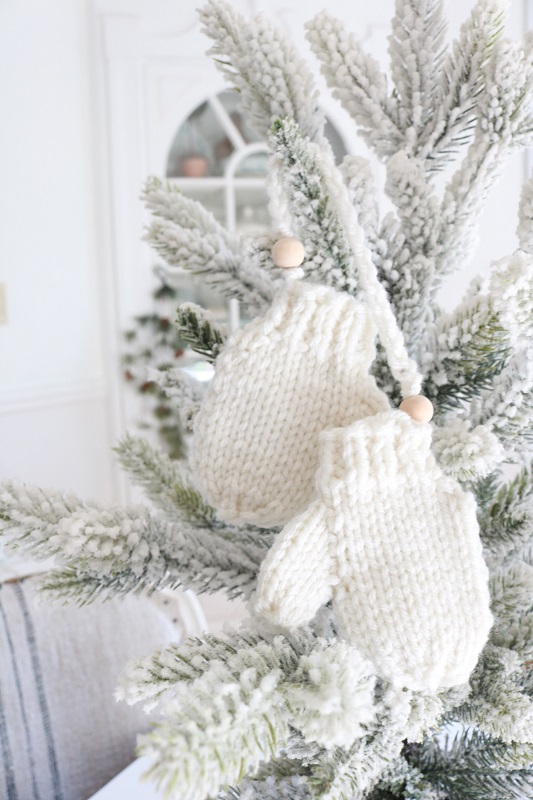
- approx. 30 yards of Medium weight (size 4) yarn to make 2 mittens. I used Red Heart Super Saver acrylic in color ‘Eggshell’. (Lion Brand Basic Stitch is also a great option)
- stitch holder (I just used a large safety pin)
- optional – small wood beads, crochet hook (e.g. size J, 6mm)
Knitting Notions
Abbreviations
K – knit stitch K2tog – knit 2 stitches together
P – purl stitch P2tog – purl 2 stitches together
Sts – stitches Rep – Repeat
RS – Right Side (side that faces you when finished)
PATTERN INFORMATION
The free pattern for the solid color mini mittens ornament is provided below.
- but you can also get the ad-free, printable pdf pattern for the 3 types of mitten ornaments (solid, striped, snowflake) as part of a bundle in the PATTERN SHOP! The pdf has step-by-step tutorial photos included.
(The premium Ad-Free PDF can also be purchased on ETSY)
NOTES: You will be knitting the mittens on straight needles, back and forth. The mittens are knit from the bottom up, and steps are included to increase for the thumb.
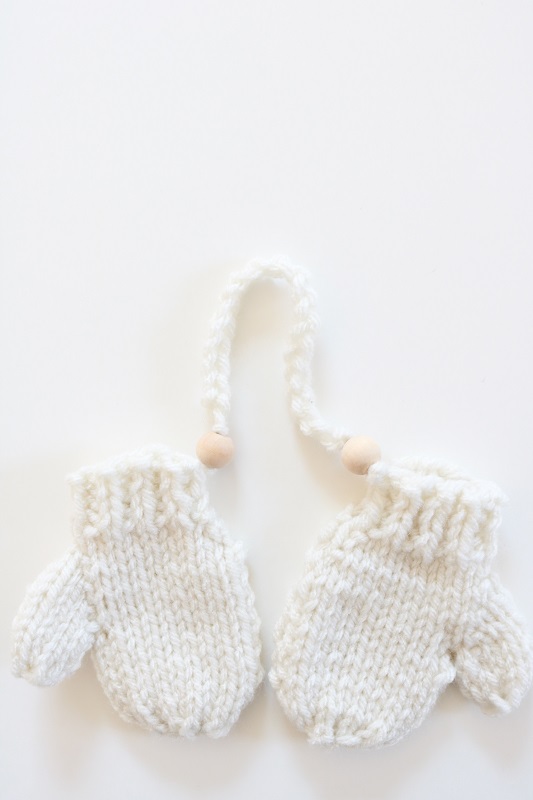
The finished mittens each measure approximately 3.5″ height by 3” width at the thumb.
You can expect each mitten to take just under 1 hour to knit.
Special Knitting Stitch:
KFB – “knit in front and back” – begin to knit a stitch, but before slipping it off the left needle, knit another stitch in the back loop. This will create 2 stitches out of 1 (an increase).
How do you make mitten ornaments?
Follow the steps below to make a solid colored mitten. Next, repeat to make another mitten. Lastly, attach the pair with a chain of yarn (embellished with beads).
Gauge isn’t necessary, as the mini mittens can be any size.
Steps to knit mitten ornaments:
Beginning with the size 5 knitting needles, cast on 16 sts with the size 4 yarn.
Ribbing on Cuff
Rows 1-4: *K1, p1; rep from * across.
Body of Mini Mitten
Row 5 (RS): Kfb, k across until last st, kfb. (18 sts)
Row 6: Purl across.
Increase for Thumb
Row 7: Kfb, k7, kfb in next 2 sts, k7, kfb. (22 sts)
Row 8 (and all even rows): Purl across.
Row 9: K9, kfb, k2, kfb, k9. (24 sts)
Row 11: K9, kfb, k4, kfb, k9. (26 sts)
Row 12: Purl across.
Separate Thumb
Row 13: K9, cast on 2 sts (using single cast-on method), place next 8 sts on a stitch holder, k9. (20 sts)
Row 14: Purl across.
Rows 15-20: work in stockinette st (knit 1 row, purl 1 row). (20 sts)
Taper Top of Mini Mitten
Row 21: *K2tog; rep from * across. (10 sts)
Row 22: *P2tog; rep from * across. (5 sts)
Cut yarn, leaving 8” tail.
Weave tail through remaining sts.
Pull to tighten top of mitten.
Finish Thumb
Place the 8 sts from stitch holder onto the left-hand needle, with RS facing you.
Join yarn.
Row 1: Kfb, k6, kfb. (10 sts)
Row 2: Purl across.
Rows 3-4: work in stockinette st (knit 1 row, purl 1 row). (10 sts)
Row 5: *K2tog; rep from * across. (5 sts)
Cut yarn, leaving 5” tail.
Weave tail through remaining sts.
Pull to tighten top of thumb.
(in-process photos of the mittens are provided in the ad-free pdf file)
Sew Seams
Use the thumb yarn tail to sew the seam on the thumb and attach it to the mitten body.
Use the body yarn tail to sew the seam on the side of the mitten.
Weave in ends.
Repeat all the steps above to make your second mitten.
Join Mittens for Christmas ornament
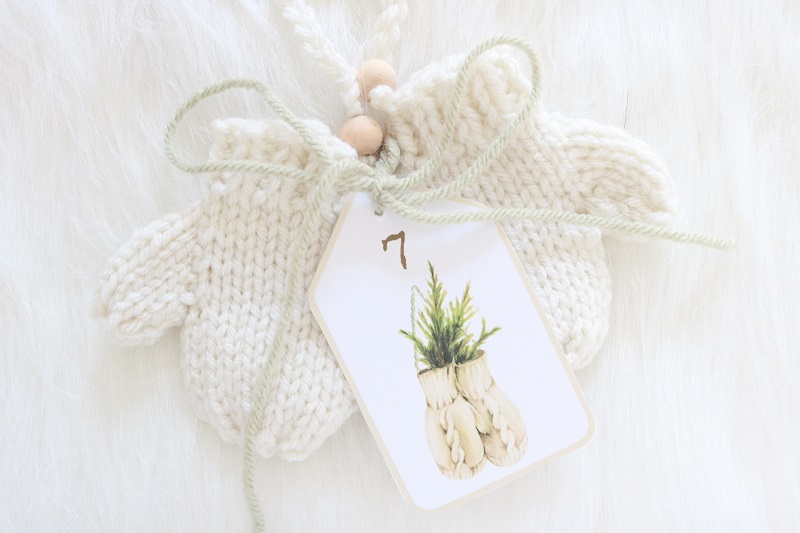
The last step to finish your mittens Christmas ornament is to join the pair of mittens together.
You can simply grab some yarn about 8-10” long, then use it to tie the mittens together at one end of the cuffs.
Another alternative is to crochet a chain and embellish it with beads as follows:
Cut yarn about 40” length.
Tie a double knot about 2.5” from end.
String a small wood bead on this end.
Make a slip knot near the bead, then chain 20 with size J (6mm) crochet hook (or until you reach about 2.5” left of yarn).
Fasten off chain, then string another wood bead on the tail.
Make a double knot to hold this bead on.
Tie the tail ends of your beaded chain on to the cuffs of each mitten.
Now just place them on a branch of your Christmas tree to show them off!
Important Tips for Knitting your Mittens Ornament
Some things to keep in mind as you knit the mini mittens are:
- Make sure to count the stitches on your needle after increase and decrease rows, to ensure you didn’t miss anything.
- The Right Side (RS) is always facing you when you knit, while the Wrong Side (WS) faces you when you purl.
- Feel free to add ribbing rows (see Rows 1-4) to the bottom of your mitten if you would like a bigger cuff.
- Make 2 mini mittens before you try to add the chain to attach them together.
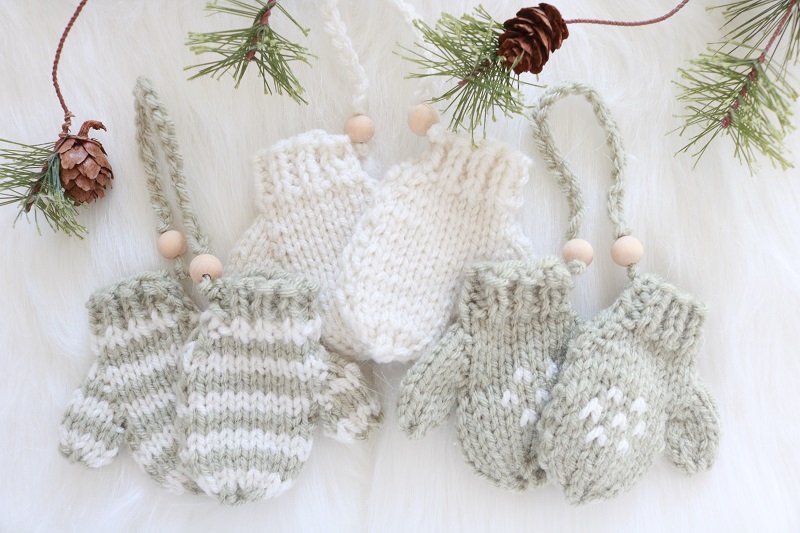
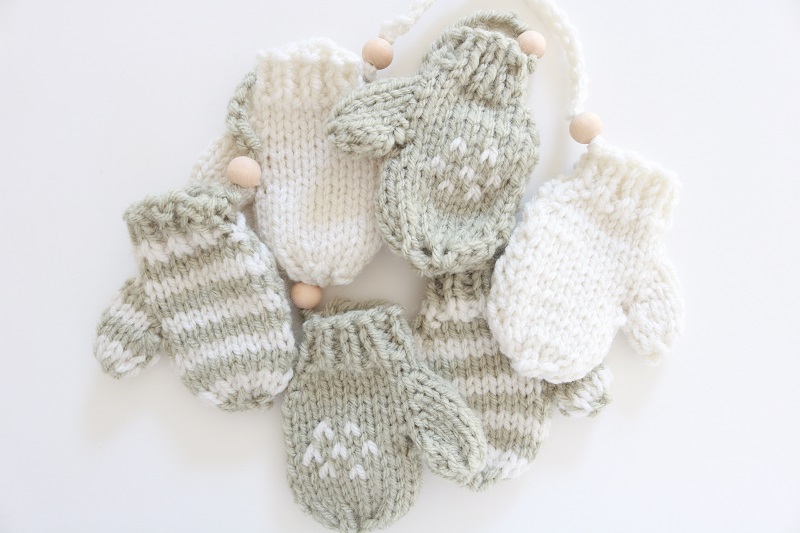
How do you knit little mittens with stripes or a snowflake?
To add interest to your little knitted mittens ornament, you can make variations of these mittens.
For a striped pair, alternate colors for every 2 rows.
I love how they look with cream and green stripes …
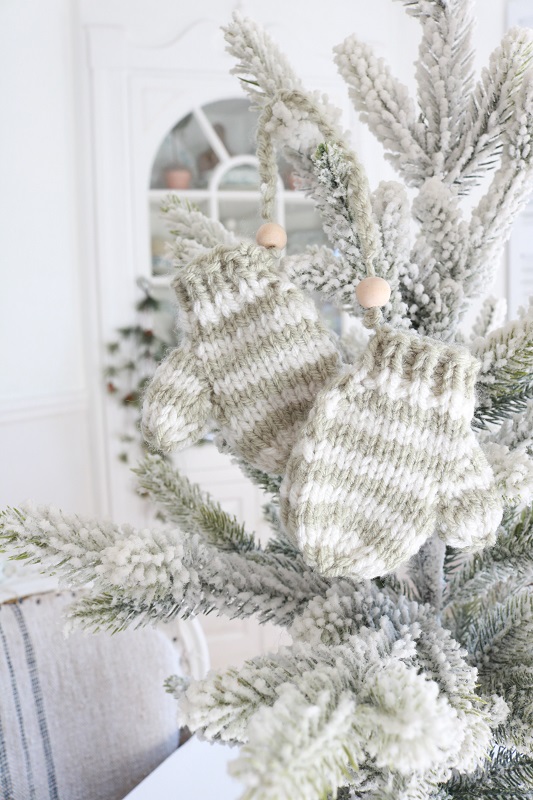
You could also add a snowflake pattern to the body of the mitten by using different colored yarn in a snowflake motif:
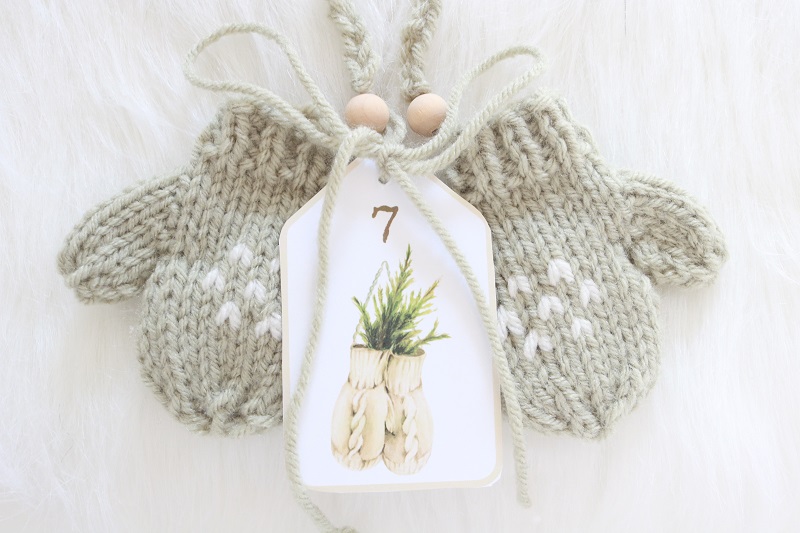
Both of these alternative patterns are included in the CHRISTMAS MITTEN ORNAMENT BUNDLE.
These mini mitten ornaments would make great gifts during Advent – package them with my FREE ADVENT GIFT TAGS!
I hope you enjoyed this mittens ornament knitting pattern (FREE!). I’m sure you can handle the kfb (knit front and back) stitches if you are a beginner. This is a good project to practice that ‘increase’ skill on, as it isn’t too complicated.
Don’t forget that the mini mittens knitting pattern is also available in a pdf pattern bundle, which includes the striped and snowflake patterns. Grab the CHRISTMAS MITTEN ORNAMENT BUNDLE in my pattern shop.
Looking for more Christmas craft ideas?
Grab the free Advent gift tags I mentioned above by subscribing below…
Visit these crafty Christmas projects, too:
CHRISTMAS STOCKING HAT ORNAMENTS
FARMHOUSE STYLE CHRISTMAS DIYS
——————————————————————————————————————–
Interested in a Christmas craft collection eBook?
Click HERE to create a Peaceful Christmas this season – even if you think you lack time or money!
CHRISTMAS CRAFT EBOOK —>
——————————————————————————————————————–
Remember to pin the Mini Mittens Christmas Ornament ….


2 Comments
Faith
Thank you for sharing this pattern! The instructions were easy to follow and the mittens are adorable.
Susan
Yay! So happy your mittens came out adorable. 🙂