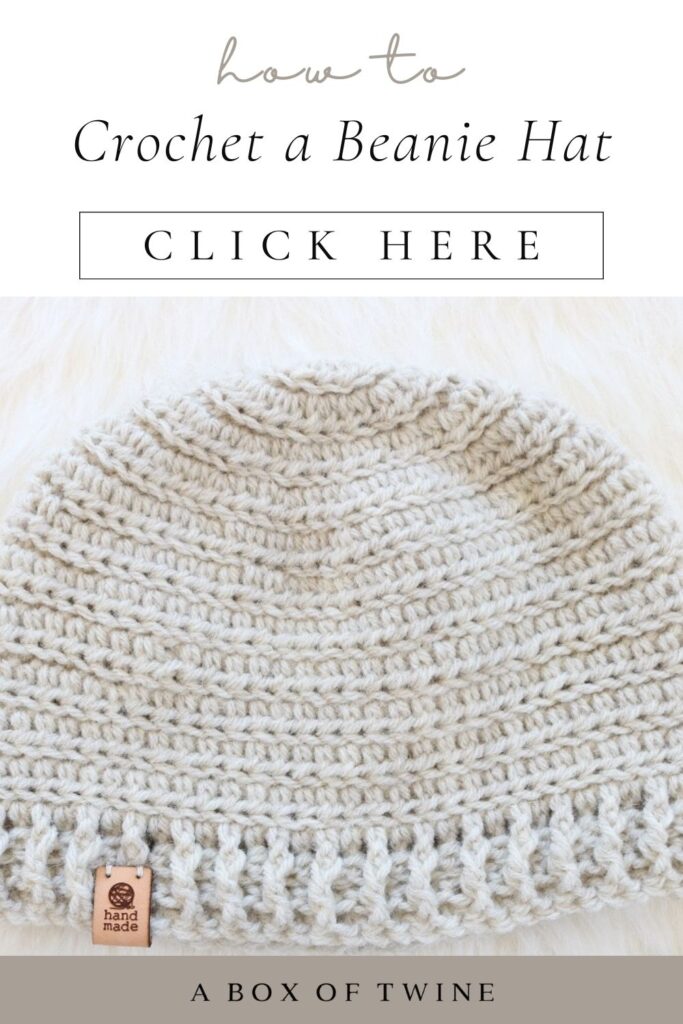
How to Crochet a Beanie for Adults
Beanies are a popular style for handmade hats, and no wonder! The basic beanie is simple, stylish and designed to fit well. I enjoy crocheting a beanie from the top down, because you get to try on the hat as you go and adjust the height accordingly. If you are looking for an easy crochet hat pattern, a beanie is a great project to start with. They are very beginner friendly and can make great gifts!
I’m sharing an easy crochet beanie pattern today, which includes two different sizes for adults. The Small/Medium size should fit a teen or woman, and the Large/Extra Large size should fit a man. I’ve got all the details and step-by-step instructions for both sizes of the hat in the free pattern below, so keep reading.
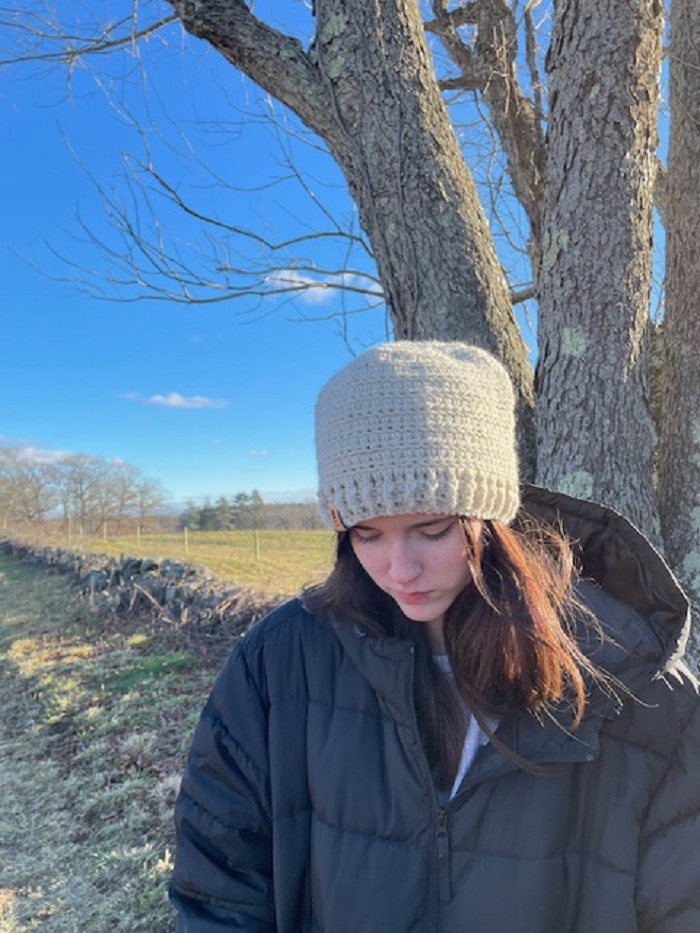
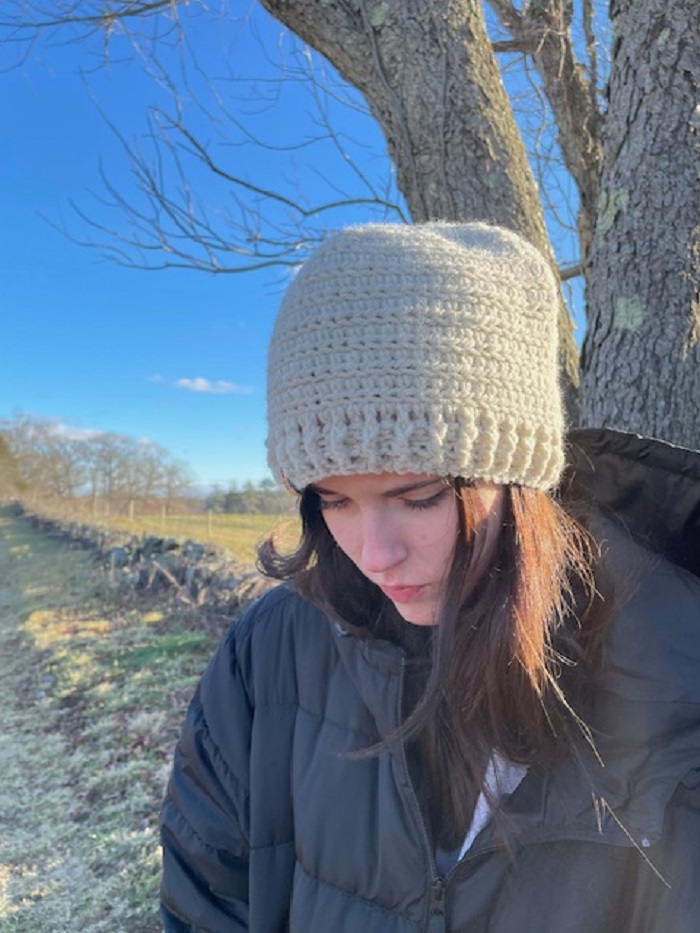
My teenage daughter agreed to model the beanie hat recently while we hiked around a local farm in Ipswich, Massachusetts. She appreciated the extra warmth on that chilly day!
This post may contain affiliate links. That means if you click and buy, I may make a commission at no cost to you. Please see my full disclosure policy for more details.
Crochet Beanie Hats
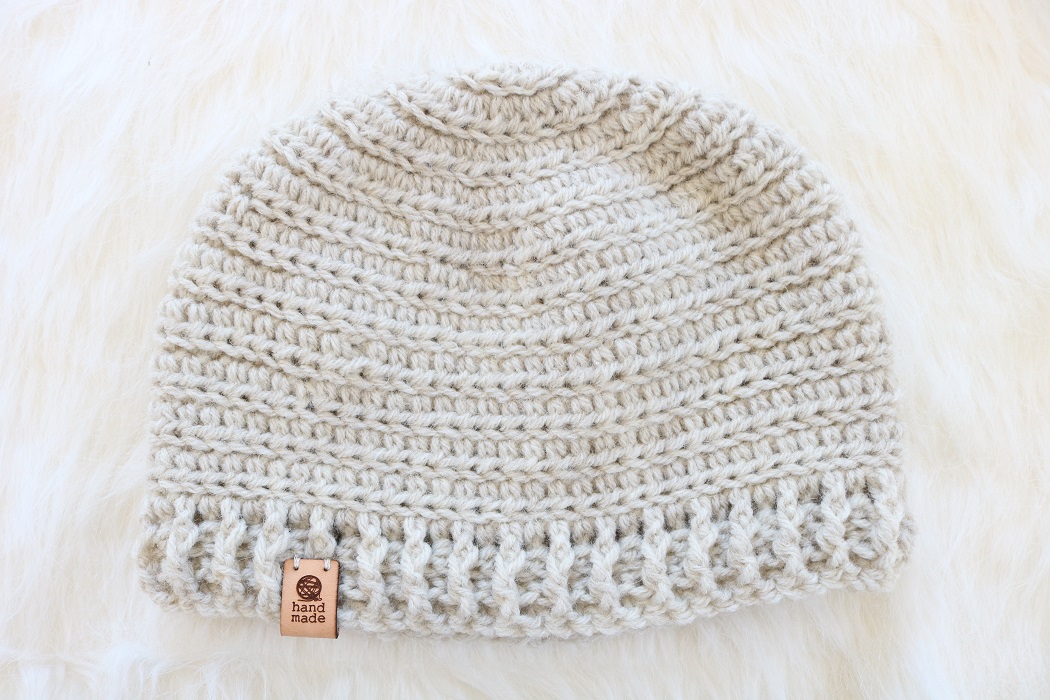
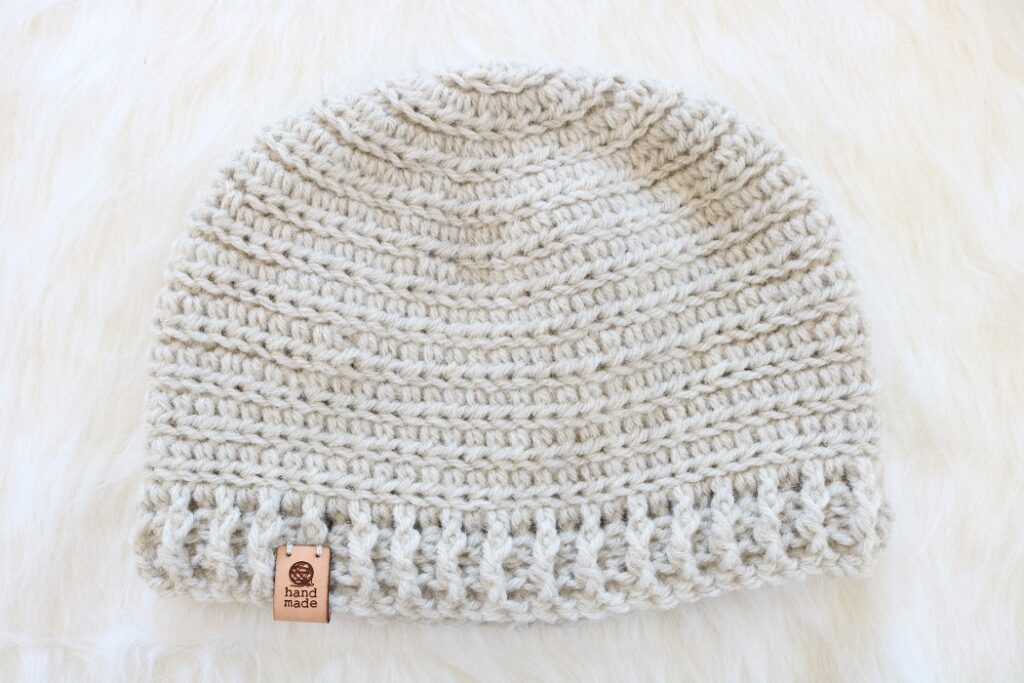
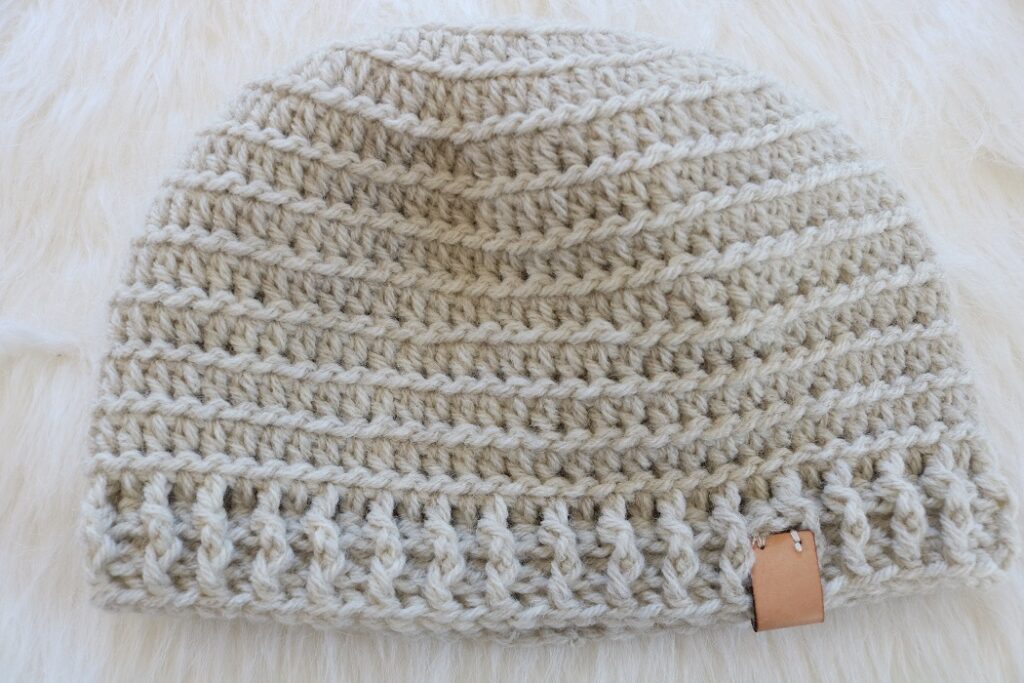
The idea behind a crochet beanie pattern is to design a top-down hat with BASIC CROCHET STITCHES, working from the top down. You begin by working a flat circle for the crown of the head, increasing stitches over the rounds. Next, you work the sides of the beanie, following by the brim. Once finished, the beanie hat can be embellished with a ‘Handmade’ tag.
The following is a list of supplies you would need to create one hat in adult sizes. Feel free to use similar yarn (size 4, worsted weight yarn) and the same size crochet hook to make your own. This is a great way to use up just one skein of yarn. You can make several of these crochet hats in no time at all!
Supplies
- Size J (6mm) hook size
- Size 4 Medium yarn weight – 145 (185) yds
- Lion Brand Wool Ease in color Natural Heather (1 skein = 197 yds)
- scissors
- tapestry needle (aka yarn needle)
- stitch marker
- optional – ‘Handmade’ leather tag (find the tags I used in my FAVORITE CRAFT SUPPLIES list)
Crochet Abbreviations
US Crochet terminology is used. (US terms)
Ch – chain
BLO – back loop only
dc – double crochet
FPdc – front post double crochet (work dc around front post of designated stitch)
BPdc – back post double crochet (work dc around front post of designated stitch)
hdc – half double crochet
rep – repeat
sl st – slip stitch
st(s) – stitch(es)
RS – Right Side
WS – Wrong Side
PATTERN INFORMATION
I enjoy naming my crochet and knit patterns after local New England places of interest.
This “Brandeis Beanie” is named after the local Brandeis University in Waltham, MA. I can envision this hat fitting right in with a collegiate atmosphere, but it’s classic look would fit in anywhere. The Natural Heather yarn color gives a softness and neutral look that will never go out of style.
The FREE simple beanie crochet pattern for the crochet beanie hat is provided below, with a Beginner friendly skill level.
- but you can also get the ad-free, printable pdf pattern bundle for the CROCHET BEANIE HAT in the ETSY SHOP! The pdf has some helpful photos included.
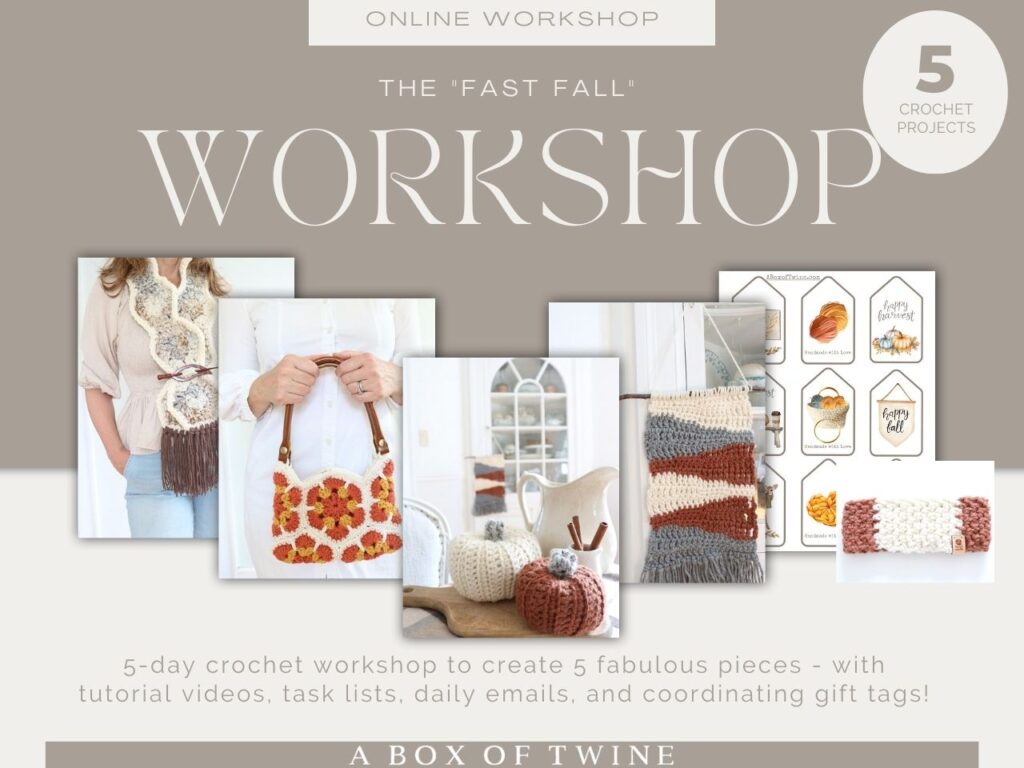
Before we begin, I wanted to make you aware of a crochet pattern workshop to help you make 5 fabulous fall-themed pieces. Click on the link below to learn all about making an ear warmer, purse, pumpkins, scarf, and wall hanging! You will love the ease and simplicity of these crochet pieces, no matter the season..
——————————————————————————————————————–
Looking for quick crochet projects?
Click HERE to crochet fabulous FALL items in just 5 days – even if you think you are short on time & skills!!
FAST FALL WORKSHOP —>
——————————————————————————————————————–
Beginner Crochet Beanie Pattern
Can you crochet a simple hat?
Yes! And very quickly with this easy hat pattern using basic stitches and simple techniques!
Here I will walk you through each step of making an easy crochet beanie hat for two adult sizes, S/M and L/XL. You will be using an easy stitch pattern, repeated every 2 rounds.
Gauge: 4″ (10cm) square = 12 sts by 13 rounds (of Round 11-12 pattern repeat).
The S/M (small/medium) size should fit a teen or woman, with 8″ height and 22″ circumference.
The L/XL (large/extra large) size should fit a man, with 9″ height and 24″ circumference.
NOTE –
- The first Ch 1 in each round does not count as a st.
- Hat will be worked from the top to the bottom, increasing stitches in alternate rounds.
- You will be turning after each round, creating a slight ‘seam’ in the same place.
- The hat is reversible.
Beanie Hat Pattern
Crown of Hat
With size J hook, make a Magic Loop (aka Magic Ring or Magic Circle) with size 4 yarn.
NOTE – Be sure to put a stitch marker (SM) at the first st to mark the beginning of each round. You will be joining and turning at the end of each round.
Stitch count for the top of the hat will be the same for both sizes through Round 9.
Round 1: Ch 1, work 8 sc into the Magic Loop. Pull tail to close loop. Join with sl st to first sc. Turn. (8 sts)
Round 2: Ch 1, 2 hdc in each st around. Join with sl st to first st. Turn. (16 sts)
Round 3 and all odd-numbered Rounds: Ch 1, sl st in BLO of each st around. Join with sl st to first st. Turn.
Round 4: Rep Round 2. (32 sts)
Round 6: Ch 1, *1 hdc in next st, 2 hdc in next st; rep from * around. Join with sl st to first st. Turn. (48 sts)
Round 8: Ch 1, *1 hdc in each of next 2 sts, 2 hdc in next st; rep from * around. Join with sl st to first st. Turn. (64 sts)
For Size S/M only:
Round 10: Ch 1, *1 hdc in each of next 15 sts, 2 hdc in next st; rep from * around. Join with sl st to first st. Turn. (68 sts)
For Size L/XL only:
Round 10: Ch 1, 2 hdc in next st, *1 hdc in each of next 6 sts, 2 hdc in next st; rep from * around. Join with sl st to first st. Turn. (74 sts)
Sides of Hat
Round 11: Ch 1, sl st in BLO of each st around. Join with sl st to first st. Turn. 68 (74) sts
Round 12: Ch 1, hdc in each st around. Join with sl st to first st. Turn. 68 (74) sts
Rep Rounds 11-12 until piece measures approximately 7 (8)” from the center of the crown, ending with a Round 11.
Feel free to make your hat height shorter or longer, stopping approx. 1″ before your final desired height. (For instance, if you want a longer slouchy hat).
Ribbed Brim of Hat
The ribbed brim of the hat is made with double crochet stitches. The ‘ribbing’ is created by working FPdc and BPdc stitches around the posts of the previous round.
Round 1: Ch 2 (counts as 1 dc), 1 dc in next st and in each st around. Join with sl st to top of tch (1st dc). Turn. 68 (74) sts
Round 2: Ch 2 (counts as 1st st), BPdc around next st, *1 FPdc around next st, 1 BPdc around next st; rep from * around. Join with sl st to top of tch. Turn. 68 (74) sts
Round 3: Ch 2 (counts as 1st st), alternate working FPdc around front posts and working BPdc around back posts all around. Join with sl st to top of tch. 68 (74) sts
Fasten off.
The hat is reversible, so you can choose which side you prefer for RS.
Weave in all loose ends on your chosen WS.
Optional Finishing Touches
Add an optional ‘Handmade’ leather tag to the brim of your hat. Attach it to the front, so that the ‘seam’ of the hat is less visible in the back.
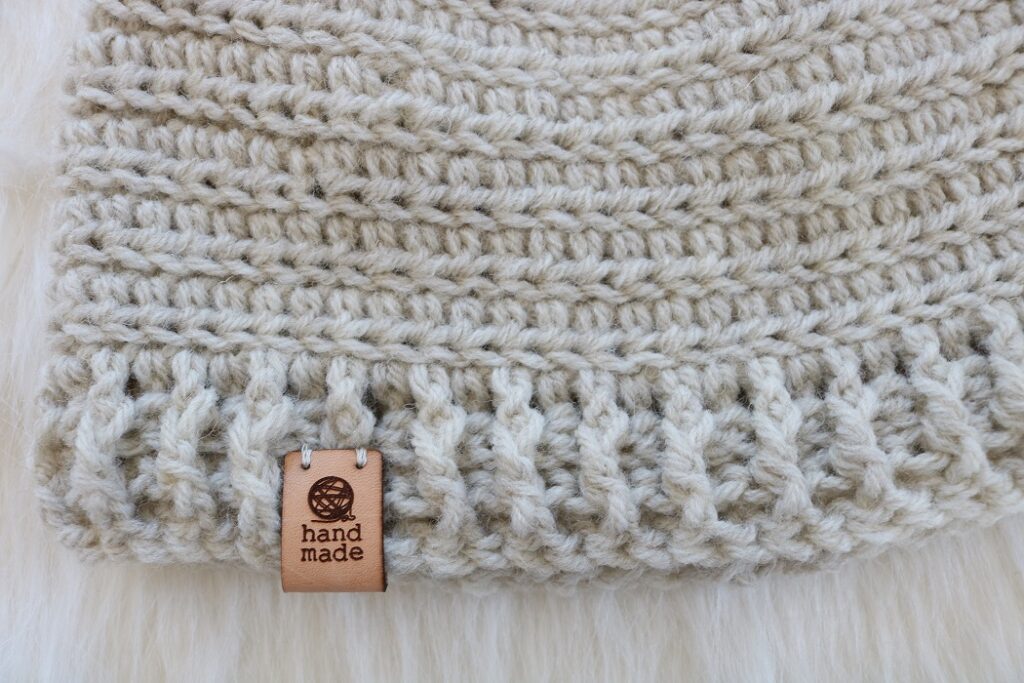
Find the leather tag I used in my FAVORITE CRAFT SUPPLIES.
You could also add a yarn pom pom or faux fur pom pom to the top of the beanie when you’re finished. Use a pom pom maker to create a yarn pom pom, or purchase a faux pom pom. Just keep in mind that once you add the pom pom, the hat will no longer be reversible.
Important Tips for Crocheting your Beanie Hat
Some things to keep in mind as you work the beanie crochet pattern are:
- The increase sts for the crown are worked on even-numbered rows.
- You will be turning after each round, so that a slight ‘seam’ will occur in the same place.
- Use a stitch marker (SM) to mark the first st in each round.
- Two adult hat sizes are provided in the pattern:
- S/M should fit a teen or woman
- L/XL should fit a man
- Feel free to try the hat on as you go and adjust the height if you’d like, as instructed in the pattern.
Finished Size
The finished hat measures approximately 8 (9)″ height by 22 (24)” head circumference at the brim. Feel free to block the hat if you wish, but it is not necessary.
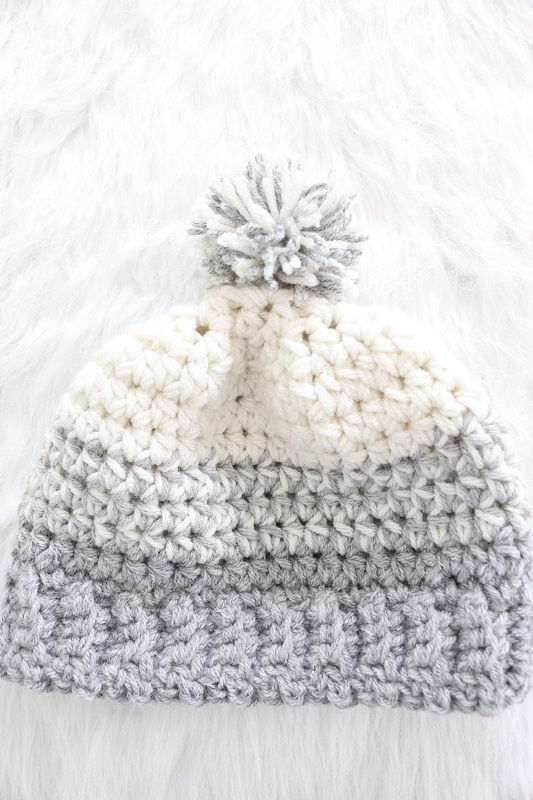
Crochet Beanie Hat
The beanie hats make great gifts. Just pull the hat over your head and ears to feel the warmth! Feel free to embellish your hat with a customized leather tag. It will add just that unique touch. You could also customize the hat by using different colors for the body and the brim.
Since the beanie hat is reversible, you can turn it inside out for a different look:
Don’t forget that this crochet hat pattern is also available in an ad-free digital pdf pattern. The pdf has a few helpful photos. Grab the CROCHET BEANIE HAT pattern in my Etsy shop.
Love crocheted hat patterns? Check out these other FREE crochet hat patterns…
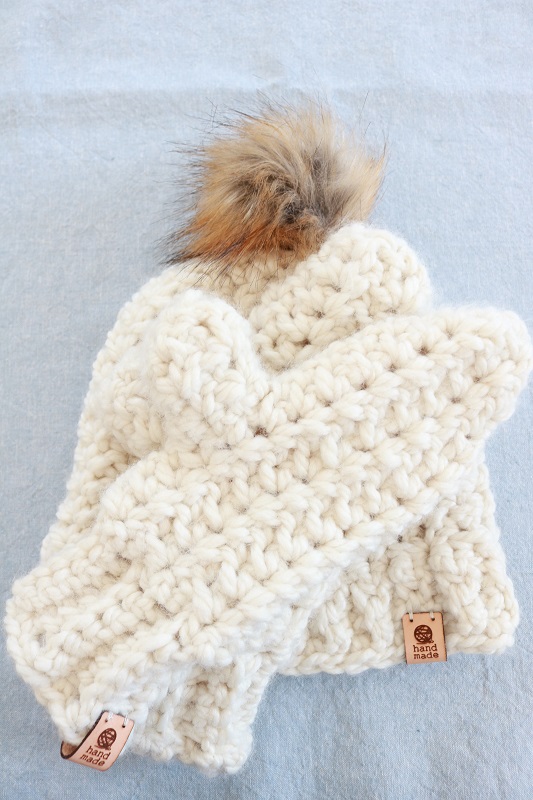
I also offer this chunky CROCHET HAT AND MITTENS PATTERN BUNDLE in the Etsy shop:
Did you enjoy this easy beanie crochet pattern? These hats would also make lovely gifts for your family and friends during the colder seasons.
Check out all of my FREE CROCHET PATTERNS HERE.
===> Remember to PIN for later! <===


2 Comments
Anna
I have a question, when doing the hdc rows after the slip stich, where do I put my hook to make the hdc. into the slip stitch or into the front loop of the previous row?
Susan
Hi Anna, thanks for your question. When working the hdc rounds, you will be putting your hook into the slip stitches that were worked in the prior round. These will be straightforward hdc stitches worked into both loops of the slip stitches. The only time you are working into one loop of a stitch is when you work slip stitches into the back loop of the hdc stitches (you do this on odd-numbered rounds).
Happy crocheting,
Susan