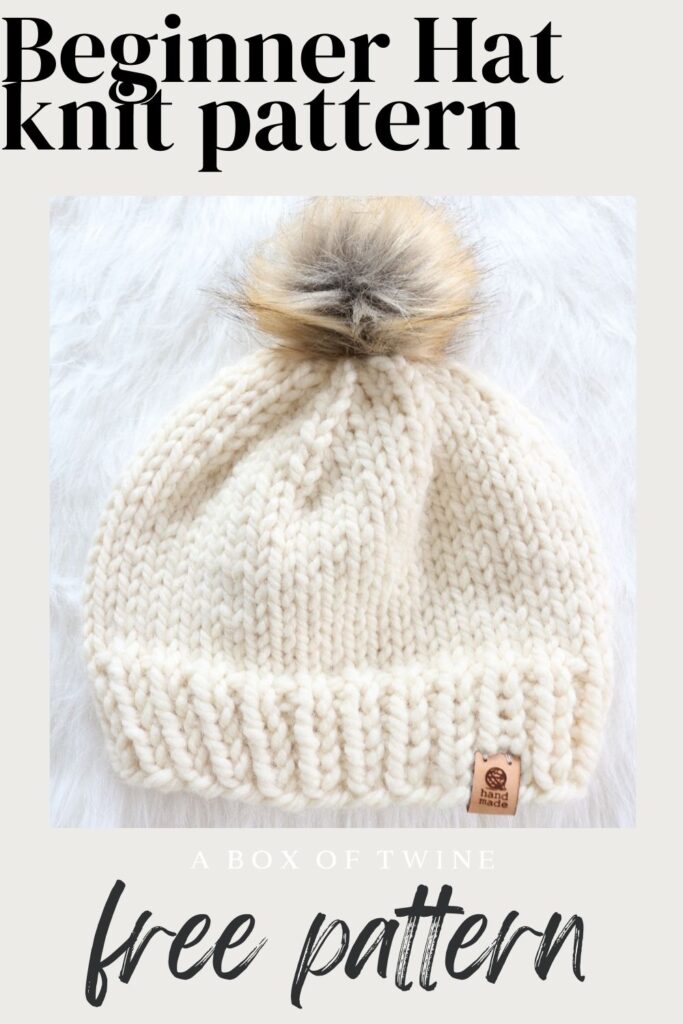
How to Knit a Hat for Beginners {step by step with pictures}
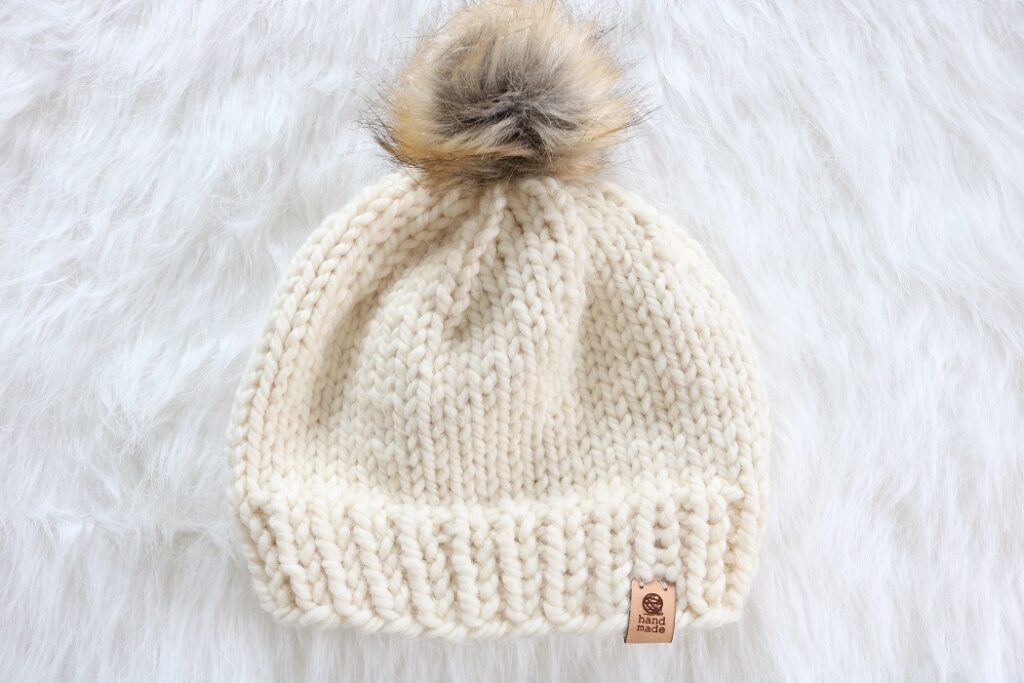
If you are looking for a SIMPLE, beginner knit hat pattern, you have come to the right place! Beginners take note – this is one of the easiest knit hat patterns you will find. It is worked with a straightforward ribbing pattern for the brim, and a stockinette stitch pattern for the body and top of the hat. You just need to know how to work knit and purl stitches to make this hat (and there aren’t many purl stitches!). Once you’ve completed this hat (in a matter of hours), you can embellish it with a faux fur pom pom and leather tag to brag that it is ‘Handmade’ by you!
Keep reading for a step-by-step photo tutorial of this bottom-up simple hat. I will take you through each section of the hat, showing you how to join and knit in the round with circular needles. Whether you are new to knitting hats, or have already made many, you will enjoy the classic simplicity of this timeless stockinette knit hat!
This post may contain affiliate links. That means if you click and buy, I may make a commission at no cost to you. Please see my full disclosure policy for more details.
How to Knit a Hat for Beginners
This easy hat pattern is a great project for complete beginners learning to knit in the round. You will work on small circular knitting needles, 16″or 19″ length, with:
- a rib stitch pattern for 6 rounds on the bottom,
- then a simple repetitive stockinette pattern for the main body of the hat.
- Lastly, you will work decrease rounds at the crown of the hat.
You will need the following supplies to make your own knit hat:
Supplies
- 1 skein of Wool Ease Thick & Quick size 6 Lion Brand yarn (106 yds per skein) to make one hat
- Color: Fisherman
- or similar weight Super Bulky yarn, about 65 yds
- Size 13 (9.0 mm) circular needles, 16-19″ length
- Scissors
- tapestry needle (yarn needle)
- Stitch Marker
- Optional: Faux pom-pom and Leather Tag
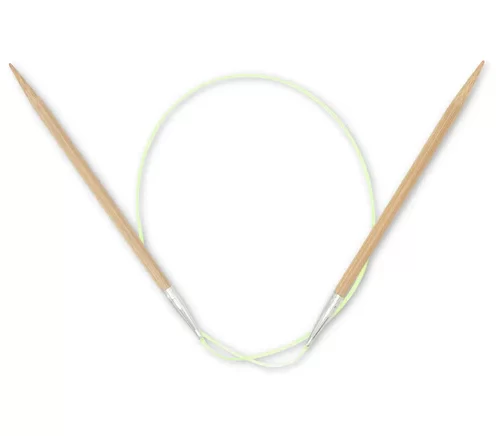
Circular Knitting Needles (various sizes)
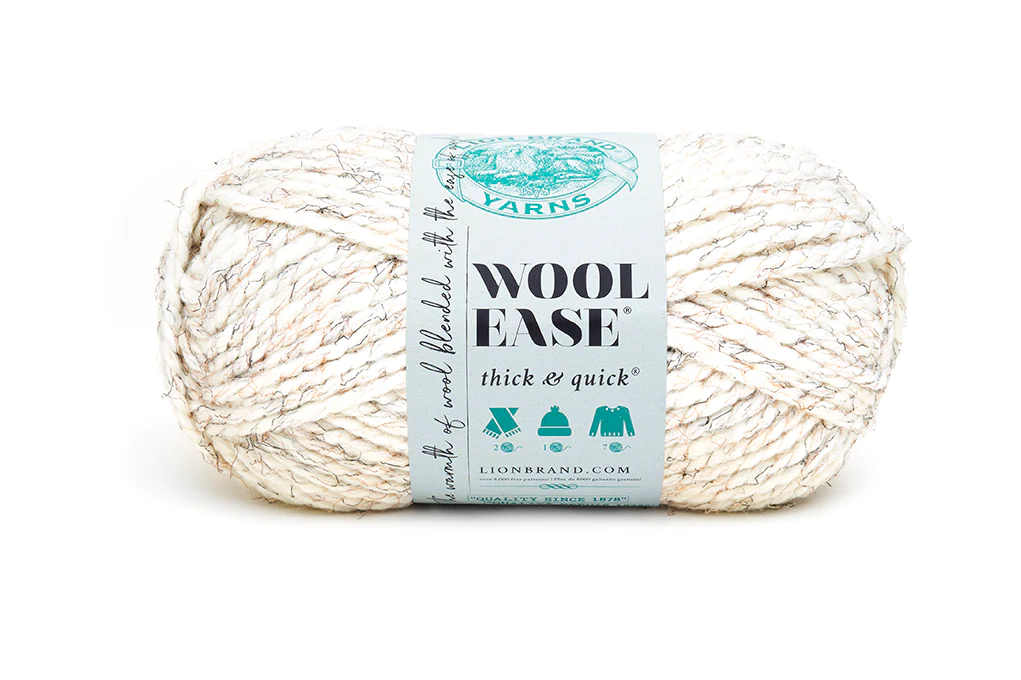
Wool Ease Thick & Quick Yarn
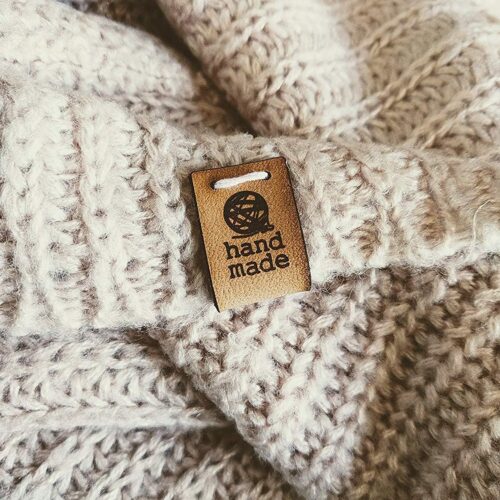
Leather Tags – ‘Handmade’
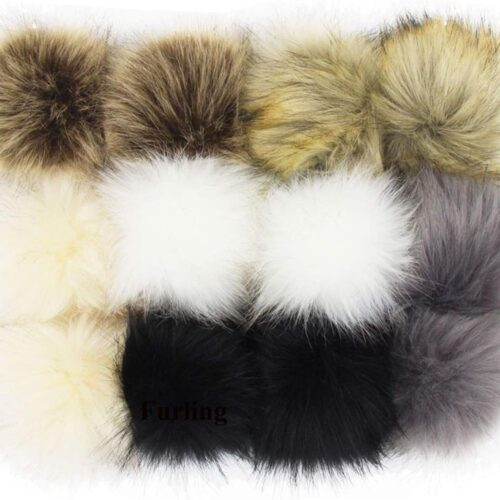
Faux Fur Pom Poms for Hats
Knitting Abbreviations
BO – bind off
CO – cast on
K – knit stitch
K2tog – knit 2 stitches together
P – purl stitch
sl – slip stitch from left needle to right without working it
sm – stitch marker
sts – stitches
Rep – repeat
RS – Right Side
WS – Wrong Side
PATTERN INFORMATION
The easy hat free pattern is provided below.
- but you can also get the ad-free, printable pdf beginner KNIT HAT PATTERN in the ETSY SHOP! The pdf has all the helpful photos included.
Before we begin on this pattern, are you a new knitter? You may be interested in taking my knitting class first, to master the basics …
——————————————————————————————————————–
Do you wish you could really learn how to knit beautiful things?
Click here to master basic knitting skills in under 2 weeks – even if you are a complete beginner, intimidated by mistakes, and lack design coordination!
KNITTING COURSE —>
——————————————————————————————————————–
FREE HAT KNITTING PATTERN
Gauge: 4″ (10cm) square = 9 sts by 14 rounds
How to knit a hat with circular needles
New knitters take note:
When knitting in the round using a circular needle, the stitches are joined to make a circle. This happens right after you cast on the initial stitches, as you begin the first Round. (You will be working in ‘rounds‘ instead of back-and-forth ‘rows’). Rather than stitching on needles back and forth, alternating between Right Side (RS) and Wrong Side (WS) facing you, the RS will always face you as continuously stitch around.
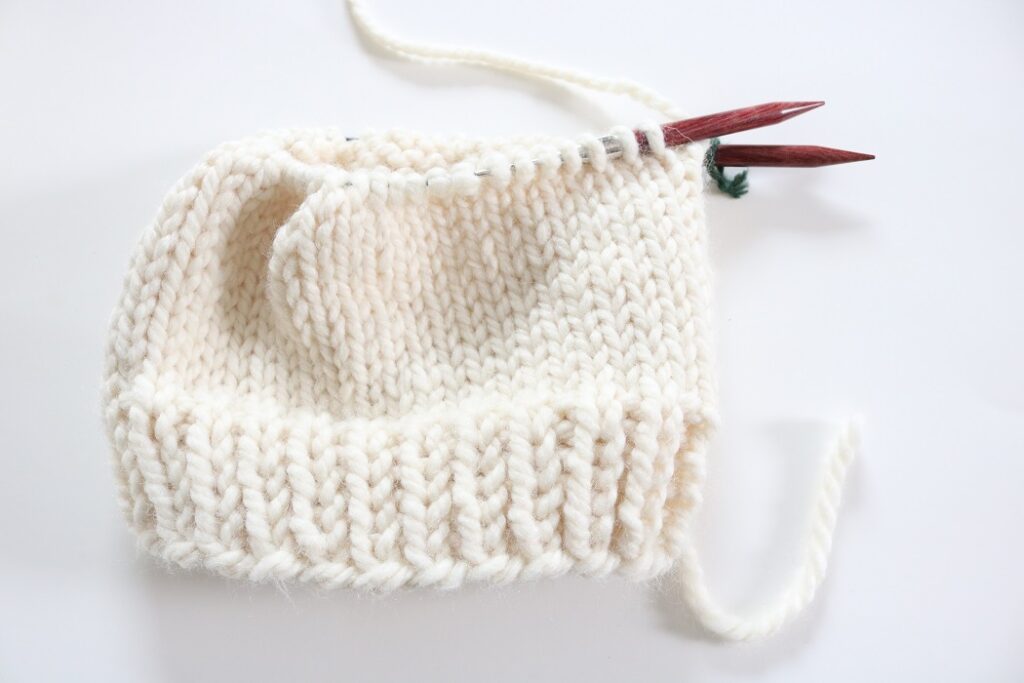
Once you cast on the 48 stitches on your circular needles, you will join the stitches in the round. Use a stitch marker (SM) to keep track of each round. After casting on, it will be a matter of working a ribbed brim, followed by a simple stockinette pattern (all knit stitches) for the main section of the hat, followed by decrease rounds for the finished crown of a hat (top of the hat).
The pattern creates a basic beanie style hat. The great news is that one of these hats can be worked in just a few hours. You can knock out a knit hat any rainy/snowy afternoon or slow weekend.
How to make a Knit Hat
NOTES: First, you will create the hat ‘tube’ by casting on, joining for round 1, and working the indicated 6 rounds in the rib brim pattern for the bottom of the hat.
Next, you will work the repetitive stockinette pattern for the body of the hat. This forms the main sides of the hat.
Next, you will work the last rounds in an alternating decrease pattern to form the crown of the hat.
Lastly, you will cut a tail of from the working yarn and run it through the last 8 stitches to tighten the top of the hat closed.
The Right Side (RS) will always face you as you work in the round.
Instructions are as follows for the chunky hat free knitting pattern …
Knit Hat Pattern
With size 13 circular needles, CO 48 sts with size 6 yarn. The circular needle size must be 16″-19″ length.
I always use the long-tail cast-on method for casting on stitches.
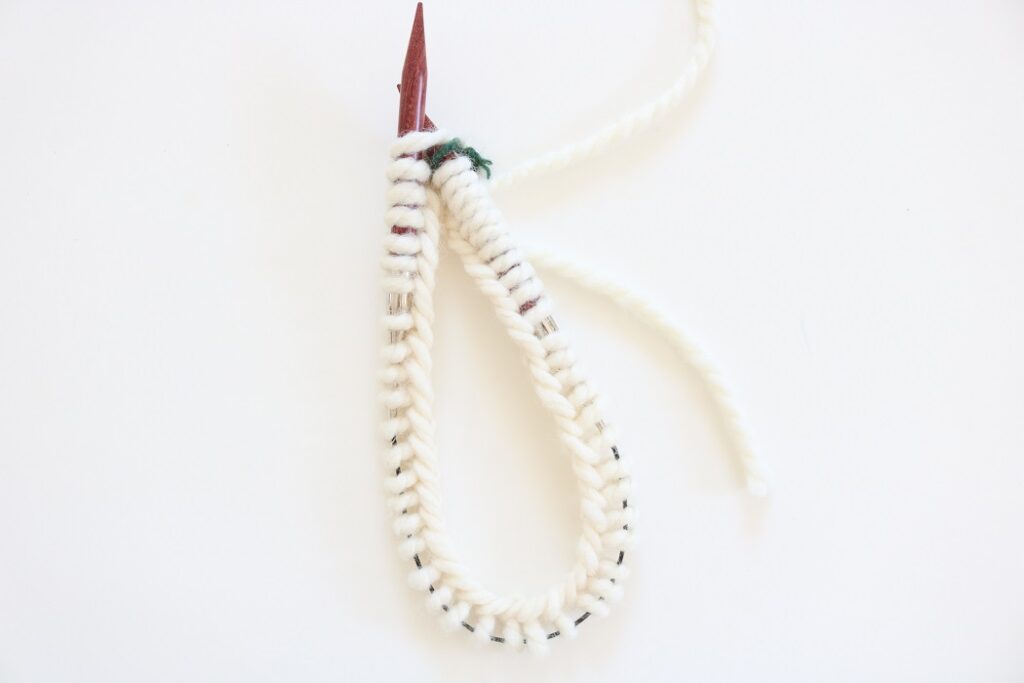
{Joining in the Round}
Place a stitch marker (SM) after the last stitch you casted on. This will help you to count each round going forward. In each subsequent round, simply slide the SM to the other needle. (I just used a piece of contrasting yarn as my stitch marker)
At this point, your right needle holds the last st casted on, while the left needle holds the first st casted on.
Next, being careful that the stitches on your circular needle are not twisted, join the last st casted on with the first st in round by knitting the first st.
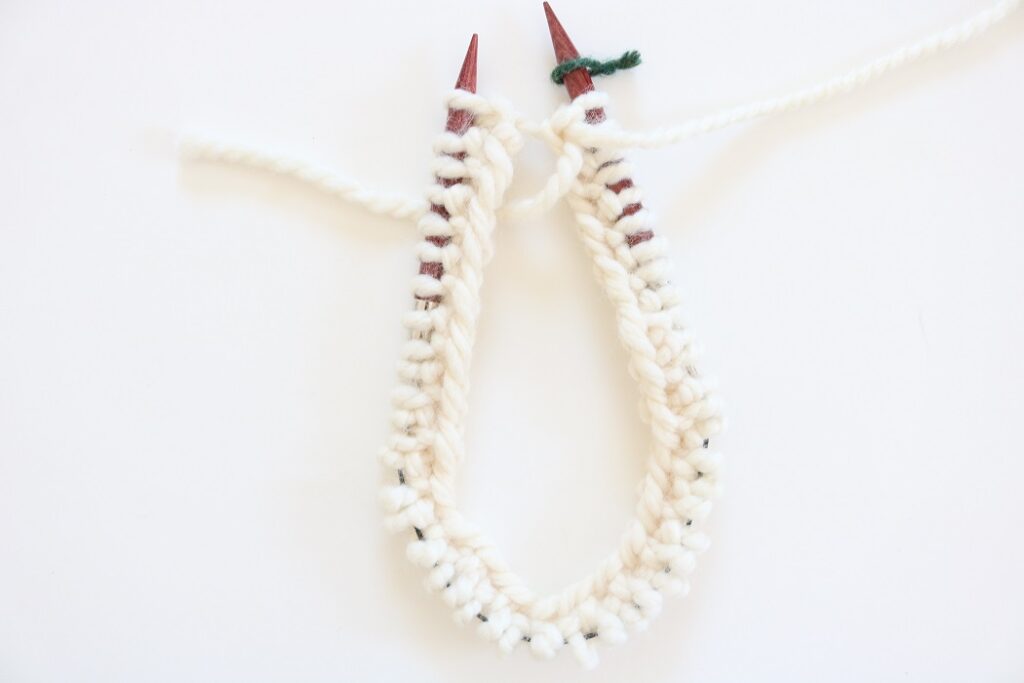
Rib Stitch Brim
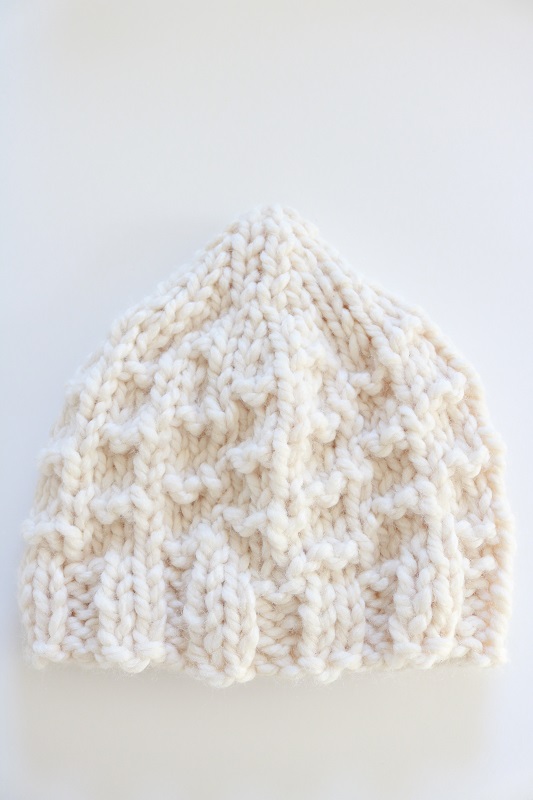
The bottom of the hat is worked in ribbed stitches (alternating knit and purl stitches) to form the brim.
Rounds 1-6: *K1, p1; repeat from * to end of round. (48 sts) (until brim measures approximately 2.5″)
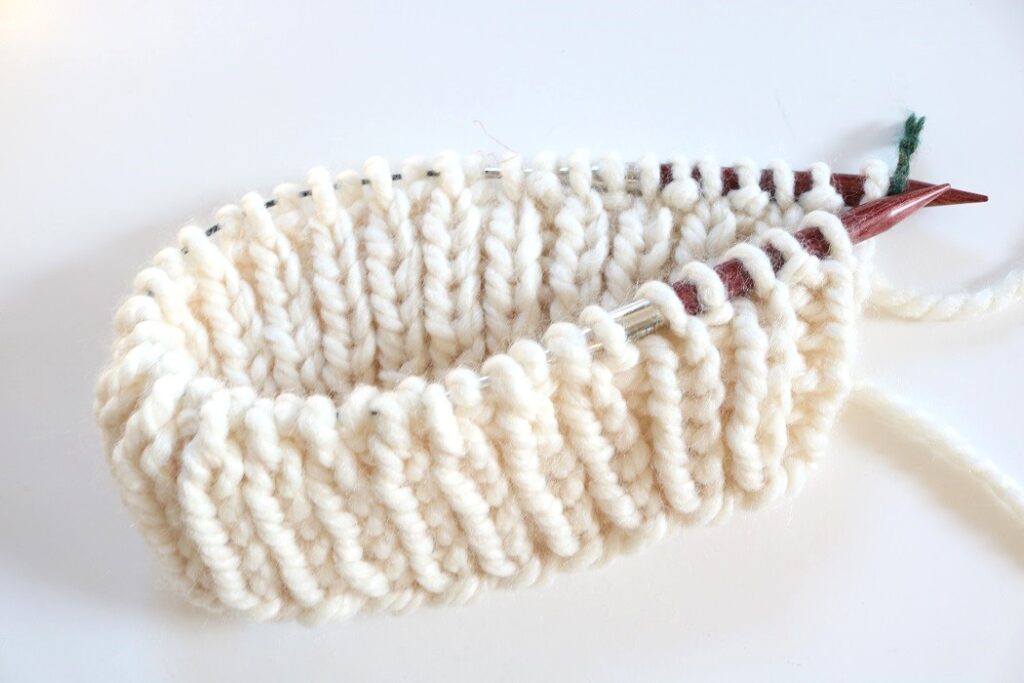
Sides of Hat
Round 1: Knit to end of round. (stockinette pattern) (48 sts)
Rep Round 1 until hat measures approx. 6″ height from bottom.
(For reference, I worked 13 rounds for sides of hat)
Crown of Hat (How to finish knitting a hat)
Crown decreases – Next you will be working alternate decrease rounds to form the smaller crown of the hat. This is the critical way to finish knitting a hat with crown shaping. You need to make the hat smaller at the crown (top) of the head, and decreasing the number of stitches in the round will do this.
Round 1: *K4, k2tog; rep from * to end of round. (40 sts)
Round 2 (and all even-numbered rounds): Knit to end of round.
Round 3: *K3, k2tog; rep from * to end of round. (32 sts)
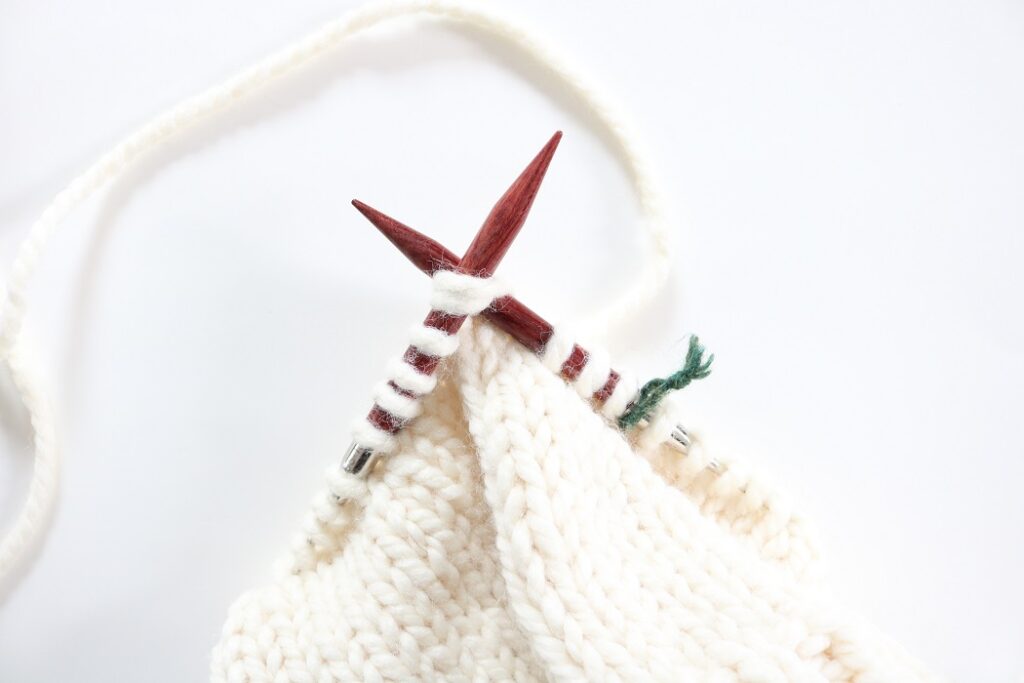
Round 5: *K2, k2tog; rep from * to end of round. (24 sts)
Round 7: *K1, k2tog; rep from * to end of round. (16 sts)
Round 9: *K2tog; rep from * to end of round. (8 sts)
(note – round 9 may get a little tricky with so few stitches on the circular needles, but it can be managed)
Remove SM.
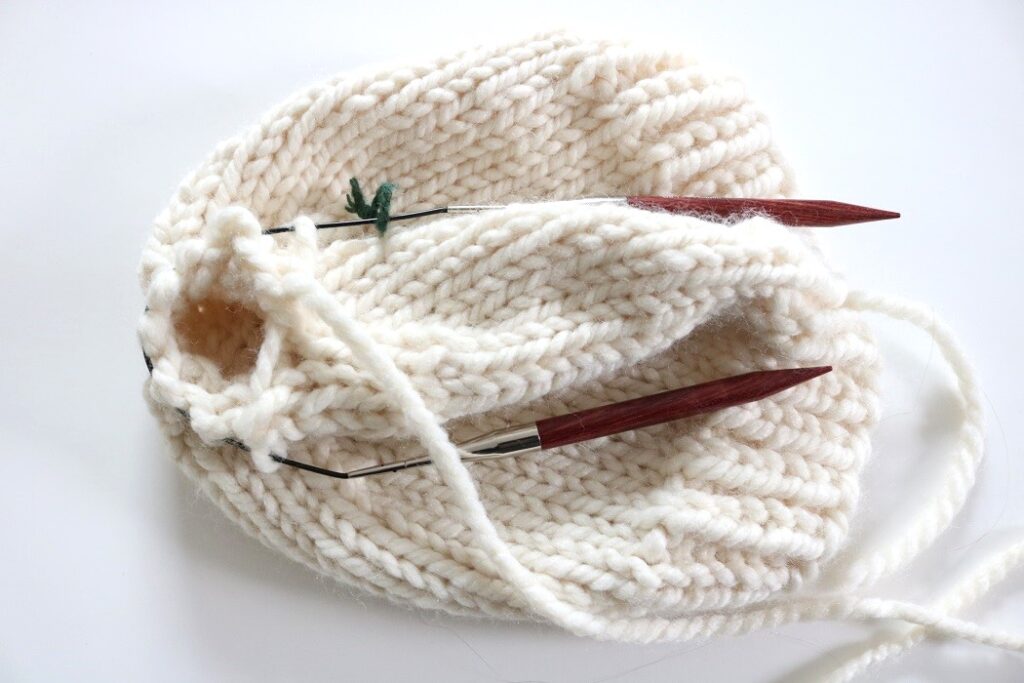
Finishing the Beginner Knit Hat
Cut a long tail (approx. 6-8″) from working yarn.
Draw yarn through a tapestry needle (yarn needle) and thread the tail securely through the remaining 8 stitches on the circular needles.
Pull tail to close up the top of the hat.

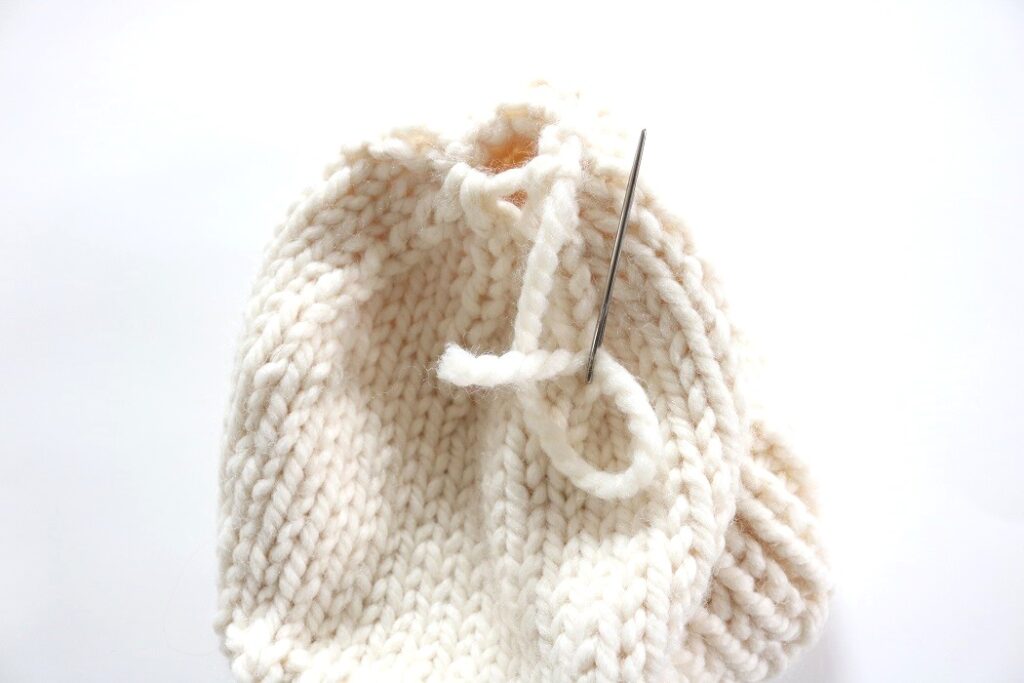
Secure the yarn tail to the top, or use it to attach a pom-pom to the top of your hat.
Weave in loose ends on the WS (inside) of the hat.
Ensure the join at bottom of hat is secured neatly.
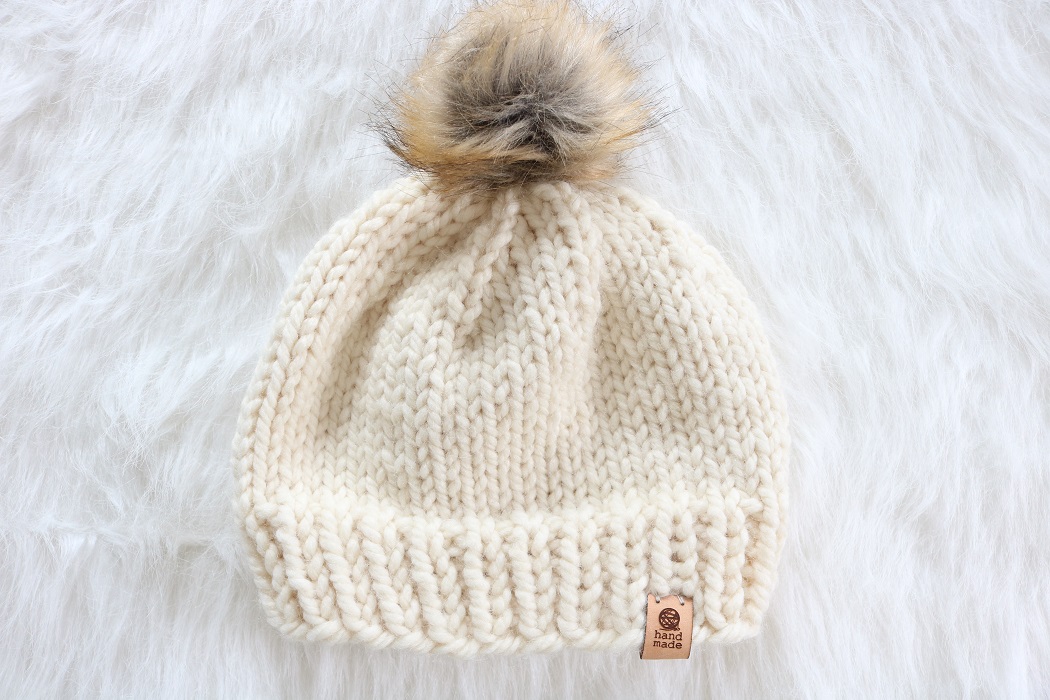
Add optional ‘Handmade’ tag to brim of hat.
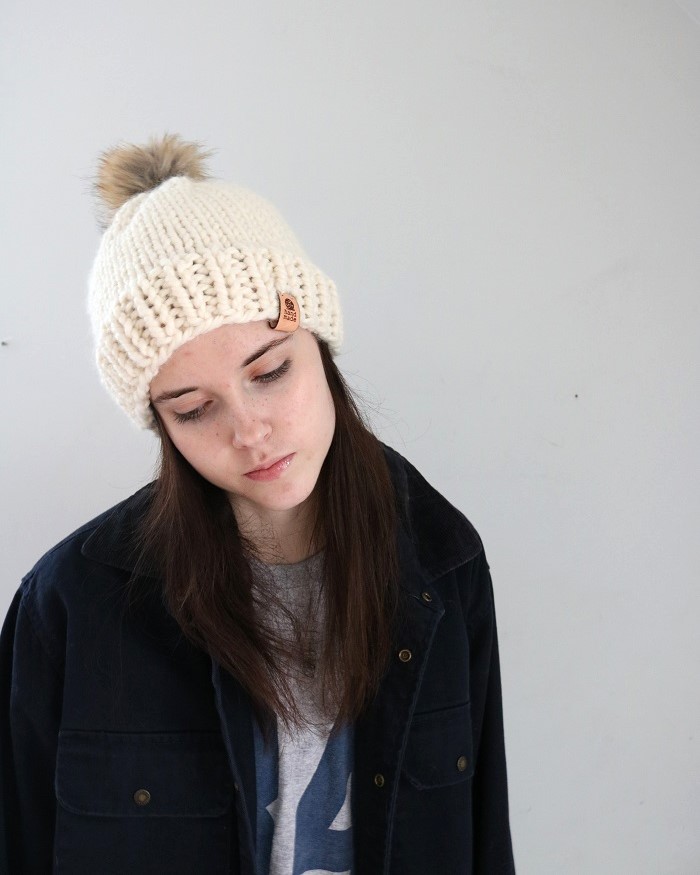
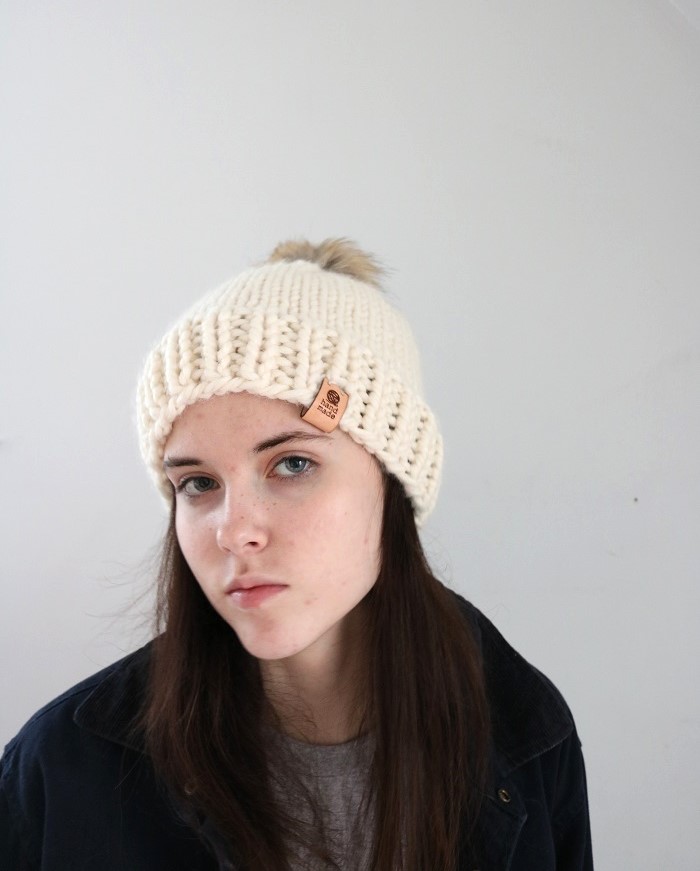
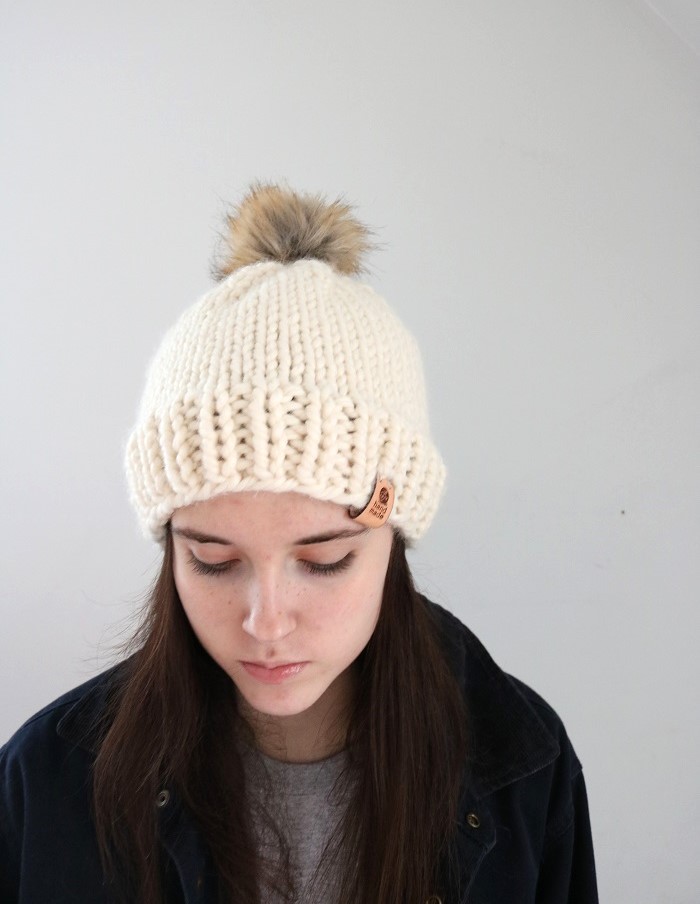
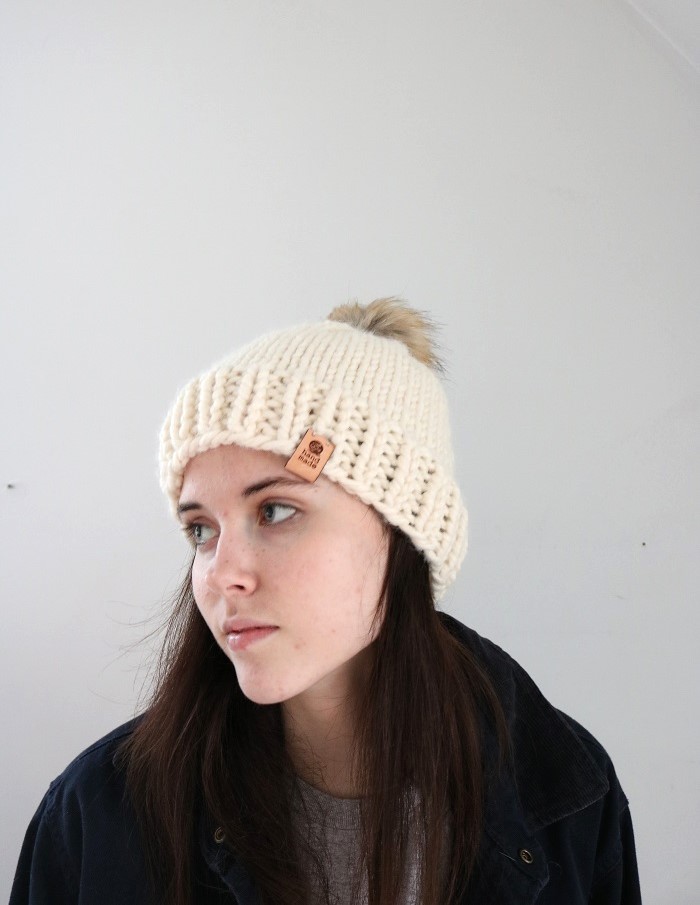
The FINISHED SIZE of the hat will be approximately 21″ circumference by 8″ hat length. It should fit a teen or woman’s head size, with head circumference approx. 19-21″.
Important Tips for Knitting your Hat
Some things to keep in mind as you knit the hat are:
- Make sure your stitches are not twisted when you first join in the round after casting on stitches.
- Use a Stitch Marker (SM) to keep track of each round
- The Right Side (RS) is always facing you as you knit each round.
- Bulky weight yarn works best with these needles, but feel free to double up thinner yarns.
- Feel free to add a few rounds to the sides of your hat to increase the height, such as for a slouchy beanie. Just be sure to have enough yarn.
How to wear your stylish beginner knit hat
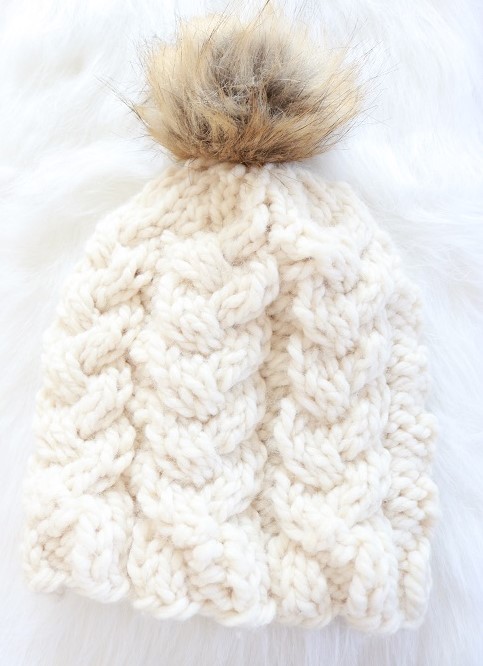
Before wearing your finished hat, try to embellish it if you can. Faux fur pom poms are a great way to accessorize a knit hat, and you could also add a leather ‘Handmade’ tag to indicate it was made from scratch. These embellishments would be especially nice if you are making the hat for someone else. What a great gift idea, especially if you can personalize your leather tag with your name!
I love to use a faux fur pom-pom, but you could also make your own yarn pom-pom with a pom-pom maker. You could make your pom-pom any size diameter – go small or go big!
Once the hat is finished, just pull it down over your head and ears. If you chose to add some rounds to the body of the hat, you could also fold over the ribbed brim on your forehead. The hat is a stylish accessory for the cold days of winter, adding a cozy layer of warmth for your head. Wool yarn may be the best choice for this project if you really want the warmth.
I asked my teenage daughter to model the hat for me, and I think she did a great job! Kinda wish she smiled more, but I’ll take what I can get. 🙂
You CAN make a beginner knit hat!
I hope you enjoyed this FREE knitting pattern to make a knitted hat. Once you get the stockinette stitch pattern down, the project will become repetitive and simple. I know you can handle the knitting in the round if you are a beginner. This is a great way to practice those skills, as the pattern isn’t too complicated.
Don’t forget that the chunky hat knitting pattern is also available in an ad-free pdf pattern. Grab the KNIT HAT PATTERN in my Etsy shop.
Love knit hats? Check out these other FREE hat knitting patterns…
===> Remember to PIN for later! <===