FREE Cotton Sleeveless Knit Top Pattern
A Lightweight Layer for Summer & Beyond!
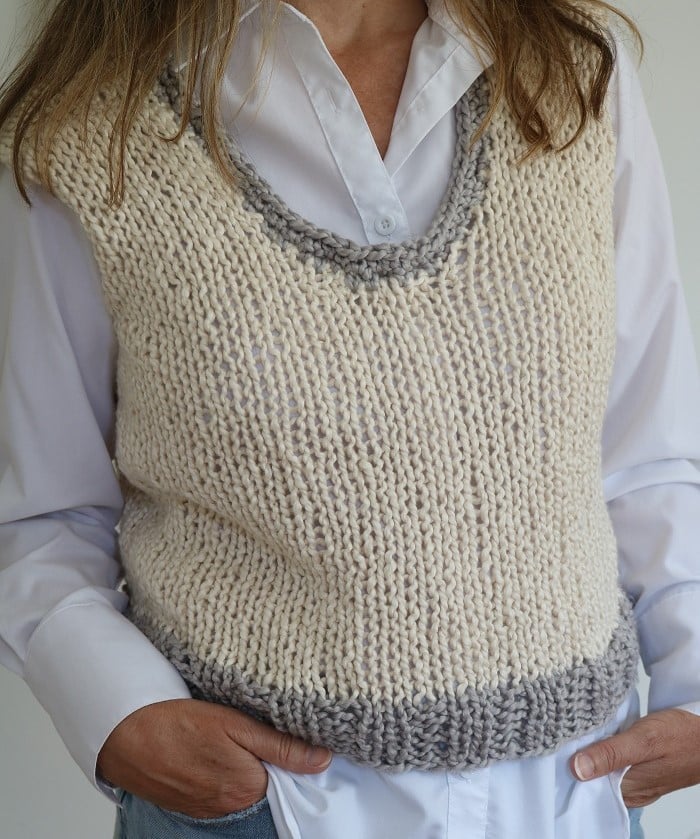
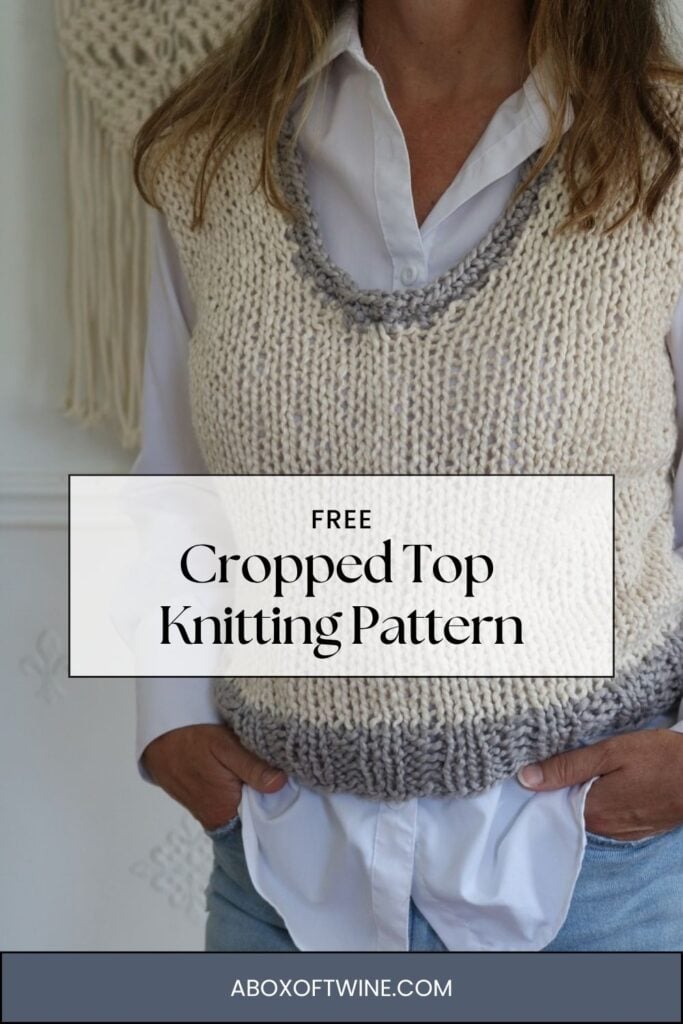
Looking for a stylish and modern knit layer for your wardrobe? Love knitted vest patterns? How about knitting a easy summer knit top using contrasting cotton yarn colors? It’s not just for summer! You can add this extra layer over your shirts during the transitional seasons of spring and fall, too. Knitted vests come to the rescue to add just a tad more warmth. Today have a simple and FREE sleeveless knit top pattern for you that works up so quickly with Bulky cotton yarn.
Keep reading to learn how to knit a cotton top using simple stockinette stitch pattern with ribbing at the bottom. Use one solid color yarn throughout, or choose a contrasting yarn color for the bottom edge and neckline.
This post may contain affiliate links. That means if you click and buy, I may make a commission at no cost to you. Please see my full disclosure policy for more details.
Free Sleeveless Knit Vest Pattern
The idea behind this knit top pattern is to work in the round bottom-up, then separate to work in rows to create the top front & back panels. You will use BASIC KNIT STITCHES for the stockinette and ribbing patterns.
The following is a list of supplies you would need to create one knit vest. Use similar yarn (size 5, Bulky weight yarn) and the same knitting needle sizes to make your own.
Yardage is for these sizes: S (M, L, XL)
Supplies
- Loopy Mango ‘Summer’ Size 5 (90 yds per skein)
- Main Color (MC): Pearl, Contrast Color (CC): Misty Morning
- approx 210 (235, 270, 300) yds total
- Size 13 (9.0 mm) circular needles, at least 24″ length
- Size 15 (10.0 mm) circular needles, at least 24″ length
- Size N/13 (9mm) crochet hook (for optional neckline edging)

Loopy Mango Summer Yarn

Amour Plastic Bulky Hooks
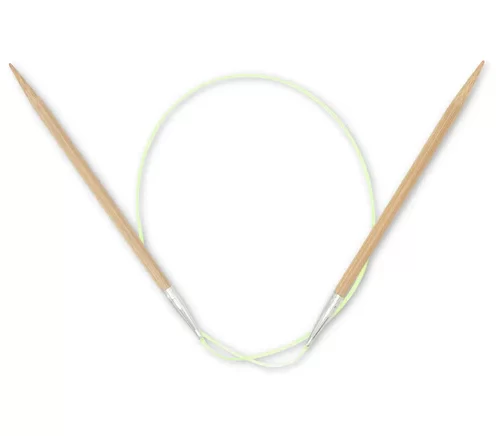
Circular Knitting Needles (various sizes)
Knitting Notions
Knitting Abbreviations
approx – approximately
BO – bind off
CO – cast on
K – knit
k2tog – knit 2 stitches together
k3tog – knit 3 stitches together
P – purl
pm – place marker
skp – slip one st knitwise, knit next st, pass slipped st over
sm – stitch marker
sts – stitches
Rep – repeat
RS – Right Side
WS – Wrong Side
PATTERN INFORMATION
The FREE classic sleeveless knit pattern is provided below.
- but you can also get the ad-free, printable pdf pattern for the KNIT COTTON TOP in the SHOP! The pdf has some helpful photos & diagrams included, as well as seaming instructions.

Can a beginner knit a top?
Yes! Especially with a repetitive easy stitch pattern using basic knit stitches and simple techniques! This pattern has an Intermediate skill level, but an advanced beginner can give it a try. The stockinette & ribbing stitches are simple to master, and the overall pattern is very repetitive.
How to knit a breathable top for warm weather
Here I will walk you through each step of making this modern minimalist knit top, using your favorite yarn color(s) . You will be using the simple stockinette stitch pattern throughout most of the vest pattern, with an easy ribbing stitch pattern to start the bottom.
Finished Measurements:
- Measurements are for finished garment
- Approx. 2-4″ ease
Sizes S (M, L, XL) :
Bust: 36 (40, 44, 48) inches
Length: 18 (18, 19, 19) inches
Gauge: 4″ (10cm) square = 9 Sts by 12 Rounds in stockinette stitch, blocked
Make sure to get the correct gauge for an accurate fit.
FREE Sleeveless Knit Top Pattern
Follow stitch and row/round counts using sizing S (M, L, XL) :
NOTES –
First, you will knit the bottom ribbing in the round with smaller needles and contrasting color. Next, you will continue knitting in the round with larger needles and main color, working a stockinette pattern, bottom up. Next, you will separate the piece into 2 front and 2 back panels, working dec rows to create openings for the armholes, as well as a neckline. Lastly, you will seam the shoulders together and add an optional finishing edge to the neckline (with a crochet hook and contrasting color).
Circular needles are used to work in round and in straight rows.
Bottom of Knit Top
With size 13 (9mm) circular needles, CO 84 (92, 104, 112) sts with size 5 yarn in CC.
Stitch count will remain the same when working in rounds.
Take time to match gauge for an accurate fit.
Carefully join sts for Round 1, being careful not to twist stitches.
Use a sm (stitch marker) to keep track of rounds.
Bottom Edge in Ribbing
Round 1: [K2, p2] around.
Rep Round 1 for five more rounds.
Break CC yarn.
Body of Knit Top:
Switch to US size 15 (10mm) circular needles.
Join MC yarn at the start of the next round.
Continue to use a sm to keep track of rounds.
Continuing with MC and larger needles, work in a stockinette stitch pattern (where every round is knit) until piece measures approx 12 (11, 11, 11)” or your desired length from bottom to chest.
Top Panels
Next you will work the top of the piece in 4 separate panel sections for the upper front & back, working each in rows.
These sections will create openings for the armholes and neckline.
Stitches not being worked will be temporarily placed on waste yarn or stitch holders.
Feel free to switch to straight needles when working in rows if preferred.
Front Panel (left-wearing):
You will be working only the first 21 (23, 26, 28) sts in rows to form the front left-wearing panel piece.
Row 1 (RS): BO 1st 2 sts, K 17 (19, 22, 24), k2tog. 18 (20, 23, 25) sts
Move the remaining 63 (69, 78, 84) sts from the round to a separate large stitch holder or waste yarn. These will be worked later to form the front right-wearing panel and two back panel pieces.
Row 2 and all even rows (WS): Purl.
Row 3: Skp, K to last 2 sts, k2tog. 16 (18, 21, 23) sts
Row 5: Skp, K to last 2 sts, k2tog. 14 (16, 19, 21) sts
Row 7: Skp, K to last 2 sts, k2tog. 12 (14, 17, 19) sts
Row 8: Purl.
For sizes L and XL only:
- Row 9: Skp, K to last 2 sts, k2tog. 12 (14, 15, 17) sts
- Row 10: Purl.
- Row 11: Skp, K to last 2 sts, k2tog. 12 (14, 13, 15) sts
- Row 12: Purl.
Work in stockinette stitch (knit each RS row, purl each WS row) until front left-wearing panel measures approx 18 (18, 19, 19)” from bottom edge, ending with a WS (purl) row.
BO knitwise.
Front Panel (right-wearing):
Move the next 21 (23, 26, 28) sts from the large stitch holder or waste yarn back to the size 15 needles.
You will now be working these 21 (23, 26, 28) sts to form the front right-wearing piece.
With RS facing, join MC yarn at beginning of right-wearing piece row, then proceed as follows:
Row 1 (RS): Skp, K to last 3 sts, k3tog. 18 (20, 23, 25) sts
Row 2 and all even rows (WS): Purl.
Row 3: Skp, K to last 2 sts, k2tog. 16 (18, 21, 23) sts
Row 5: Skp, K to last 2 sts, k2tog. 14 (16, 19, 21) sts
Row 7: Skp, K to last 2 sts, k2tog. 12 (14, 17, 19) sts
Row 8: Purl.
For sizes L and XL only:
- Row 9: Skp, K to last 2 sts, k2tog. 12 (14, 15, 17) sts
- Row 10: Purl.
- Row 11: Skp, K to last 2 sts, k2tog. 12 (14, 13, 15) sts
- Row 12: Purl.
Work in stockinette stitch (knit each RS row, purl each WS row) until front right-wearing panel measures approx 18 (18, 19, 19)” from bottom edge, ending with a WS (purl) row.
Tip → work the same # of rows as you did for the left-wearing front panel.
BO knitwise.
Back Panel (right-wearing):
Move the next 21 (23, 26, 28) sts from the large stitch holder or waste yarn back to the size 15 needles.
You will now be working these 21 (23, 26, 28) sts to form the back right-wearing piece.
Follow instructions for front left-wearing panel by working Rows 1-8, Rows 9-12 for sizes L & XL only, then subsequent steps to finish the section.
Back Panel (left-wearing):
Move the last 21 (23, 26, 28) sts from the large stitch holder or waste yarn back to the size 15 needles.
You will now be working these 21 (23, 26, 28) sts to form the back left-wearing piece.
Follow instructions for front right-wearing panel by working Rows 1-8, Rows 9-12 for sizes L & XL only, then subsequent steps to finish the section.
Seaming/Finishing
SEAM shoulders as follows :
- Left Shoulder: Use MC yarn (or smaller-sized similar color yarn) and a tapestry needle to join the top of the front and back left-wearing panels together with an invisible horizontal seam.
- Right Shoulder: Likewise, work an invisible horizontal seam to join front & back right-wearing panels at right shoulder.
If you know how to crochet,
Add optional neckline edging as follows :
- Join: With RS facing, join CC yarn to the center of back panel with a size N crochet hook.
- Round 1: Work sc stitches into row edges evenly around the entire back & front necklines, then join with a sl st to first sc st.
- Round 2: Ch 1, sc in each st around, join with sl st to 1st st.
Fasten off.
Blocking
Weave in all loose ends.
Block knit top to 18 (20, 22, 24)” wide by 18 (18, 19, 19)” length.
Important Tips for Knitting your Top
Some things to keep in mind as you work the cotton top knit pattern are:
- Use a stitch marker to keep track of rounds.
- You will be working in the round at first, then switching to rows for the upper front and back panels of the top. (RS always faces when working in rounds. When working rows, RS faces on knit rows, WS faces on purl rows.)
- Customize:
- Feel free to add or subtract rounds during the bottom portion of your top to adjust the length from bottom to chest (ensure enough yarn)
- Make a size up or down depending on your desired finished ease
- Use a contrasting color for bottom and neckline, or one solid color throughout
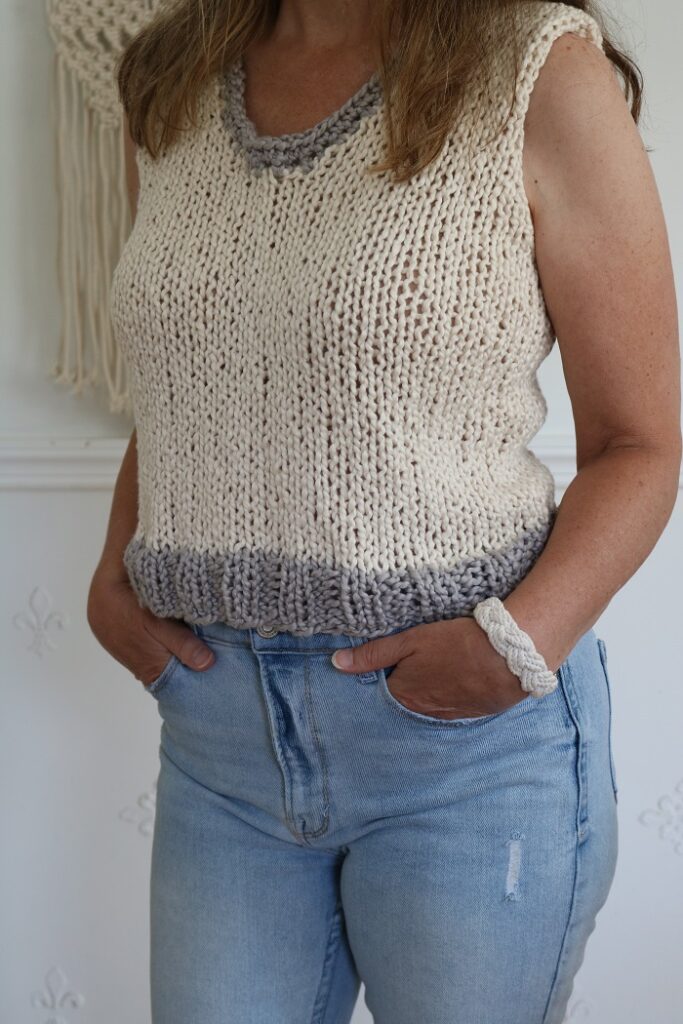
Lightweight Knit Top
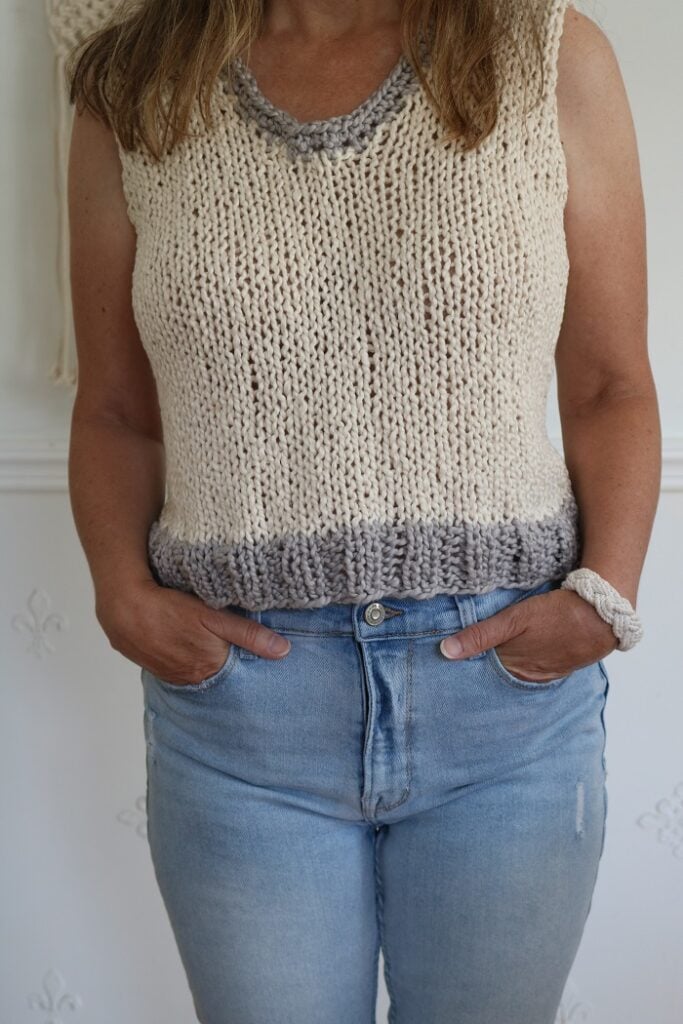
The capsule wardrobe knit top makes a great layering piece in the transitional seasons, or as a stand-a-lone piece in the summer. The classic design of this knit vest is fun & trendy with the cropped length & contrasting colors – you’re bound to get compliments from making this beautiful pattern. It exudes timeless, classic style, showcasing knitwear that pairs well with linen pants or skirts, too.
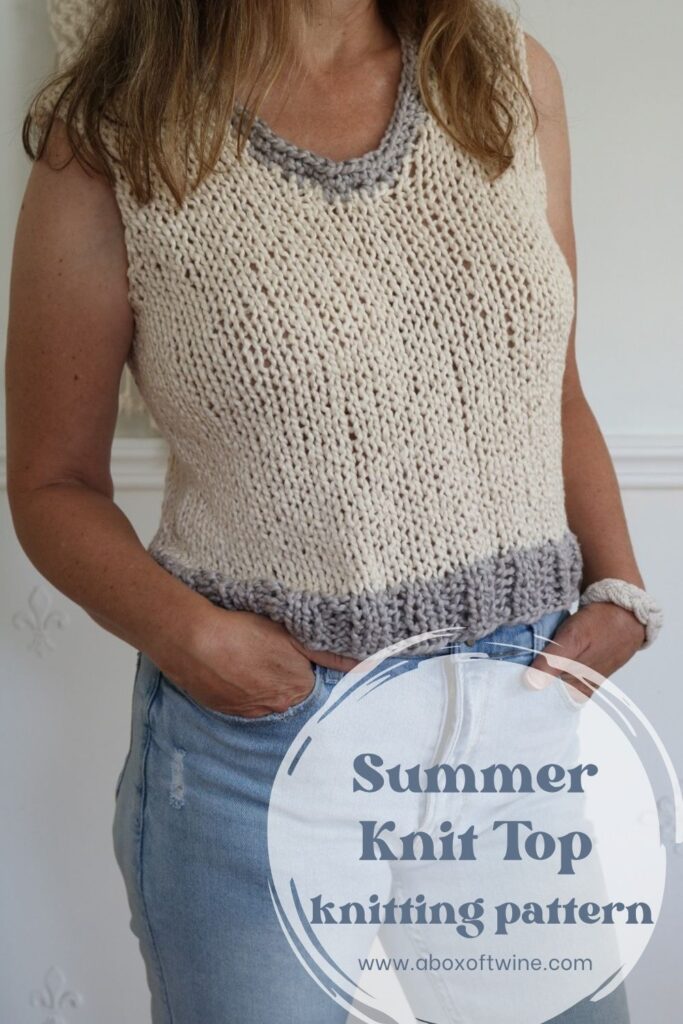
Model in photos below is shown wearing size S:
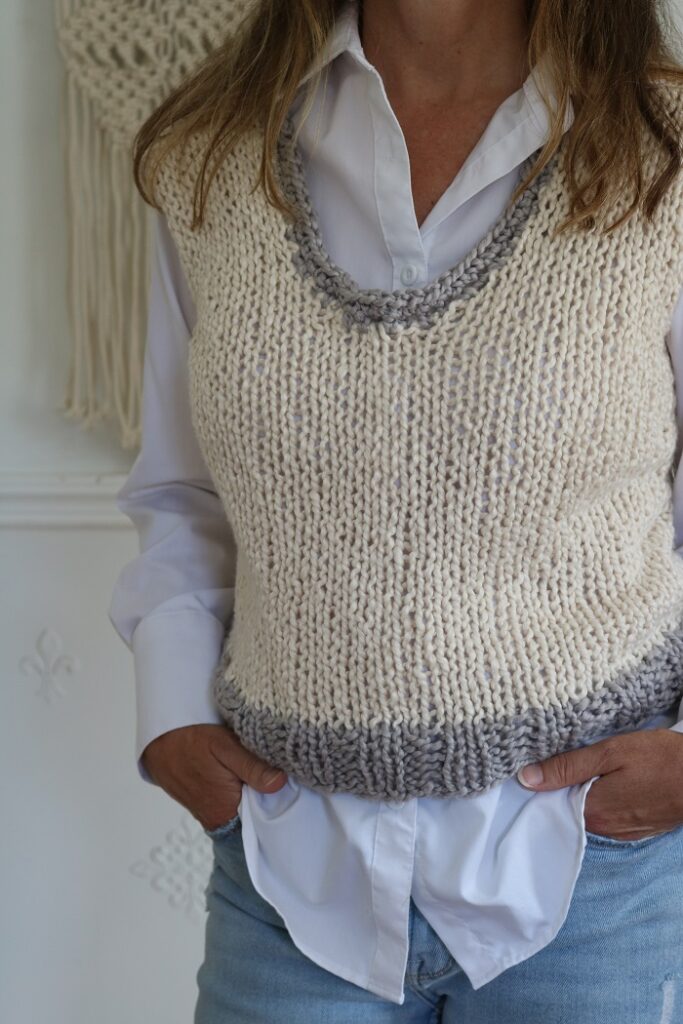

Wear the knit vest over a tank top or alone during the warm months, or over longer shirts in cooler seasons. You can wear it with different outfits – jeans, shorts, skirt, or leggings. It is the perfect knit top to provide timeless handmade fashion for your summer wardrobe.
Don’t forget that this neutral cotton knitwear pattern is also available in an ad-free digital pdf pattern. The pdf has a few helpful photos and diagrams. Grab the VEST KNIT PATTERN pattern in my shop.
Love knit top patterns? Check out these other FREE knit projects…
Did you enjoy this free knitting pattern? I think it’s also a perfect idea to make as a gift for a stylish friend.
Check out all of my FREE KNIT PATTERNS HERE.
===> Remember to PIN for later! <===


2 Comments
Violeta
Just wanted to let you know that I featured your amazing sleeveless vest pattern on Crafts on Display today, I hope you enjoy it! What a perfect piece for layering. https://craftsondisplay.com/knitting/easy-knit-vest-pattern-modern-sleeveless-cotton-top-199678/
Susan
Thanks so much, Violeta – I appreciate the feature!