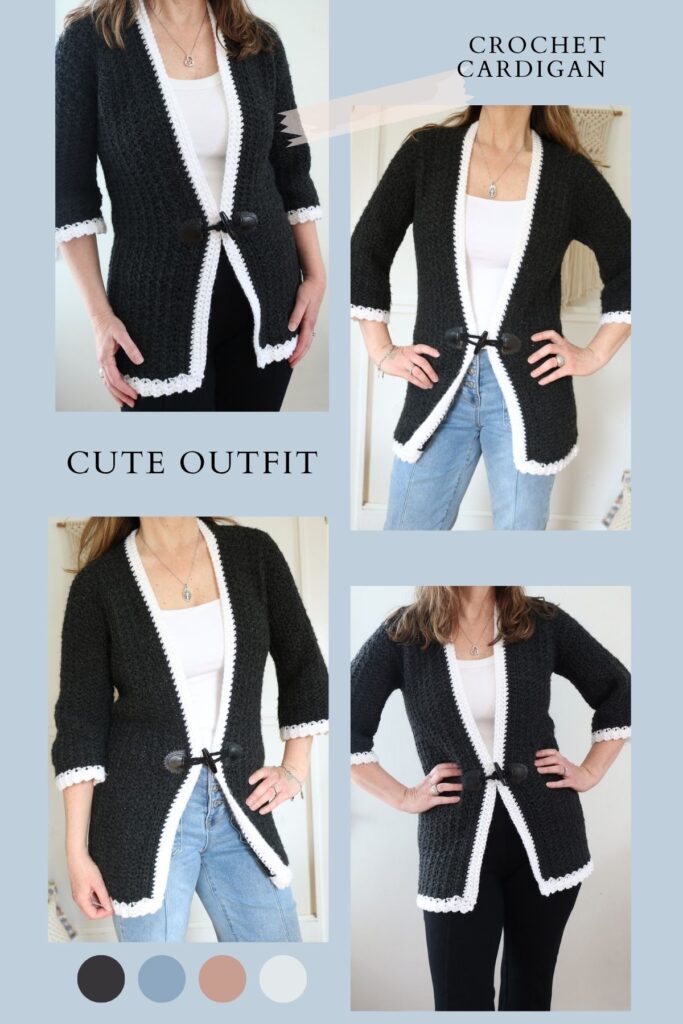
Free Retro Crochet Cardigan Pattern — V-Stitch Bell Sleeve Design (7 Sizes)
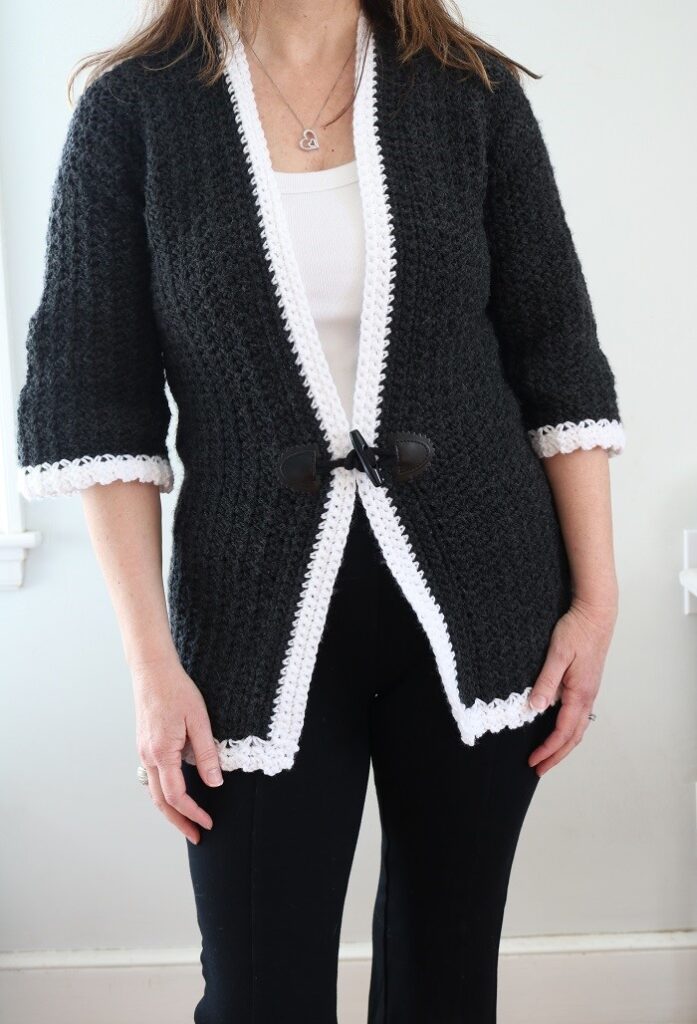
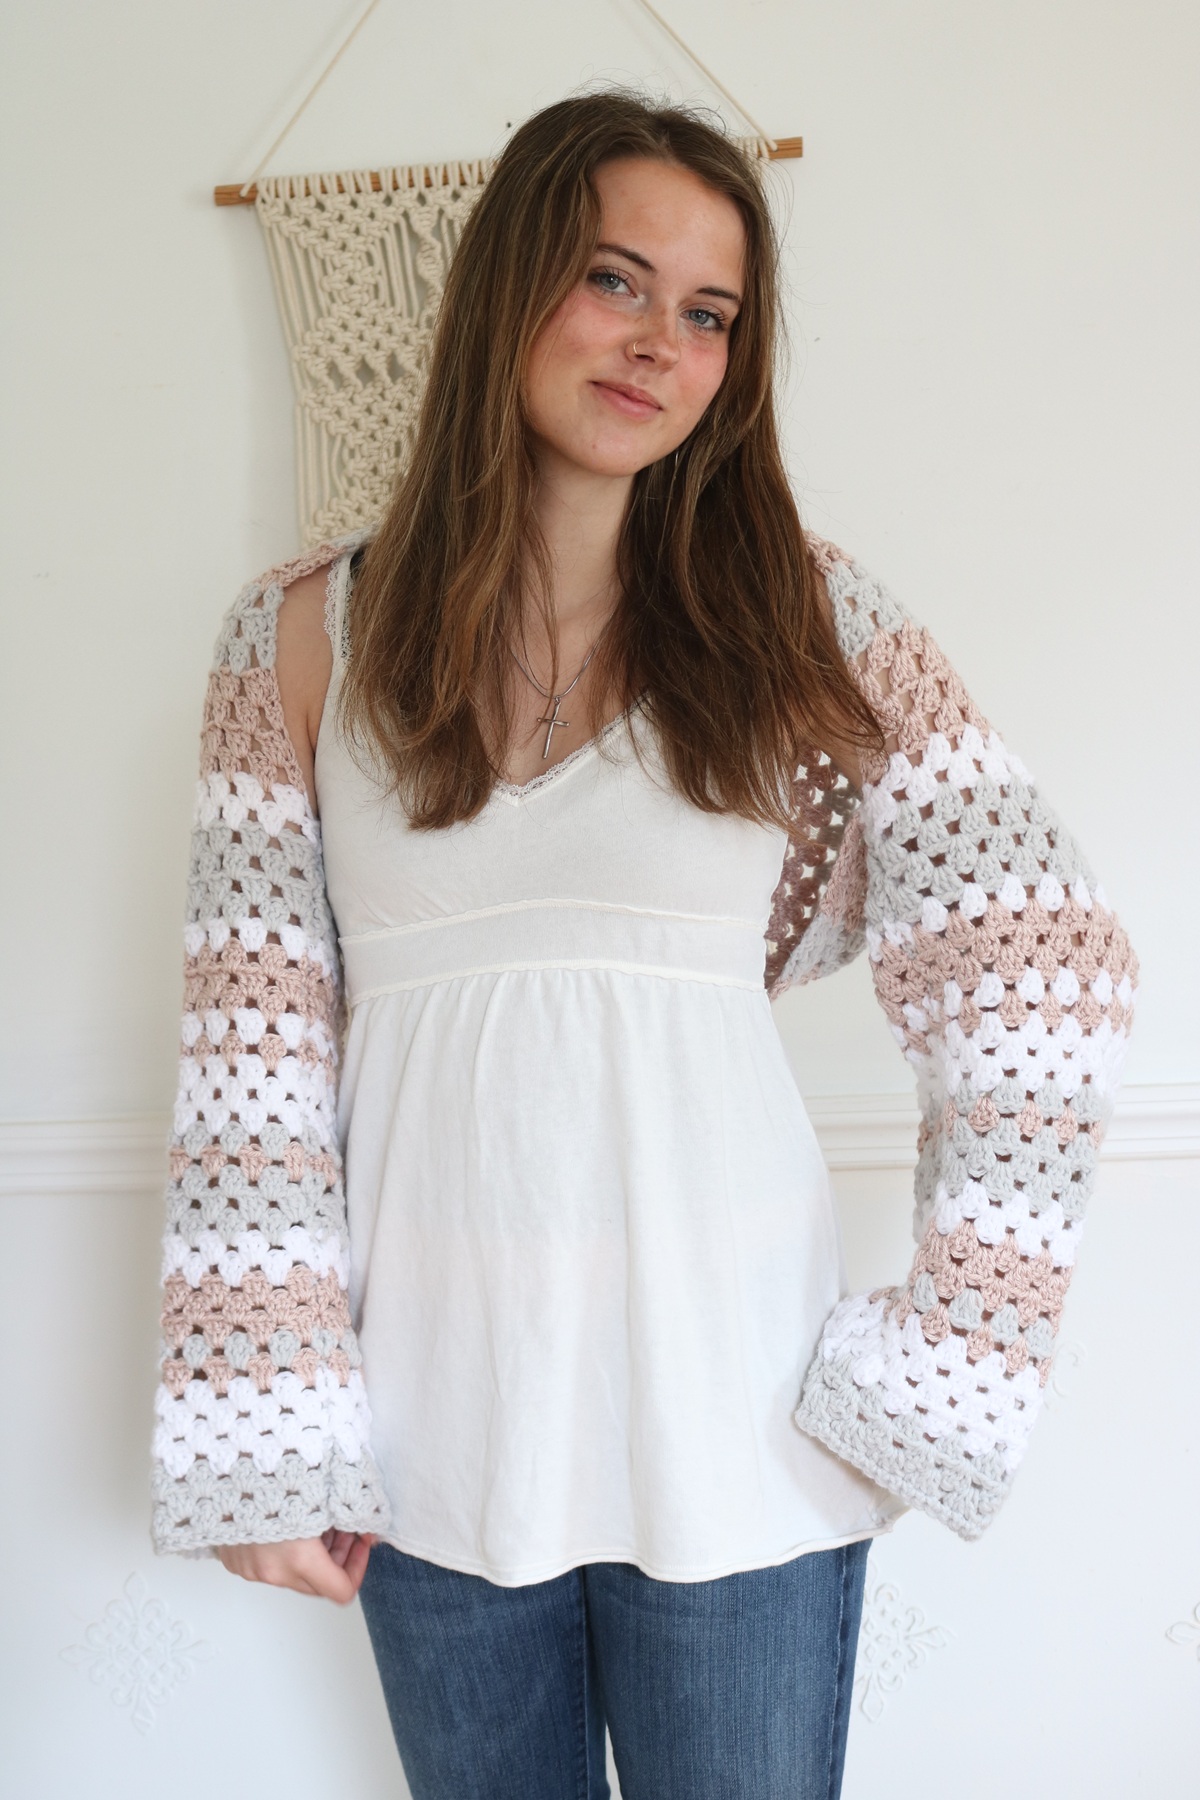
There’s something about a long, comfy cardigan that never goes out of style, and this one has a little extra personality. This free retro crochet cardigan pattern takes inspiration from 1960s mod fashion, with bell sleeves, a tunic length, and a two-tone striped trim that makes it look far more complex than it actually is. The entire body is worked in a simple single crochet V-stitch that creates an open, vintage-inspired texture with very little effort.
What makes this pattern stand out is the sizing. With 7 sizes ranging from XS to 3XL, this is a cardigan you can make for yourself, your daughter, or a friend, and everyone gets a great fit. The classic fit (approximately 2″ ease) gives it a polished, intentional look rather than an oversized drape.
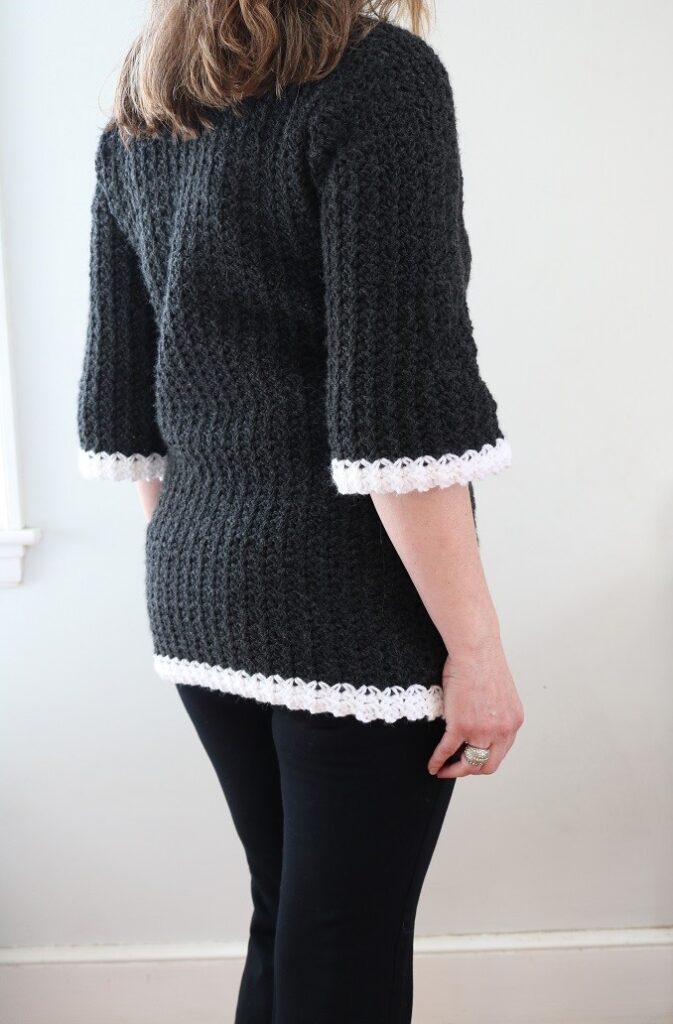
This is also a genuinely beginner-accessible garment. The front and back panels are simple rectangles worked in rows. The bell sleeves are added in rounds directly to the body — no separate seaming required for the sleeves — and the contrasting trim at the cuffs and front opening is what gives it that signature retro flair.
Pattern at a Glance:
- Skill level: Beginner / Low Intermediate
- Sizes: XS, S, M, L, XL, 2XL, 3XL
- Yarn: Worsted weight, Size 4 (1120–1800 yds MC + up to 160 yds CC)
- Hook: Size J (6.0 mm)
- Finished bust: 34–56 inches (~2″ ease)
- Key details: V-stitch panels, bell sleeves, contrasting striped trim
Keep reading for the full free pattern with complete instructions for all sizes. The ad-free printable PDF is also available in the Etsy shop and includes helpful assembly diagrams.
This post may contain affiliate links. That means if you click and buy, I may make a commission at no cost to you. Please see my full disclosure policy for more details.
Simple Crochet Cardigan Pattern
The idea behind this cardigan crochet pattern is to create one back panel and two front panels with BASIC CROCHET STITCHES, working in rows, then add sleeves & seam the simple rectangles together. You will be crocheting the body of the cardigan in separate panels with one solid color, using a single crochet V stitch pattern. Next, you will add two bell sleeves working top down in rounds in the same stitch pattern and adding contrasting colored yarn at the sleeve cuffs. Lastly, you will seam the pieces together and add trim.
The following is a list of supplies you would need to create one cardigan. Feel free to use similar yarn (size 4, worsted weight yarn) and the same size crochet hook to make your own. The contrasting yarn color is a great way to use up yarn in your stash.
Yardage is for these sizes: XS (S, M, L) [XL, 2XL, 3XL]
Supplies
- Size J (6mm) hook size
- Size 4 Medium yarn weight (worsted weight yarn) –
- Lion Brand Yarn Pound of Love (1 skein = 1020 yds) in colors:
- MC– Charcoal, 1120 (1240, 1320, 1440) [1560,1680,1800] yds
- CC – White, 120 (120, 120, 140) [140,140,160] yds
- optional toggle button
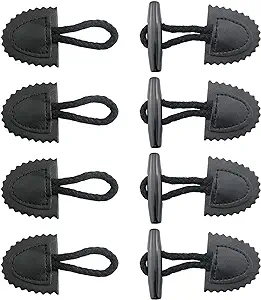
Toggle Buttons

Bright Hooks (various sizes)

Lion Brand Pound of Love Yarn
Crochet Notions
Crochet Abbreviations
US Crochet terminology is used. (US terms)
Ch – chain
Ch – refer to chain or space previously made, e.g., ch-1 sp
sc – single crochet
rep – repeat
sl st – slip stitch
sm – stitch marker
sp – space
st(s) – stitch(es)
tch – turning chain
RS – Right Side
WS – Wrong Side
V st – (sc, ch 2, sc) in designated st or ch (Single Crochet V Stitch)
PATTERN INFORMATION
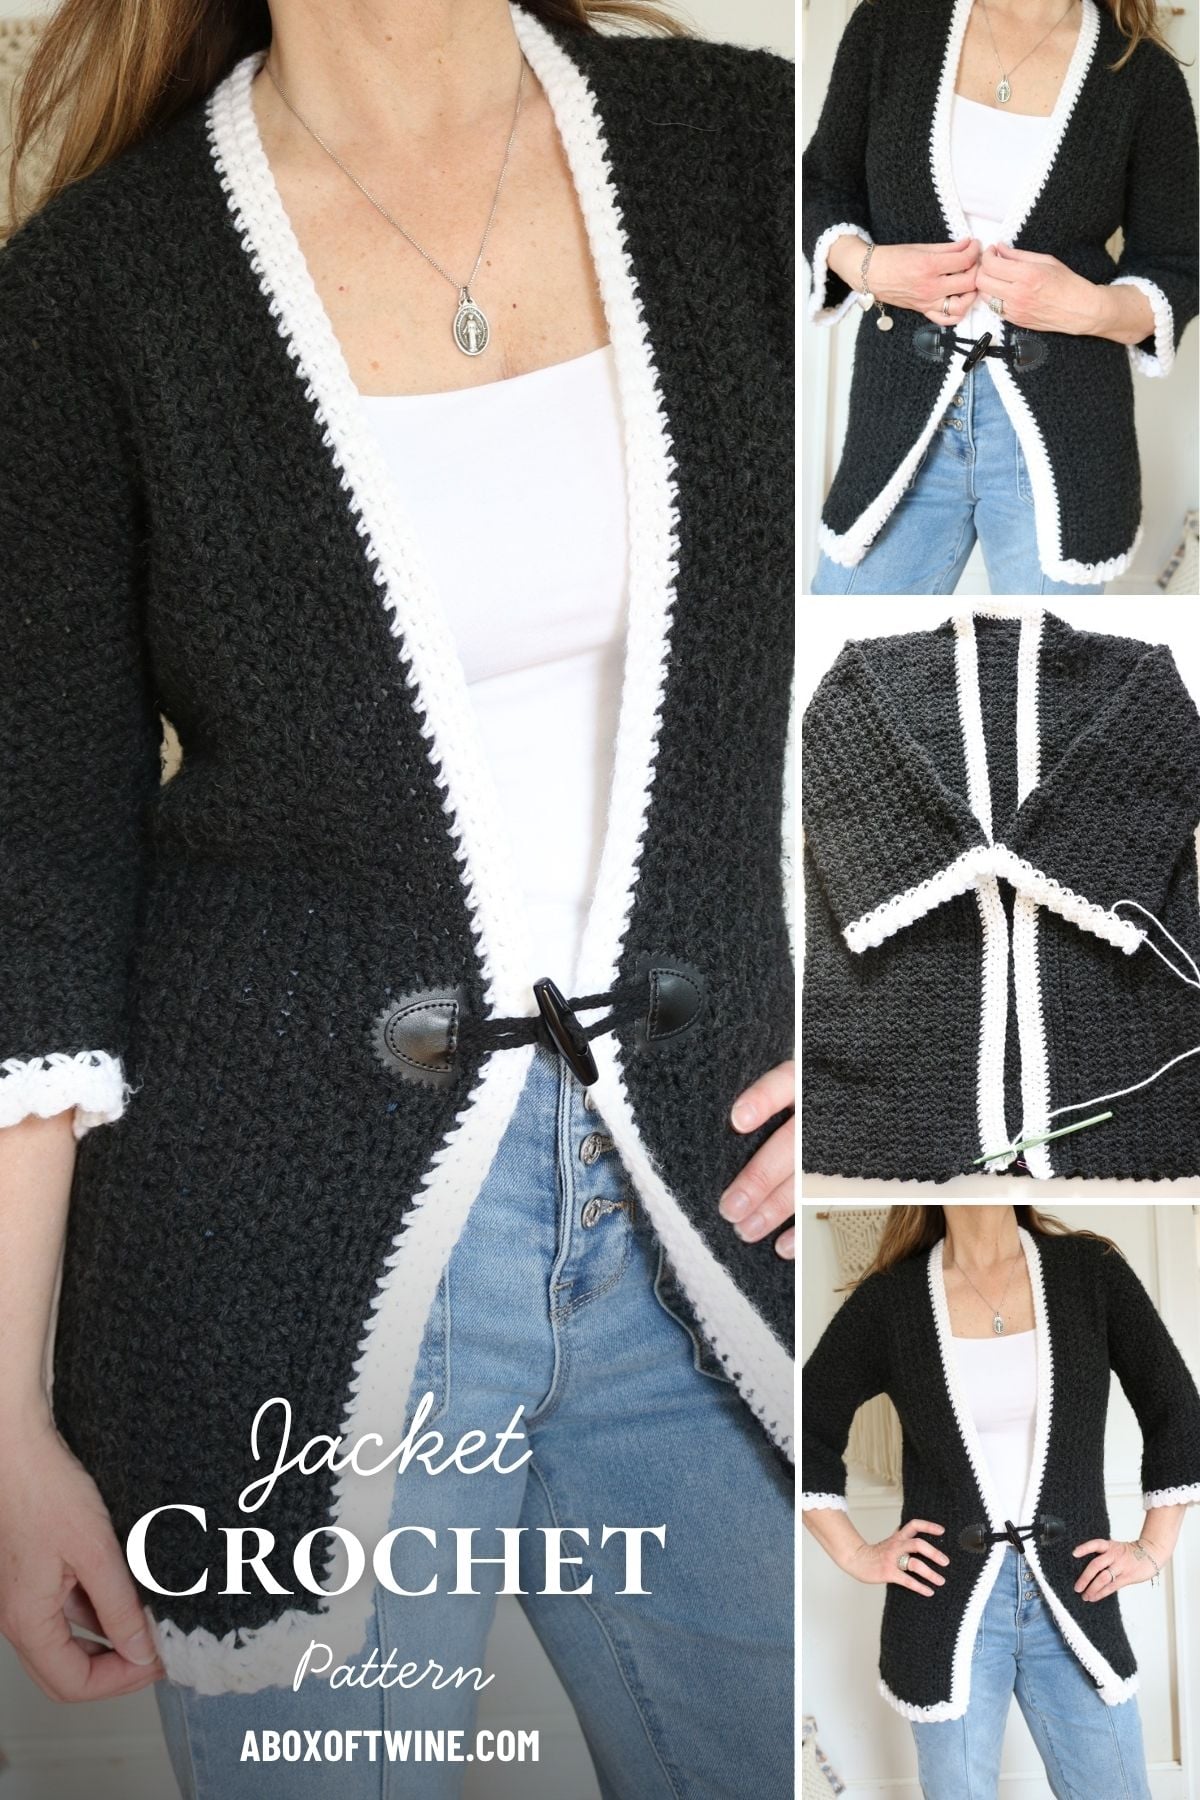
The FREE simple cardigan crochet pattern is provided below, friendly for beginner crocheters, but you can also get the ad-free, printable pdf pattern for the CROCHET CARDIGAN in the pattern shop! The pdf has some helpful photos & diagrams included:
(The premium Ad-Free PDF can also be purchased on ETSY)
How to Crochet a Cardigan
Finished Measurements:
- Measurements are for finished garment, sleeve length is adjustable
- Classic Fit, approx. 2″ ease
Sizes XS (S, M, L) [XL, 2XL, 3XL]:
Bust: 34 (38,40,44) [48,52,56] inches
Length: 26 (26,26,26) [27,27,27] inches
Bell Sleeves Circumference: 14 (15, 16, 17) [18,19,20] inches
Gauge: 4″ (10cm) square = 6 V sts by 11.5 rows in pattern, blocked
Make sure to get the correct gauge for an accurate fit.
Cardigan Crochet Pattern
Follow stitch and row/round counts using sizing XS (S, M, L) [XL, 2XL, 3XL]:
You will be crocheting the back panel and two front panels of cardigan to start. Then you will join the panels with seams and add sleeves & trim.
NOTE – Ch 1 does not count as a st.
Cardigan FREE Pattern
Back Panel (make 1)
Using size J crochet hook, ch 75 (84, 87, 96) [105, 114, 123] with size 4 yarn in MC.
Row 1: Sc in 2nd ch from hook, sk next ch, *V st in next ch **, sk next 2 ch; rep from * across, ending last rep at **, sk next ch, sc in last ch. Turn. 24 (27, 28, 31) [34, 37, 40] V sts and 2 sc sts.
Row 2: Ch 1, sc in first sc, *V st in next ch-2 sp; rep from * across until last st, sc in last sc. Turn. 24 (27, 28, 31) [34, 37, 40] V sts and 2 sc sts.
Rows 3-72 (72, 72, 72) [74, 74, 74]: Rep Row 2.
Fasten off.
Front Panel (make 2)
Using size J crochet hook, ch 30 (36, 39, 45) [48, 54, 57] with size 4 yarn in MC.
Row 1: Sc in 2nd ch from hook, sk next ch, *V st in next ch **, sk next 2 ch; rep from * across, ending last rep at **, sk next ch, sc in last ch. Turn. 9 (11, 12, 14) [15, 17, 18] V sts and 2 sc sts.
Row 2: Ch 1, sc in first sc, *V st in next ch-2 sp; rep from * across until last st, sc in last sc. Turn. 9 (11, 12, 14) [15, 17, 18] V sts and 2 sc sts.
Rows 3-72 (72, 72, 72) [74, 74, 74]: Rep Row 2.
Fasten off.
Seaming Back and Front Panels
Use MC yarn and a tapestry needle to join the first (top) rows of the two front panels and back panel with a seam.
Be sure to align the outer corners together and align the V sts together.
This will leave a small gap in the center back panel for the back of neck.
Note that the ‘scallop’ edges of the V stitches should be at the bottom of each panel.
Sleeves (add 2)
You will be joining yarn and working in rounds to add each sleeve top-down. The sleeve length is adjustable if you would like long sleeves.
NOTE – Use a stitch marker (SM) to keep track of first st in each round.
Ch 1 does not count as a st.
Starting with top of shoulders, place a stitch marker (SM) at top corner of each shoulder seam. Using this center shoulder SM as a guide,
- Place another SM 19 (20, 22, 23) [24, 26, 27] rows down on front panel at row edge (for underarm).
- Place another SM 19 (20, 22, 23) [24, 26, 27] rows down on back panel at row edge (for underarm).
LEFT sleeve:
With RS of panels facing, join MC yarn with size J crochet hook to left-wearing front panel at underarm SM.
Round 1: Ch 1, work 56 (62, 68, 68) [74, 80, 86] sc sts evenly up the row edges to shoulder and down the row edges from shoulder to the other underarm SM. (This can be done by alternating approx. 1 sc in one row edge and 2 sc’s in next row edge)
Join with sl st to first sc, turn.
Round 2: Ch 1, sc in first sc, sk next sc, *V st in next sc **, sk next 2 sc; rep from * around, ending last rep at **, sk next sc, sc in last sc. Join with sl st to first sc, turn. 18 (20, 22, 22) [24, 26, 28] V sts and 2 sc sts.
Round 3: Ch 1, sc in first sc, *V st in next ch-2 sp; rep from * around until last st, sc in last sc. Join with sl st to first sc, turn. 18 (20, 22, 22) [24, 26, 28] V sts and 2 sc sts.
Rounds 4-12 : Rep Round 3.
Next you will work an increase round to expand the sleeve width.
Place a SM after the 9th (10th, 11th, 11th) [12th, 13th, 14th] V st at the outer center of your sleeve (putting SM between 2 V sts).
Round 13: work Increase Round A as follows:
Increase Round A: Ch 1, sc in first sc, *V st in next ch-2 sp; rep from * around until SM, work a V st at SM, rep from * until last st, sc in last sc. Join with sl st to first sc, turn. (1 V st added)
After Round 13, you will have 19 (21, 23, 23) [25, 27, 29] V sts and 2 sc sts.
Rounds 14-21: Ch 1, sc in first sc, *V st in next ch-2 sp; rep from * around until last st, sc in last sc. Join with sl st to first sc, turn. 19 (21, 23, 23) [25, 27, 29] V sts and 2 sc sts.
Next you will work another increase round to further expand the sleeve width.
Place a SM in the ch-2 of the 10th (11th, 12th, 12th) [13th, 14th, 15th] V st at the outer center of your sleeve (putting SM in center ch-2 of V st).
Round 22: work Increase Round B as follows:
Increase Round B: Ch 1, sc in first sc, *V st in next ch-2 sp; rep from * around until SM, work 2 V sts at SM, rep from * until last st, sc in last sc. Join with sl st to first sc, turn. (1 V st added)
After Round 22, you will have 20 (22, 24, 24) [26, 28, 30] V sts and 2 sc sts.
Work the rest of the sleeve as instructed or until you reach approx. 1″ above your desired sleeve length:
Rounds 23-30 (30, 30, 30) [27, 25, 25]: Ch 1, sc in first sc, *V st in next ch-2 sp; rep from * around until last st, sc in last sc. Join with sl st to first sc, turn. 20 (22, 24, 24) [26, 28, 30] V sts and 2 sc sts.
Fasten off MC.
Add contrasting color (CC) trim to end of sleeve:
Join CC yarn at start of next round, and work 3 more rounds (as Round 23).
Fasten off CC.
RIGHT sleeve:
With RS of panels facing, join MC yarn with size J crochet hook to right-wearing back panel at underarm SM.
Repeat Rounds as above to join this 2nd sleeve.
Make sure to work the same number of total rounds as the left sleeve.
Seaming Sides
Use MC yarn and a tapestry needle to join the sides of the two front panels and back panel with a seam, working from underarm to bottom.
Be sure to align the bottom edges together when seaming.
Inside Trim/Neckline
You will be joining yarn and working in sc rows to add trim/neckline to the inside of the front panels & center back panel. Both MC & CC yarn is used.
Note: Ch 1 does not count as a st.
Using size J crochet hook and RS facing, join MC yarn to bottom corner of right front panel.
Row 1: Ch 1, sc evenly along row edges of right front panel up toward back panel, across back neckline, and back down row edges of left panel, approx. 1 sc st per row and evenly across back neckline. Turn.
Row 2: Ch 1, sc in each sc of prior row. Turn.
Rows 3-4: Rep Row 2.
Fasten off.
Using size J crochet hook and RS facing, join CC yarn to bottom corner of right front panel.
Rows 5-8: Rep Row 2 with CC yarn.
Do not fasten off.
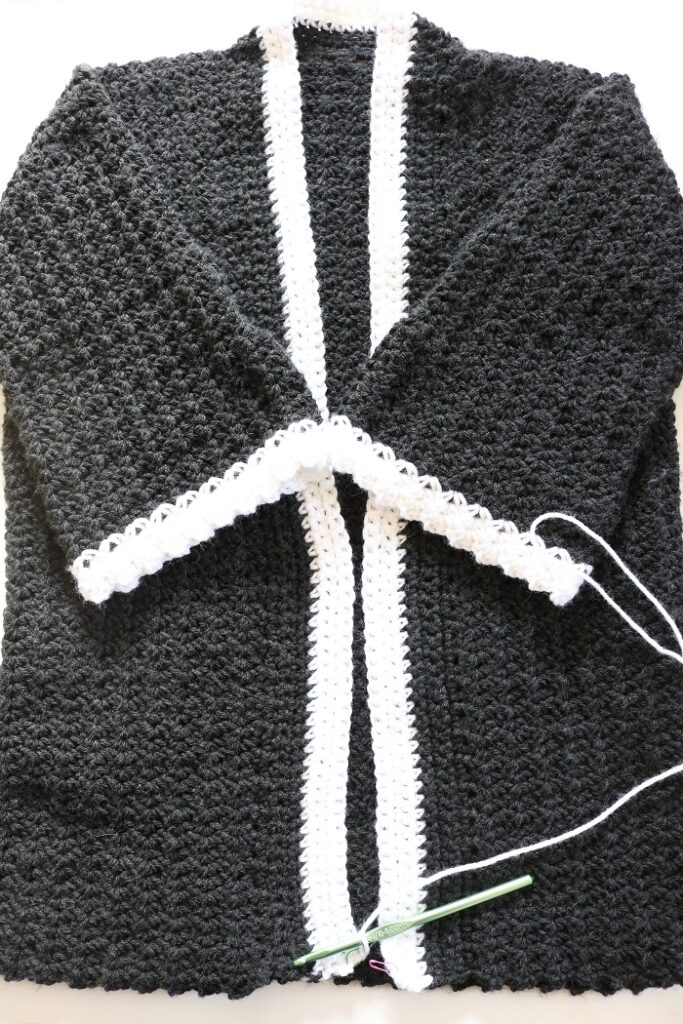
(Optional) Bottom Trim
Next you can optionally add bottom edge trim in V st pattern with CC yarn.
Continuing with CC yarn and WS facing, work across bottom edging of cardigan as follows:
Row 1: Ch 1, sc in edge of CC Row 8 trim, V st in edge of CC Row 6 trim, V st in edge of MC Row 2 trim, *V st in next ch-2 sp; rep from * across until reach trim, V st in edge of MC Row 2 trim, V st in edge of CC Row 6 trim, sc in edge of CC Row 8 trim. Turn.
Row 2: Ch 1, sc in first sc, *V st in next ch-2 sp; rep from * across until last st, sc in last sc. Turn.
Row 3: Rep Row 2.
Fasten off CC.
Finishing/Blocking Cardigan
Weave in all loose ends.
Block the cardigan. Use steam blocking for acrylic yarn.
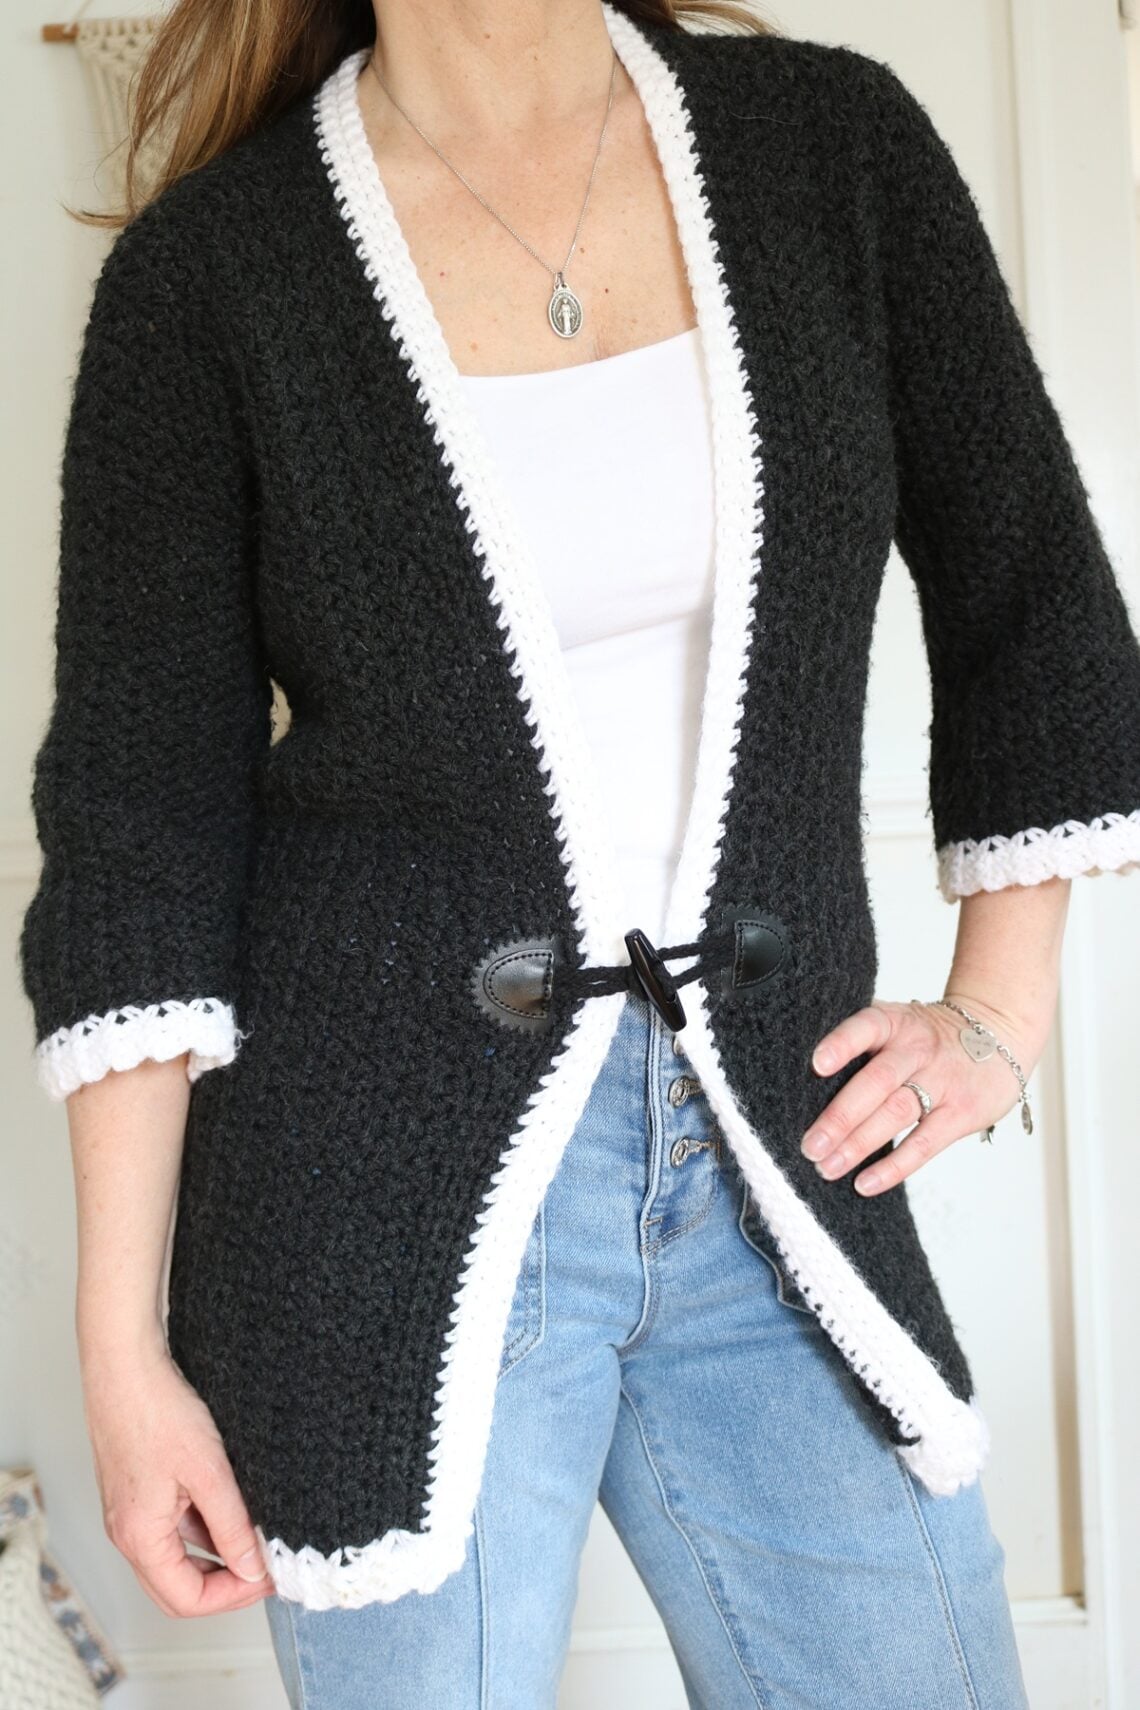
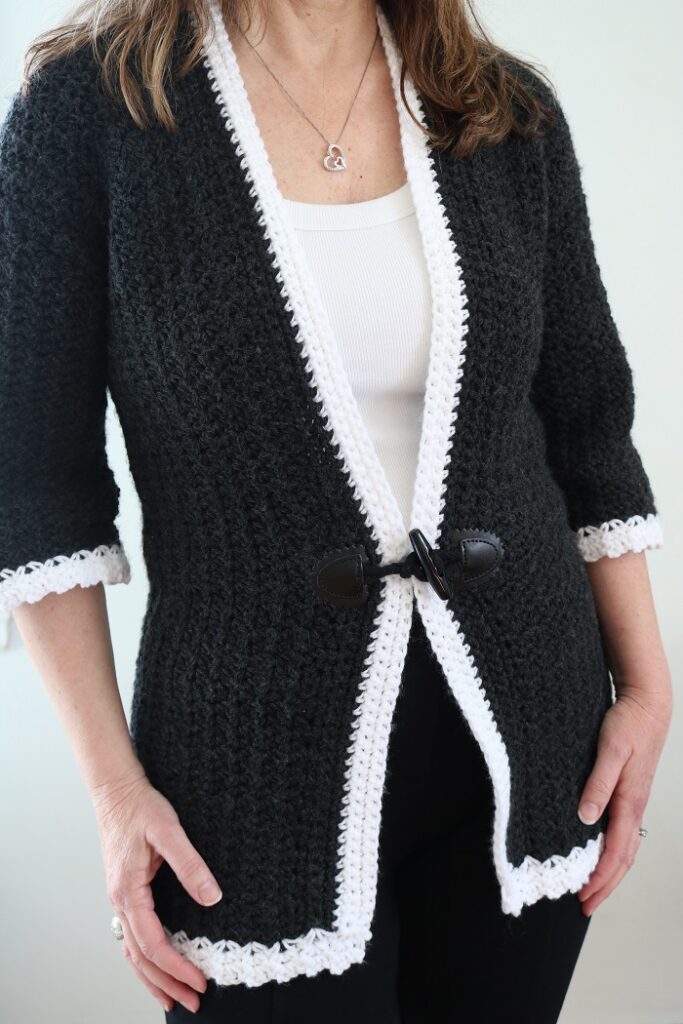
You can optionally add a toggle button at the waistline if you want to close the front of the cardigan. Just sew it to the front panels of the cardigan using coordinating needle & thread.
Find the toggle button I used in MY FAVORITE SUPPLIES LIST HERE.
A belt would look great, too!
Important Tips for Crocheting your Cardigan
Some things to keep in mind as you work the cardigan crochet pattern are:
- Note that the stitch pattern is reversible, so you can choose your desired Right Side and Wrong Side when seaming pieces.
- It’s a good idea to use a stitch marker (SM) to keep track of the first st in each row/round.
- Note that you can make the cardigan in one solid color if you do not want to change colors for trims. Just use MC (Main Color) yarn throughout.
- Feel free to slightly alter the cardigan as follows:
- work more/less rounds on sleeves toward bottom if you would like them longer/shorter (work the same # of rounds for both sleeves)
- work more/less rows on panels if you would like the cardigan longer/shorter (work the same # of rows for back & front panels)
FAQ
Can a beginner crochet this cardigan? Yes, with a little patience! The skill level is listed as low intermediate because the sleeves are worked in rounds, but the stitch pattern itself, the single crochet V-stitch, is very simple and repetitive. If you’re comfortable with single crochet and following a row pattern, you can do this. The panels are essentially just rectangles.
What yarn works best for this crochet cardigan? This pattern uses Lion Brand Pound of Love, a worsted weight acrylic that’s soft, durable, and comes in a huge range of colors. Any size 4 worsted weight yarn will work. If you want a lighter, drapier cardigan, try a cotton-acrylic blend. For a warmer version, a wool blend works beautifully. You’ll need approximately 1120–1800 yards of main color depending on your size, plus a small amount of contrasting color for the trim.
What is the V-stitch in crochet? The V-stitch used in this pattern is made by working a single crochet, chain 2, and another single crochet all into the same stitch or space. It creates an open, lacy texture that gives the cardigan its vintage, mod-inspired look. Once you get the rhythm, it works up quickly.
Can I make this cardigan in one color? Absolutely! The contrasting color is used only for the sleeve cuffs and front trim, so if you’d prefer a single solid color throughout, simply use your main color yarn for those sections too. It will still look beautiful, just more minimalist than the two-tone version.
How do I adjust the length of this cardigan? To make the body longer or shorter, add or subtract rows from the back and front panels. Just be sure to work the same number of rows on all three panels. Each row adds roughly a quarter inch of length. For longer or shorter sleeves, adjust the number of rounds worked before the contrasting color trim.
Can I use a different hook size? You can experiment, but hook size directly affects gauge, which affects fit. If you go up a hook size, your cardigan will be larger and the fabric more open; going down makes it smaller and denser. Always crochet a gauge swatch first, especially for a garment with fitted sizing like this one.
Does this pattern include a size chart or schematic? The finished measurements for all 7 sizes (XS through 3XL) are listed in the pattern. The ad-free PDF version available in my pattern shop also includes helpful diagrams showing how the pieces go together.
Crochet Long Cardigan
The retro crochet cardigan is one of those pieces that works across your whole wardrobe. For a casual everyday look, throw it over a fitted white tee and high-waisted jeans. The long tunic length and open V-stitch texture balance perfectly against a more structured base. In warmer months, it makes a beautiful beach cover-up worn over a swimsuit or sundress, with the bell sleeves adding a little drama as you walk. For an evening out, try it belted at the waist over a slip dress or wide-leg trousers to lean into the 1960s mod vibe fully. It also layers beautifully over turtlenecks and long sleeves in cooler weather, since the open stitch lets warmer layers breathe underneath.
If you made yours in a bold color or a classic charcoal-and-white like the sample shown, you’ll find it anchors an outfit rather than competing with it. Solid-colored basics let the texture and silhouette do the talking. But if you’re feeling adventurous, a floral or striped base layer underneath the open stitch creates a really pretty layered effect.
Don’t forget that this crochet cardigan pattern is also available in an ad-free digital pdf pattern. The pdf has a few helpful photos and diagrams. Grab the CROCHET CARDIGAN pattern in my pattern shop.
Love crochet garment patterns? Check out these other crochet projects…
Did you enjoy this free crochet pattern? I think it’s also a perfect cardigan as a gift for a stylish friend during the spring and summer months.
Check out all of my FREE CROCHET PATTERNS HERE.
===> Remember to PIN for later! <===