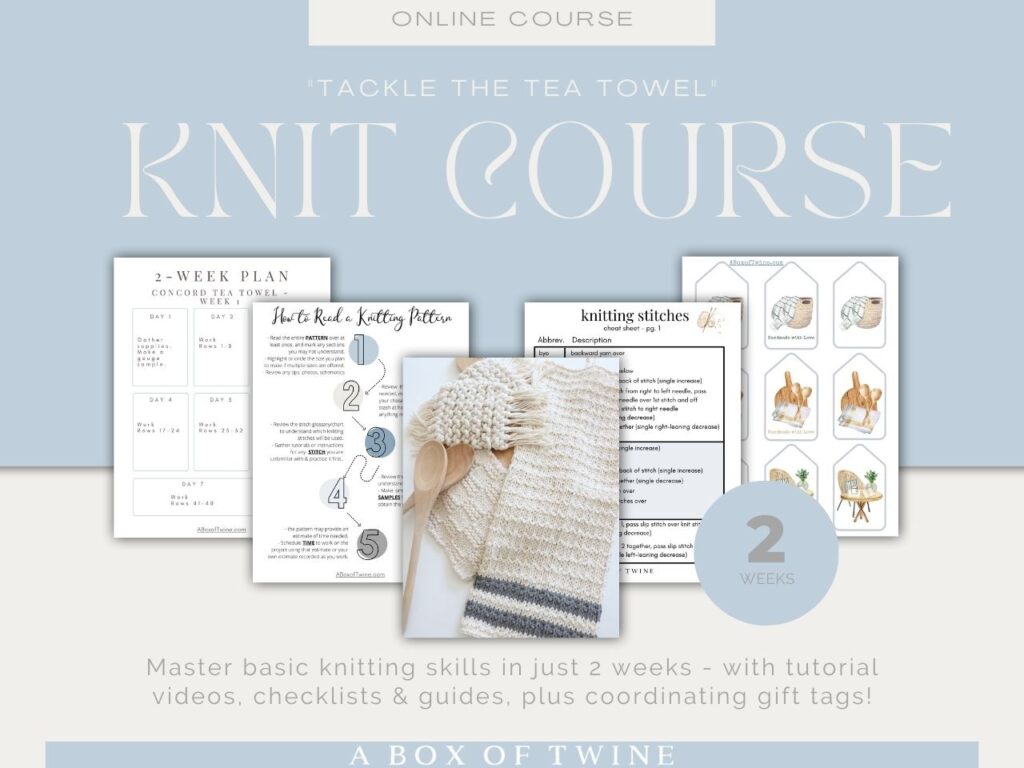
How to Knit Basic Knitting Stitches {free guide!}
Have you ever tried to knit? It may seem intimidating at first, but you can start by learning the two most basic knitting stitches. Wondering what are the basic knitting stitches? The 2 basic stitches to learn are the knit and purl stitch. Once you get the hang of these two stitches, you can make a plethora of projects combining them both!
Keep reading for step-by-step tutorials of these knitting stitches to learn. Whether you are a knitting beginner or have some experience, I hope you will learn something interesting.
I have also packaged these basic knit stitch tutorials into a FREE GUIDE! Grab it below…
Get the FREE knit guide for beginners:
You will receive photo tutorials for basic knitting stitches in this ‘basic knitting stitches pdf’ file:
This post may contain affiliate links. That means if you click and buy, I may make a commission at no cost to you. Please see my full disclosure policy for more details.
Knitting Supplies
You can use the following supplies to practice these knitting stitches:
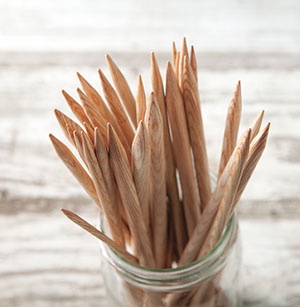
- Knitting needles (any size you are comfortable with). I am using size 10 (6.0 mm) hook in the photos.
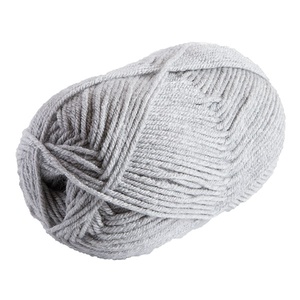
- Yarn (size 4 medium weight is a good size to practice with.) I am using size 5 Bulky weight in the photos.
Here are some of my favorite needles and yarns for beginners:

Abbreviations for Basic Knitting Stitches
You will often find abbreviations for knit terminology in patterns as follows:
K – knit (k1 means knit 1 stitch, k2 means knit 2 stitches, etc.)
P – purl (p1 means purl 1 stitch, p2 means purl 2 stitches, etc.)
RS – right side (faces out when finished)
WS – wrong side (faces in when finished)
CO – cast on
BO – bind off
Rep – repeat
Beginner Knitting Course
If you’re just learning to knit, you may want to try my comprehensive knitting course shown below. It includes plenty of videos showing you exactly how to cast on, knit, purl, change yarn color, bind off, and fix any mistakes along the way. Plus so much more. Tackle a tea towel and make fabulous pieces for your kitchen or for gifts!…
——————————————————————————————————————–
Do you wish you could really learn how to knit beautiful things?
Click here to master basic knitting skills in under 2 weeks – even if you are a complete beginner, intimidated by mistakes, and lack design coordination!
KNITTING COURSE —>
——————————————————————————————————————–
Basic Knitting Stitches for Beginners
How to knit for beginners
When you are beginning to learn how to knit, the first two stitches you will need to learn are the Knit and Purl stitches. These are the most common stitches in knit projects and are simple to get the hang of.
My instructions are written for right-handed knitters, but you can reverse the instructions for left-handed work.
Before I show you how to knit these basic stitches, I want to explain how there are different ways to hold your working yarn. The working yarn is the strand that is continually coming from your yarn source (e.g. ball or skein) as you knit. The tail is the small strand that protrudes from your initial slip knot.
You want an even tension in your working yarn as you knit. Whether you knit Continental style (with your working yarn slipping through your left fingers), or English method (moving the working yarn for each stitch with your right hand), it is important to keep an even tension as you go.
I will be showing you how to knit with the English method (also known as throwing), which means you will be wrapping the working yarn around the needle using your right hand as you work.
How to Cast On
The first step to begin a knitting project is to cast on the number of stitches required onto one of your knitting needles. You use one of several methods for ‘casting on’ each stitch. One of the most common ways to cast on is using the long-tail cast-on method (aka ‘sling shot’ method). The resulting needle with the number of cast-on stitches helps to form what is called the ‘foundational row’, basically the base row of your project.
Let us walk through Casting On with the long-tail method step by step:
Steps to CAST ON stitches:
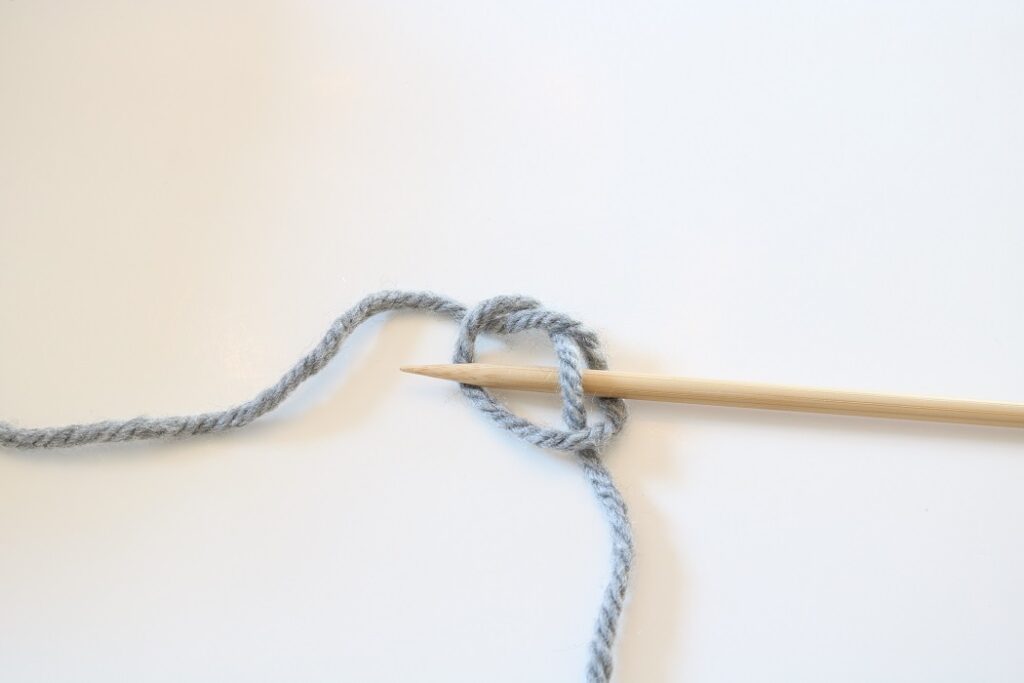
FIRST – make a slip knot on your knitting needle for the first stitch as shown below, leaving a long tail of yarn. This tail should measure about 1” per stitch that you need to cast on, plus a few extra inches. I have made my tail 12” long for 10 stitches. In the photo below, the tail is resting underneath the needle, and the working yarn lies off to the left of the needle (coming from the skein):
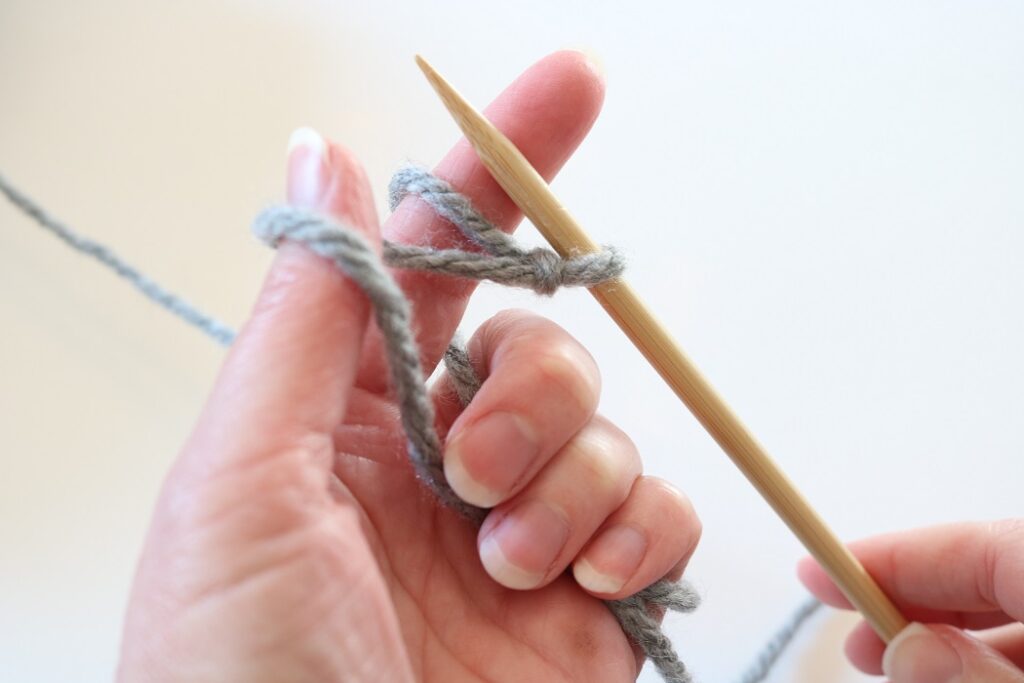
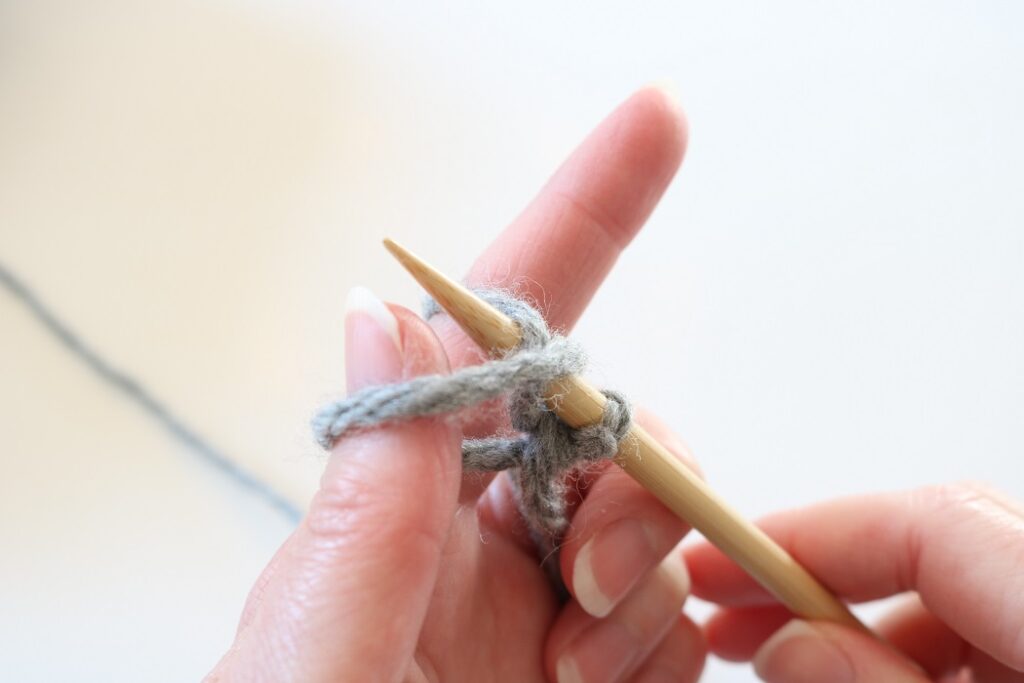
Step 1 – hold both the working yarn (around your forefinger) and the tail (around your thumb), tucking in the ends with your middle fingers and pinky at your palm. This creates a ‘V’ like a slingshot:
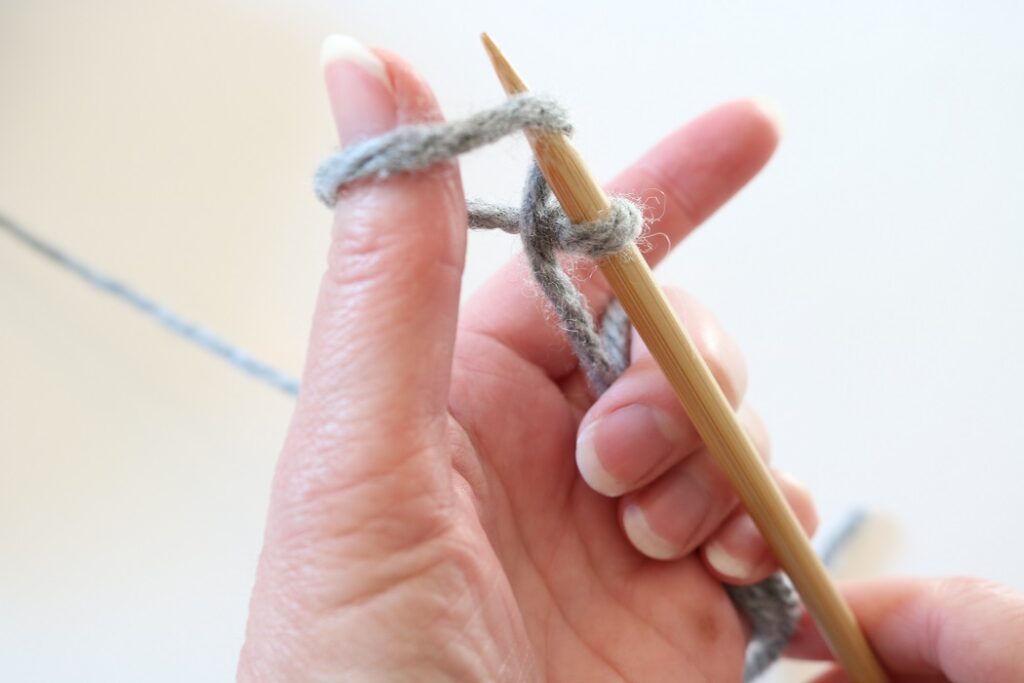
Step 2 – insert the needle tip up and under the tail yarn that is wrapped around the outer side of your thumb:
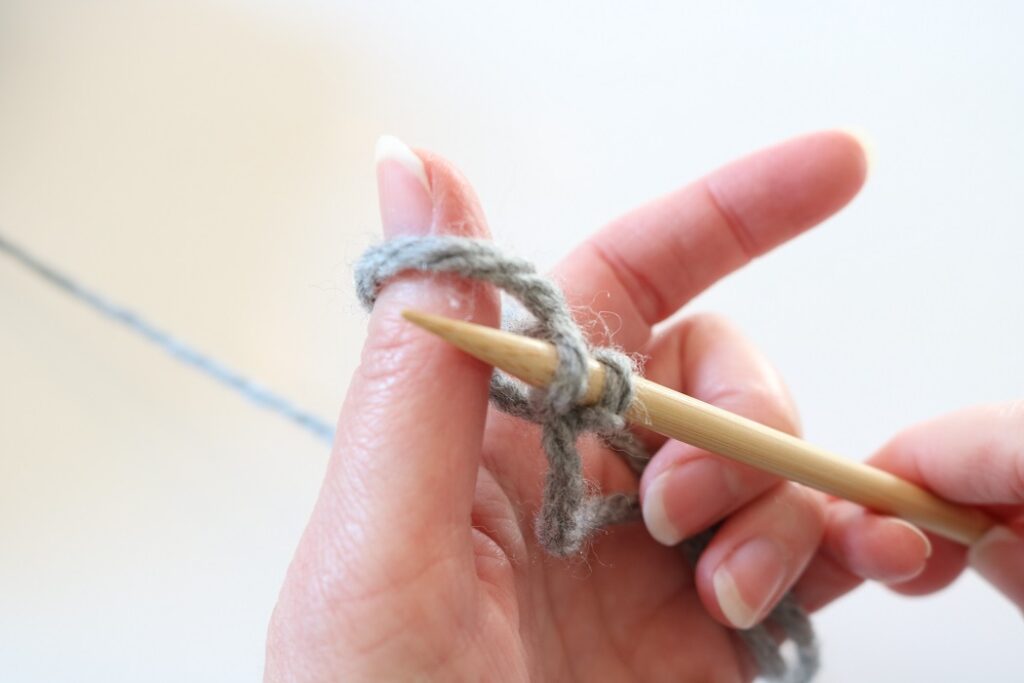
Step 3 – next move the needle tip over and back under the working yarn that is wrapped around your forefinger:
Step 4 – Bring the tip back toward you, under the tail yarn around the thumb:
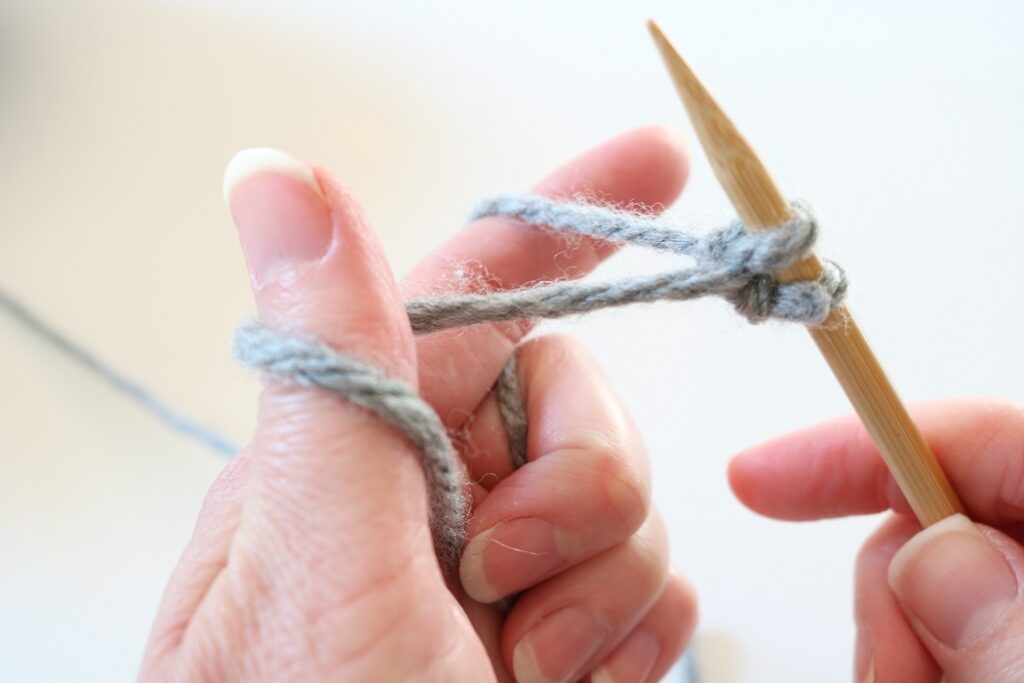
Step 5 – Release the yarn from your thumb and tug at the tail yarn to secure a stitch to the needle. Next, wrap the tail and working yarn around your thumb and forefinger again in the ‘slingshot’ position:
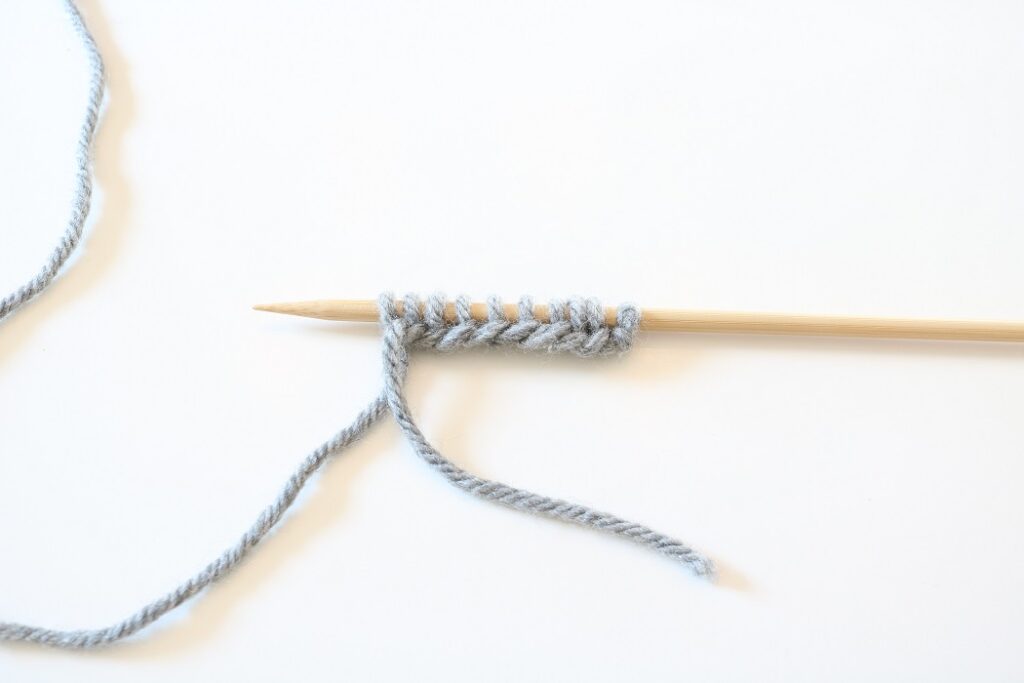
Repeat these steps to the number of stitches required to cast on. Here I cast on 10 stitches to my needle:
Next, we’ll learn how to knit and purl.
How to Knit (K)
The Knit stitch is frequently used in many knit projects. It is the most common stitch and usually appears as a lovely ‘V’ on the side of the work facing you. This stitch is also the most basic stitch to practice as a beginner. It is important to remember to keep the working yarn behind your work as you knit.
Let us walk through the Knit stitch step by step:
First, you will need to cast on any number of stitches for a foundational row (see previous instructions for Casting On). In this example I casted on 10 stitches.
Step 1 – ensuring the working yarn is behind the needles, insert tip of (empty) right needle into the front loop of the first stitch on the left needle (see photo below), from front to back:
Step 2 – wrap working yarn around the right needle from back to front:
Step 3 – using the right needle tip, pull the working yarn forward through 1st stitch, creating a new loop on the right needle:
Step 4 – pull the old stitch off the left needle. One knit stitch has been made on the right needle:
Repeat these steps to continue making knit stitches, moving them from left to right needle.
Once you finish working all the stitches on the left needle it will be empty, and all the new stitches will be on the right needle. Here I have finished working ten knit stitches on my first row:
Switch the needles, moving the full needle to your left hand and the empty needle to your right. You always want the tips toward each other and the working yarn at the tip.
How to Purl (P)
The Purl stitch is also frequently used in many knit projects. It appears as a horizontal bar on the side of the work facing you and is also a basic stitch to practice as a beginner. It is important to remember to keep the working yarn in front of your work as you purl.
Let us walk through the Purl stitch step by step:
You can cast on any number of stitches for a foundational row (see previous instructions for Casting On) or just continue to work after the 10 knit stitches you practiced before. That is what I am doing below…
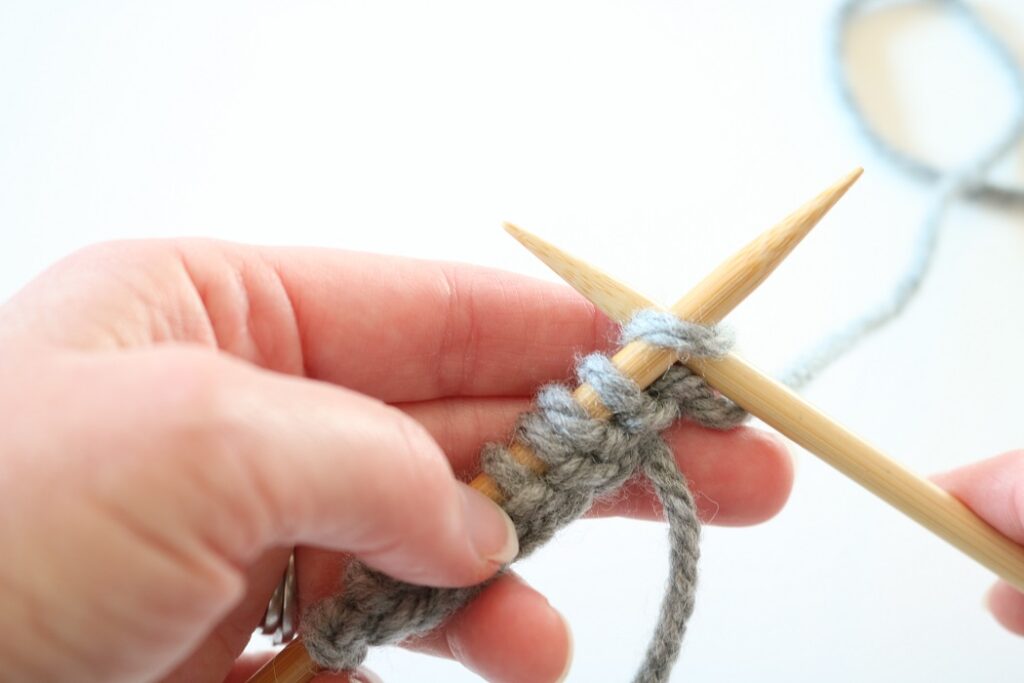
Step 1 – ensuring the working yarn is in front of the needles, insert tip of (empty) right needle into the front loop of the first stitch on the left needle (see photo below), from back to front:

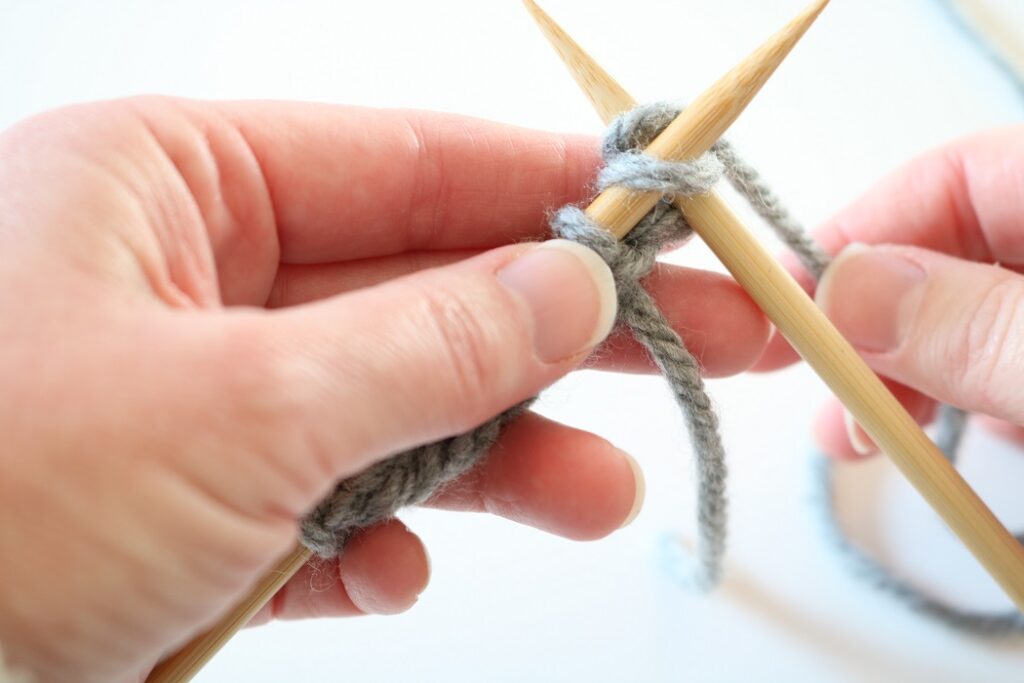
Step 2 – wrap working yarn around the right needle from back to front:
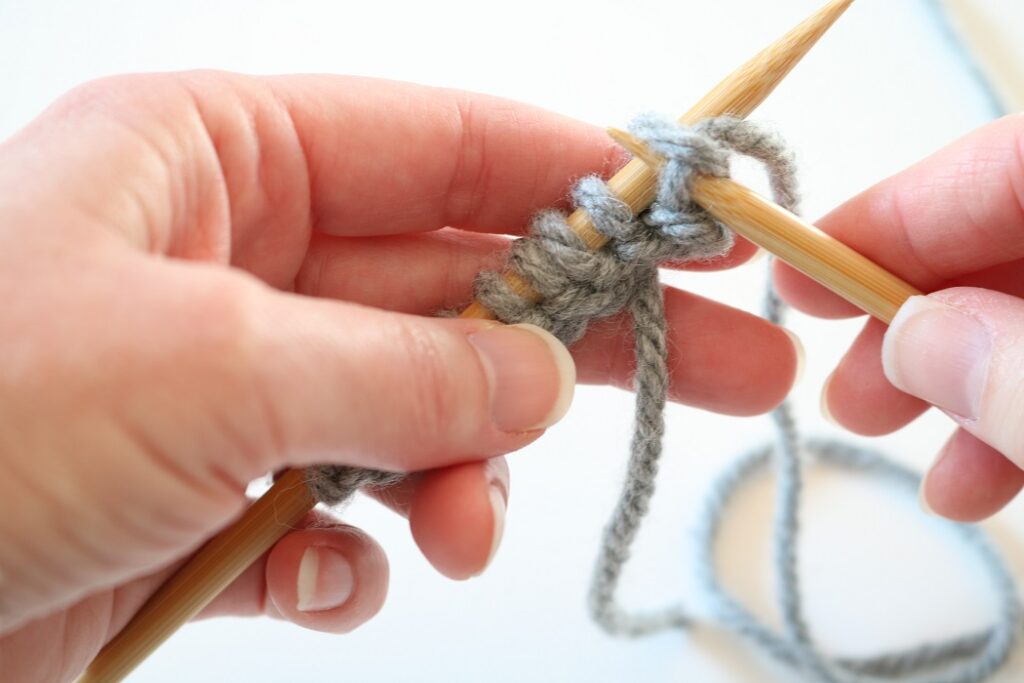
Step 3 – using the right needle tip, pull the yarn backward through 1st stitch, creating a new loop on the right needle:

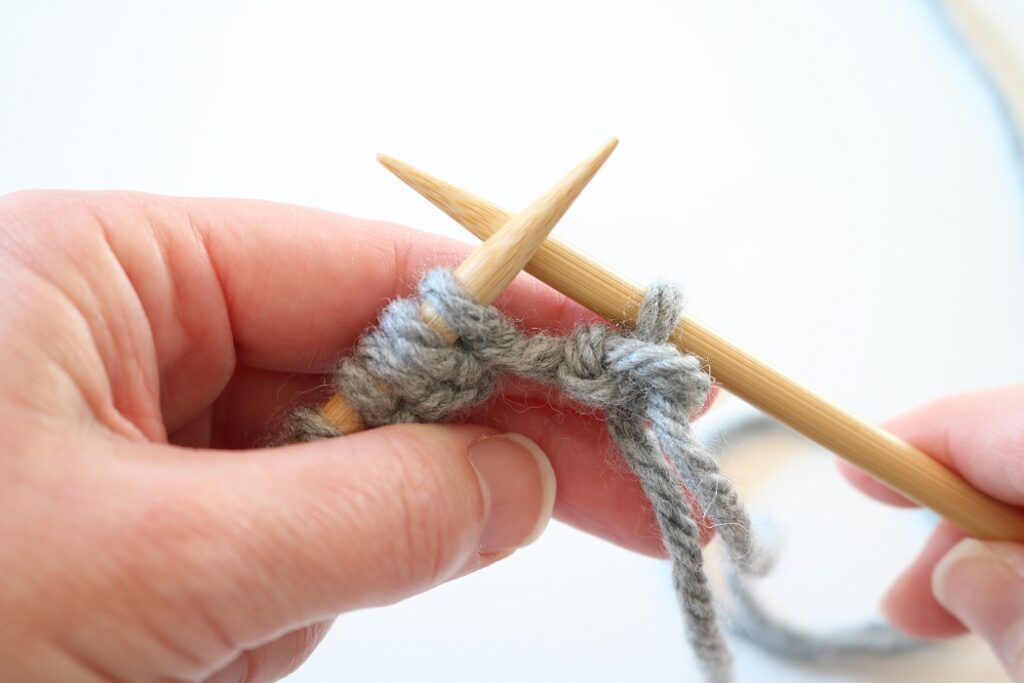
Step 4 – pull the old stitch off the left needle. One purl stitch has been made on the right needle:
Repeat these steps to continue making purl stitches, moving them from left to right needle.
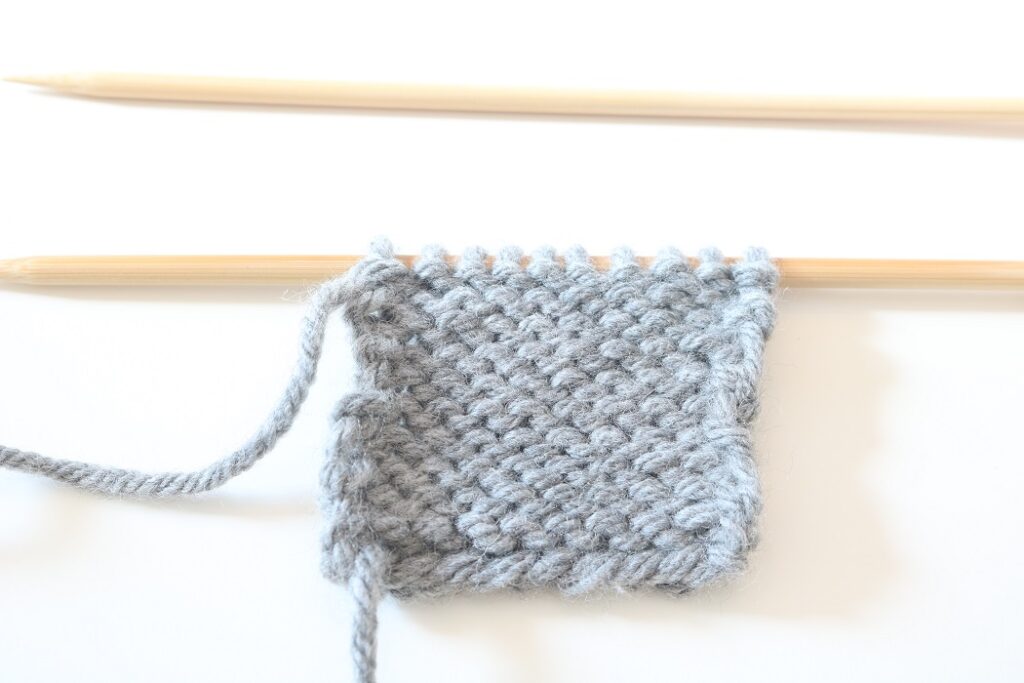
Once you finish working all the stitches on the left needle it will be empty, and all the new stitches will be on the right needle. Here I have finished working ten purl stitches on my second row:
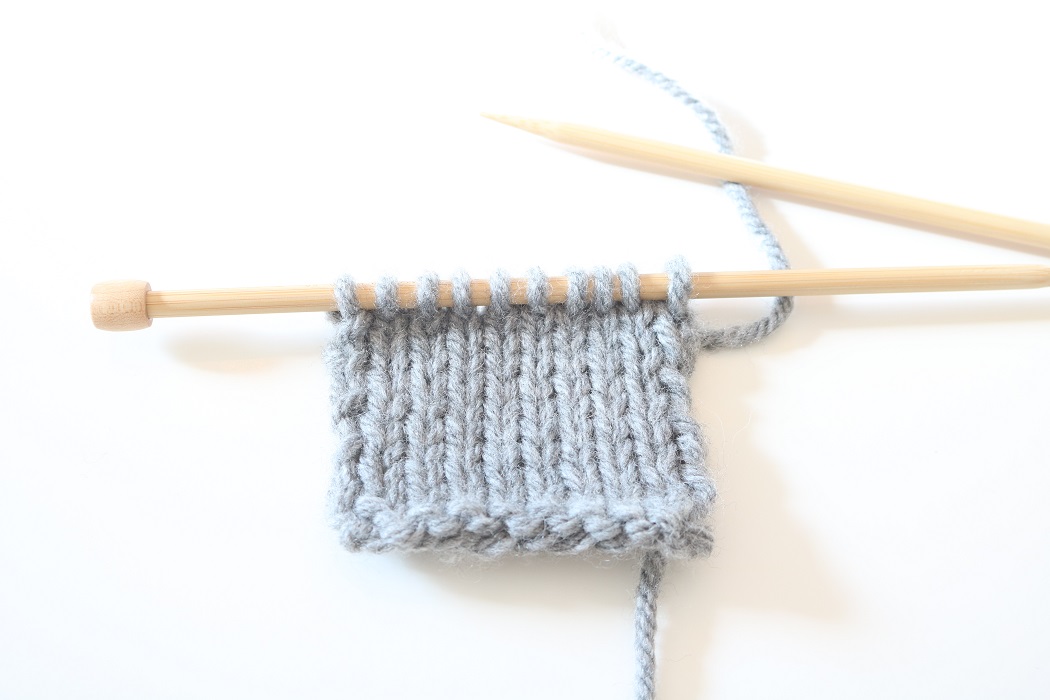
Stockinette Stitch Pattern
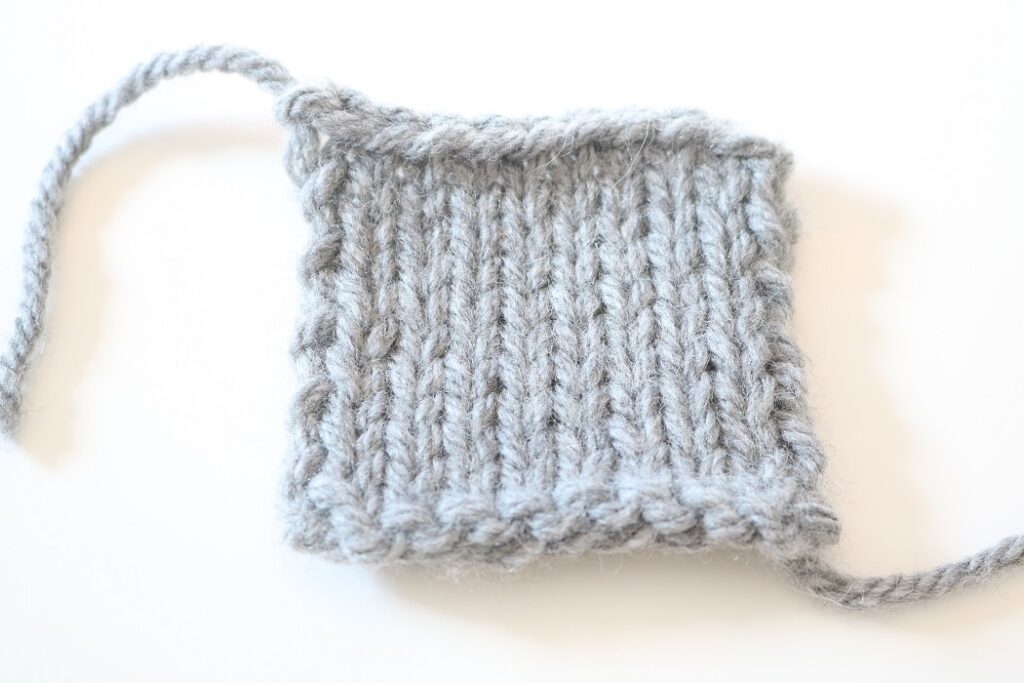
Continue taking turns knitting across the side with the knit stitches, and then turning your work and purling across the side with the purl stitches. Alternating rows with knit and purl stitches creates a well-known pattern called Stockinette Stitch. Here is the knit side of my work after several rows:

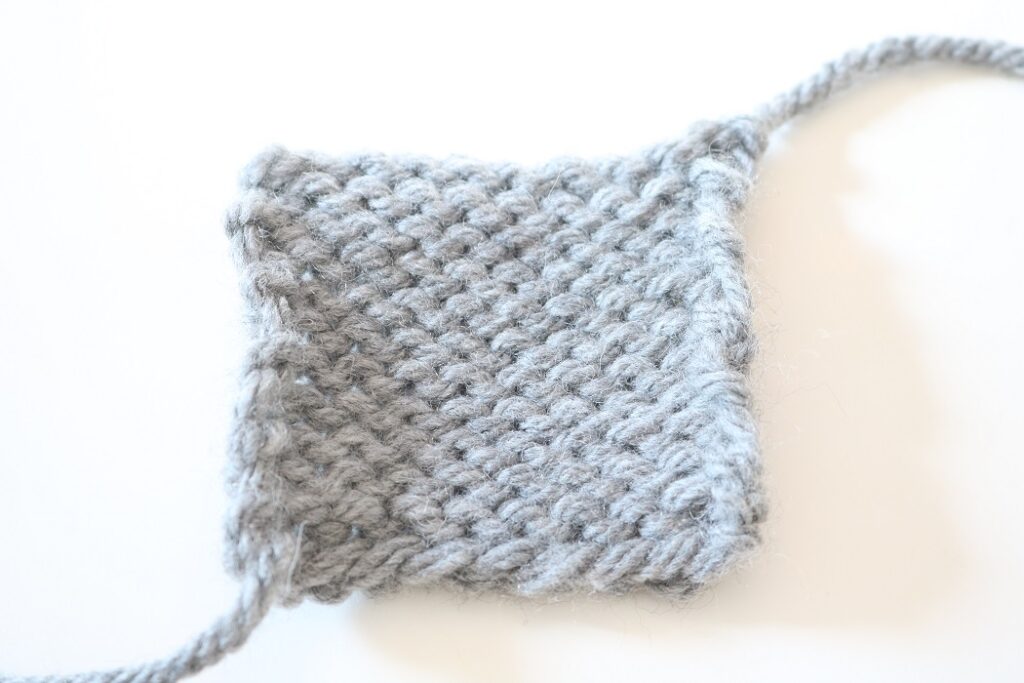
And here is the purl side of the work:
If you like seeing this in real-time, here is a video below showing one knit row being worked followed by a purl row:
How to Bind off
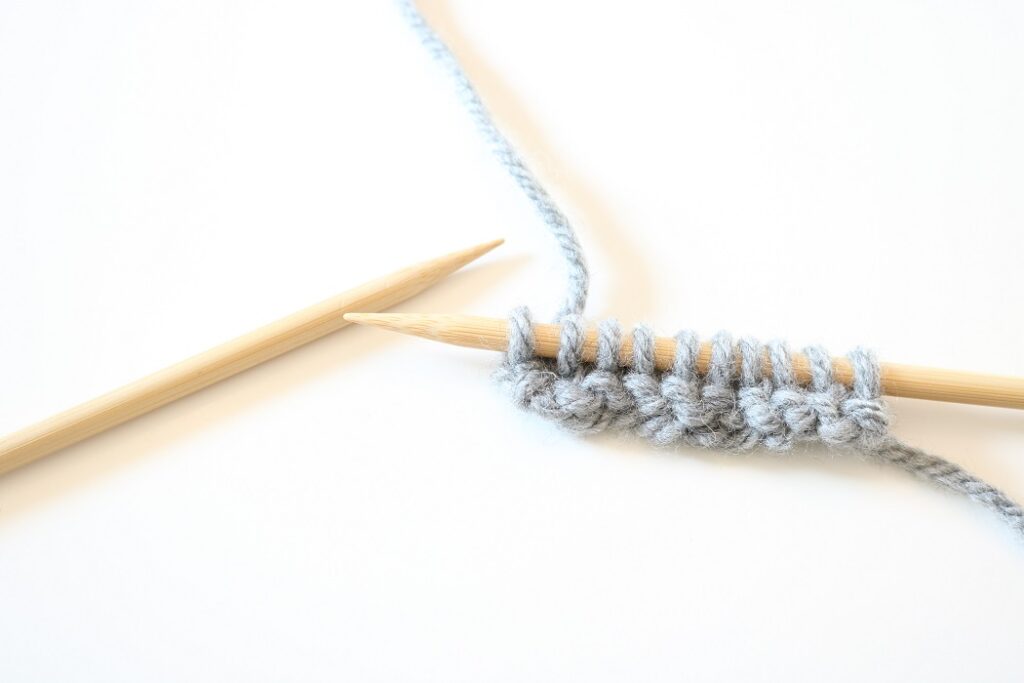
The last step to finish a knitting project is to bind off (take off) the stitches from your knitting needle. This is how the piece is securely removed from the needles, creating a finished edge. One of the most common ways to bind off is to do this knitwise using knit stitches.
Let us walk through Binding off with the knitwise method step by step:
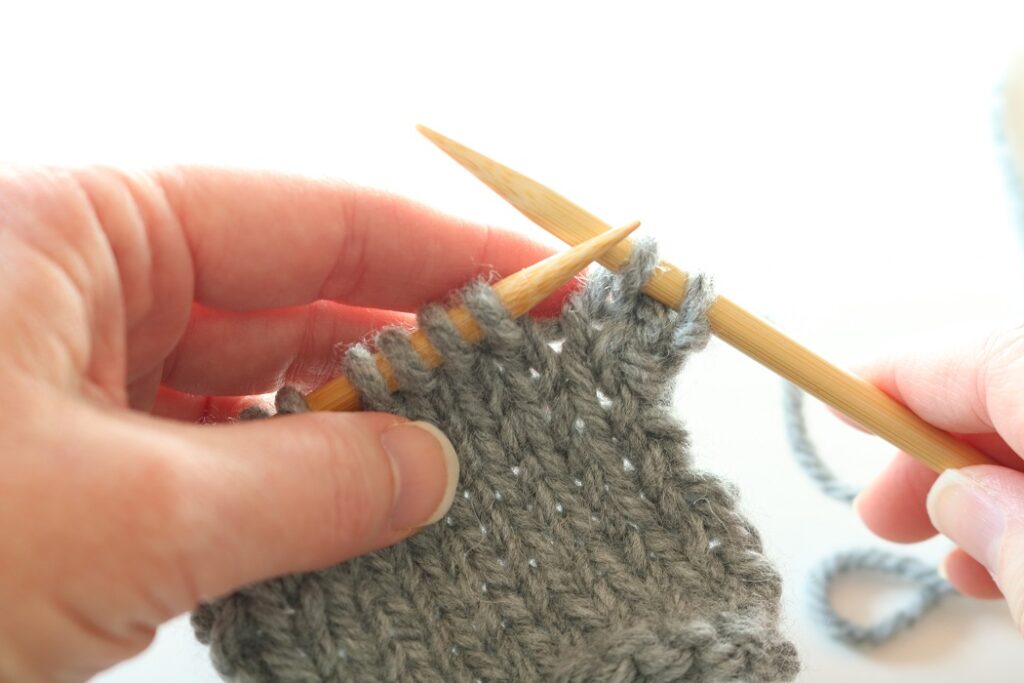
Step 1 – knit the first and second stitches:
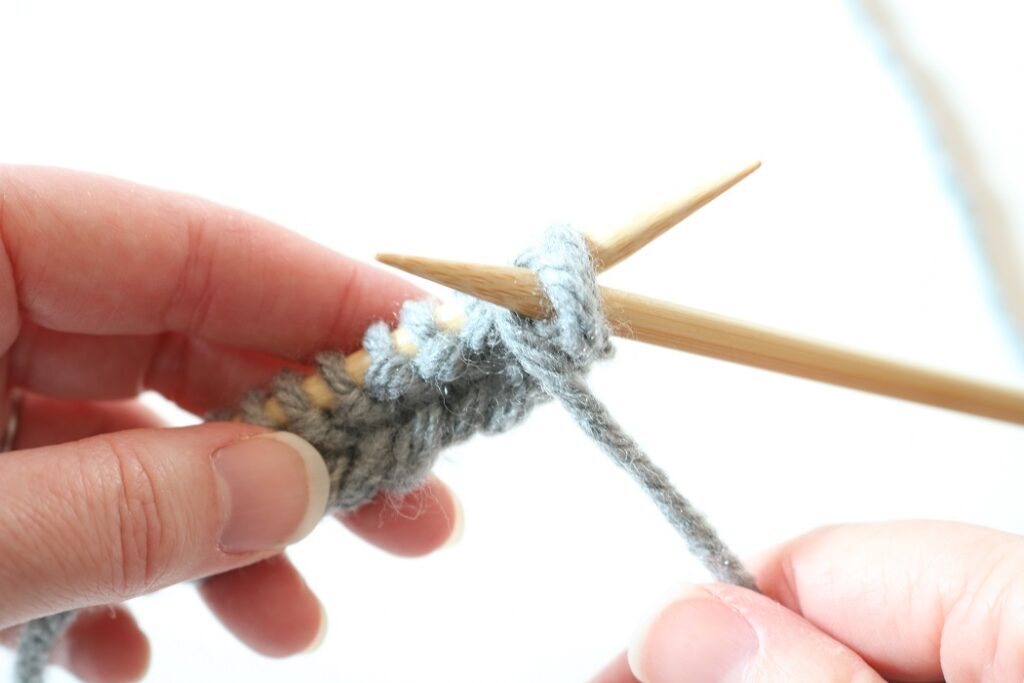
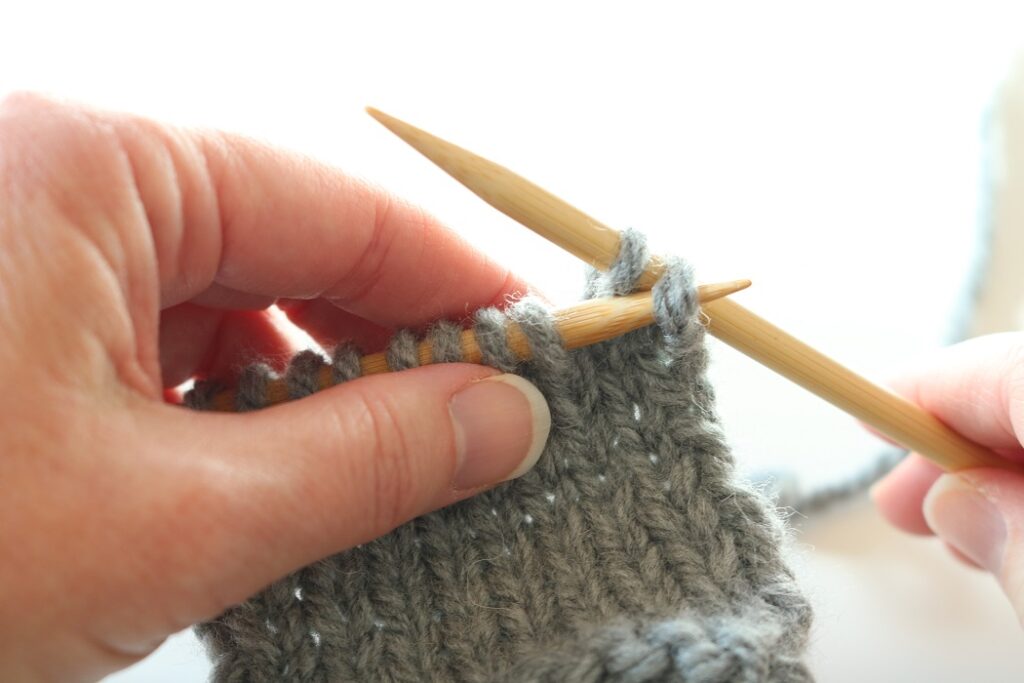
Step 2 – insert the left needle into the first stitch, from front to back:
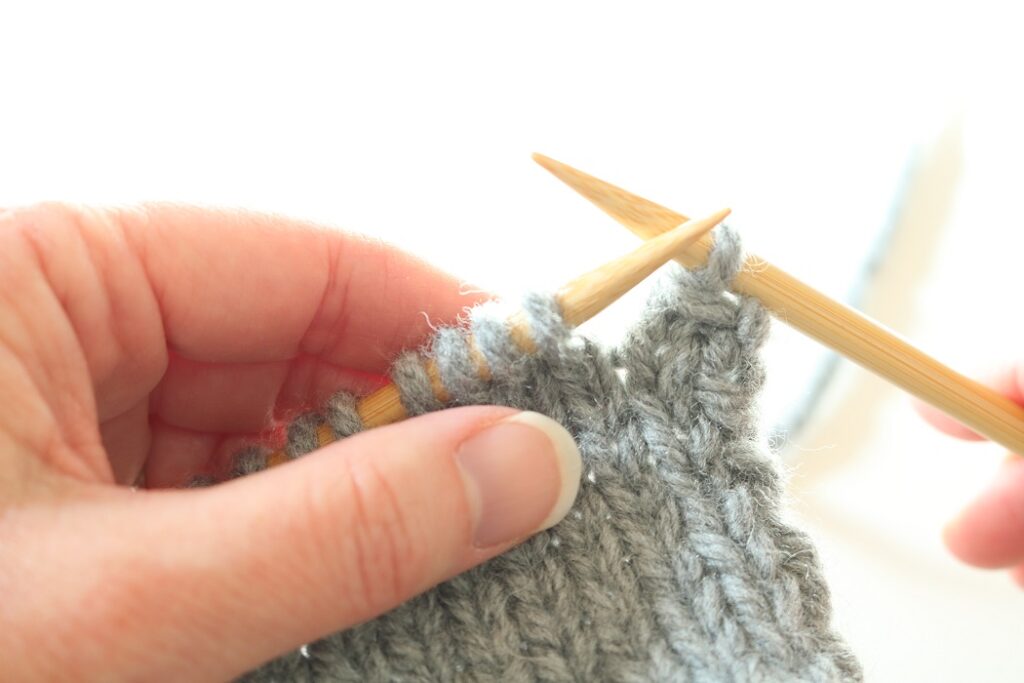
Step 3 – using the left needle, move this first stitch up and over the second stitch, removing it from the right needle. One stitch is now ‘bound off’:
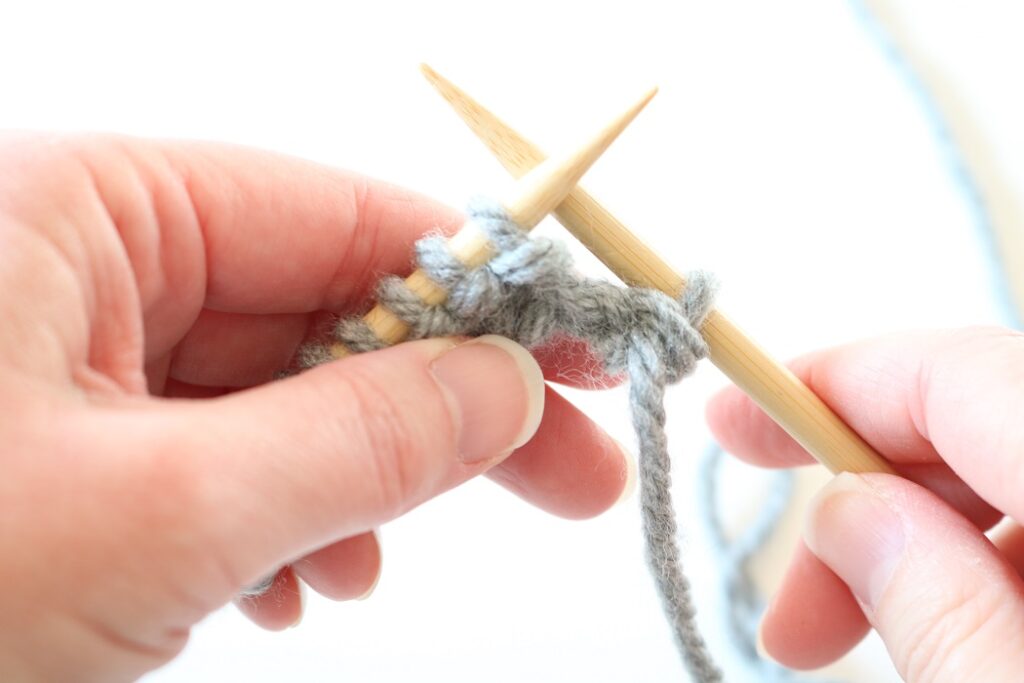
Step 4 – knit the next stitch, and repeat Steps 2-3 to remove the previous stitch on your needle.
Repeat these steps, continuing to the end of the row.
Here is a video showing binding off toward the end of a row:
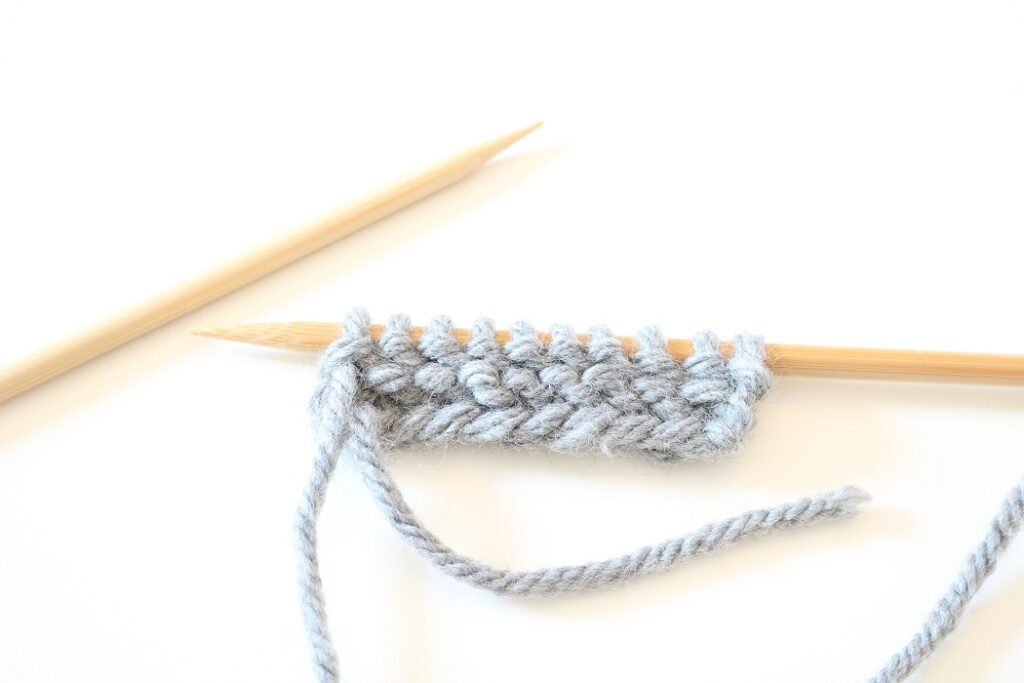
When one last stitch remains, fasten off by cutting a tail from the working yarn and weaving it through this last stitch:
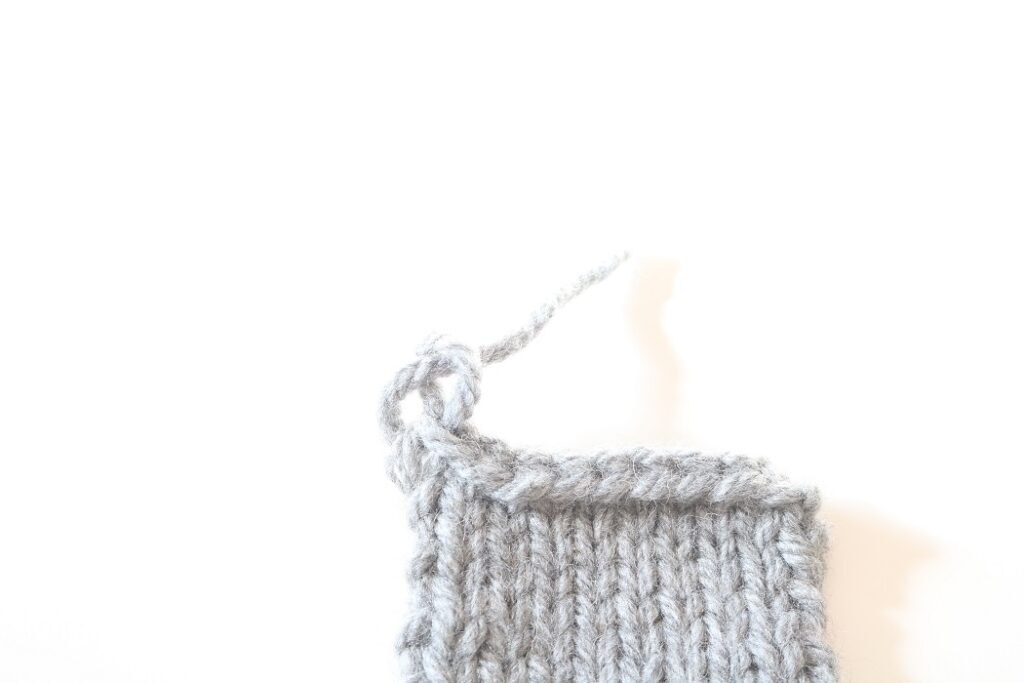
Tug the tail to tighten after fastening off.
What is the difference between Knit and Purl stitches?
If you look at the swatch samples you just made, you can see the difference between knit and purl stitches. They look quite different as they face you.
Knit stitches appear as small ‘V’s, running vertically upward:
Purl stitches appear in a more horizontal fashion, with little ‘bumps’:
One thing a beginner knitter may not realize is that once you work a ‘knit’ stitch, you have also created a ‘purl’ stitch on the opposite side of your piece. Similarly, working a ‘purl’ stitch creates a ‘knit’ stitch on the opposite side.
How to combine Knit and Purl stitches
You will eventually encounter patterns that instruct you to work both knit and purl stitches in the same row. So how do you switch between knitting and purl? It is just a matter of moving the working yarn to the proper initial position prior to working the stitch.
Let us walk through combining knit and purl stitches with a ‘knit 2, purl 2’ ribbing pattern step by step:
- First you would work 2 knit stitches.
- Move the working yarn between the needles to the front of the work.
- Next, work 2 purl stitches.
- Move the working yarn between the needles to the back of the work.
- Next, work 2 knit stitches.
Continue in this manner, moving the working yarn back and forth between knit and purl stitches.
Watch the video below to see this K2, P2 pattern:
Types of knitting stitch patterns
The exciting thing about knitting is that you can combine stitches to create various types of patterns.
Basic Knitting Stitches explained:
The following is a list of some very common stitch patterns you will encounter as you step into knitting. You can learn about these stitch patterns and more in my article ‘EASY KNITTING STITCH PATTERNS‘. I show you a variety of patterns that use combinations of just the Knit and Purl stitches.
Stockinette Stitch
Repeat a pattern of working knit stitches across one row (which will be the Right Side of your work), followed by working purl stitches across the next row.
Reverse Stockinette Stitch
Repeat a pattern of working purl stitches across one row (which will be the Right Side of your work), followed by working knit stitches across the next row.
Garter Stitch
Knit every row.
Ribbing
Repeat a pattern of alternating a number of knit stitches with the same number of purl stitches across one row.
What is the easiest thing to knit for a beginner?
Some of the simplest projects to begin knitting are:
- dish cloths
- scarves
- pot holders
- baby blankets
- cup cozies
These types of projects are normally square or rectangular in shape, and would require the same amount of stitches per row. Beginning with these shapes allows you to practice counting your stitches, which is an important skill to learn in the beginning. You want to make sure you have the same number of stitches per row for these projects.
If you are looking for beginner-friendly patterns, check out my LIST OF OVER 20 BEGINNER FRIENDLY KNITTING PATTERNS. You can also peek at all my KNIT PATTERNS on the blog for inspiration.
If you’d like to start by knitting a few accessories and are ready for more challenge, try out patterns from my KNIT ACCESSORIES PATTERN BUNDLE. These patterns include cable and increase/decrease stitches:

Need helpful knitting supply charts and checklists? I’ve got them for FREE! Just click any link below:
When it comes to knitting be patient with yourself, and enjoy the process. You will have a wonderful hobby in no time!
===> Remember to PIN for later! <===