
Easy Granny Square Shawl Crochet Pattern {FREE!}
Spring weather has a way of asking for layers that feel light, soft, and handmade. This spring crochet granny square shawl pattern is designed for those in-between moments – cool mornings, quiet walks, and gentle evenings when a full sweater feels like too much. Made from classic granny squares with a modern, feminine feel, this lightweight crochet shawl is an easy way to add warmth without bulk. If you enjoy timeless crochet projects that come together slowly and intentionally, this shawl is a beautiful addition to a handmade spring wardrobe.

I love the look of an open and airy crochet triangle shawl in the spring and summertime, and granny triangle shawls are on trend these days, especially with the poet aesthetic. If you are wondering how to crochet a shawl that is assembled with blocks such as granny squares, keep reading for this FREE and modern granny square shawl pattern. It’s a great crochet shawl for layering in spring. And if it is the first triangle shawl you have ever made, it’s an easy crochet project for an Advanced Beginner skill level.
This post may contain affiliate links. That means if you click and buy, I may make a commission at no cost to you. Please see my full disclosure policy for more details.
FREE SPRING CROCHET SHAWL PATTERN
How many squares to make a crochet shawl?
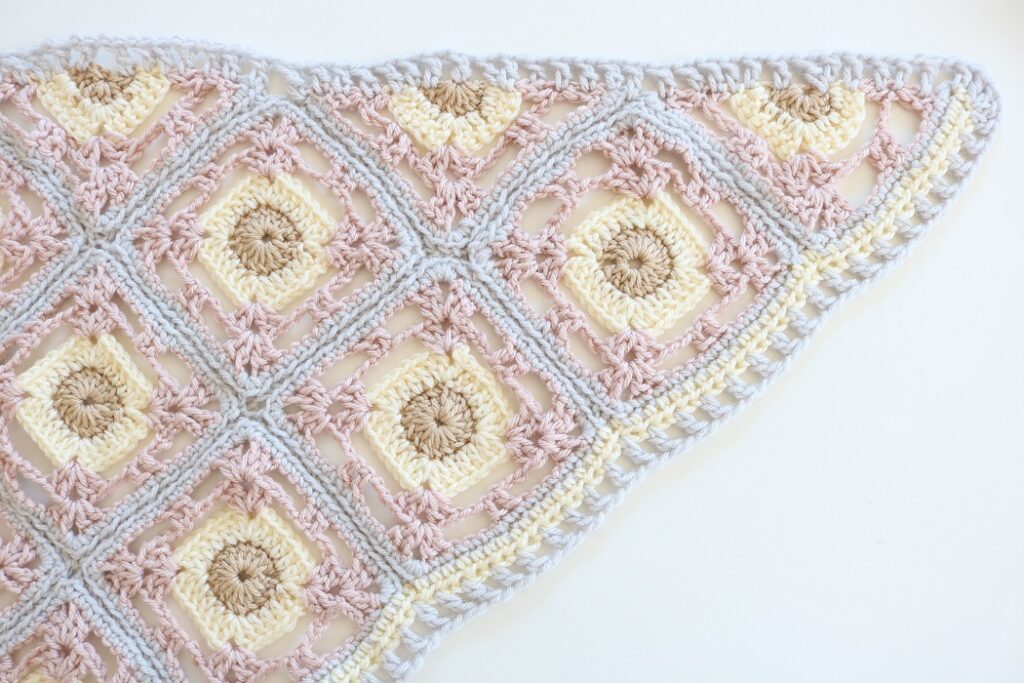
This crochet shawl with granny squares has 28 squares plus 8 triangles that are assembled together to form one large triangle. After blocking and joining these pieces with seams, you’ll need to add decorative edging all around the shawl. The process isn’t too difficult, but does take some time. It’s a great project to work on bit by bit, since the squares and triangles are crocheted individually. Perfect project for on-the-go crochet!
You will need the following supplies to make the crochet granny shawl:
Supplies
- Size H-8 (5 mm) hook or size to meet gauge
- Size 4 medium yarn weight – Lion Brand Basic Stitch Anti-Pilling in each of these colors and yds:
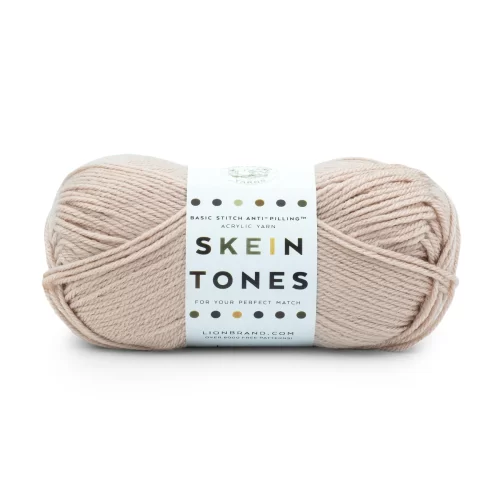
- Color A: ‘Almond‘ – 90 yds (from 1 skein)
- Color B: ‘Ecru‘ – 175 yds (from 1 skein)
- Color C: ‘Blush Heather‘ – 255 yds (from 2 skeins)
- Size 4 medium yarn weight – Lion Brand Pound of Love for the base color:
- Color D: ‘Elephant Grey‘ – 220 yds (from 1 skein)
Basic Stitch Anti Pilling Yarn

Bright Hooks (various sizes)

Lion Brand Pound of Love Yarn
Crochet Notions
Crochet Abbreviations
US Crochet terms are used.
Ch – chain
dc – double crochet
hdc – half double crochet
sc – single crochet
rep – repeat
[ ] – repeat what is inside brackets # of times indicated
sl st – slip stitch
st(s) – stitch(es)
sm – stitch marker
pm – place marker
PATTERN INFORMATION
This “Ipswich Shawl” is named after the coastal town of Ipswich, MA. It is a pretty town north of Boston, known for it’s beautiful Crane beach and estate with lovely gardens. This simple shawl will be your favorite go-to spring & summer accessory! A garden stroll or evening wedding would be fitting events for wearing this pretty shawl.
The FREE crochet pattern for the spring and summer crochet shawl is provided below as a full free pattern using BASIC CROCHET STITCHES, but you can also get the ad-free, printable pdf pattern for the CROCHET GRANNY SHAWL in the pattern shop! The pdf has step-by-step tutorial photos included, plus a diagram for assembly:
(The premium Ad-Free PDF can also be purchased on ETSY)

How to Crochet a Granny Square Shawl
Shawl Crochet Pattern
Gauge: 5″ (12.5 CM) SQUARE: 1 CROCHET SQUARE (blocked) ,
7″ (17.75 CM) WIDTH, 3.5″ (9 CM) LENGTH: 1 TRIANGLE (blocked)
NOTES: You will be crocheting each square in the round, using 4 colors and basic stitches. The Right Side will always face you. Each square may take about ½ hour to crochet.
First, you will make a foundation ring with color A.
Next, you will work 5 rounds, joining with new colors after rounds 1, 2, and 4.
Next, you will create several triangles (half squares) by working rows in a similar pattern. These triangles will be used at the top of the shawl for the horizontal edge.
Lastly, you will use color D (main color) to seam the squares and triangles together. You will then add edging using colors B and D.
This is an easy crochet pattern because it is repetitive and uses simple stitches, but it does take time to make all the squares and triangles.
Instructions are as follows for each square…
Crochet Shawl SQUARE Pattern
NOTE –
- Ch 1 does not count as a st, Ch 3 does count as one dc st.
- PM in first st of every round to keep track of rounds.
Foundation Ring: Using size H-8 crochet hook, ch 4 with color A and join with sl st to first ch to form a ring.
Round 1: Ch 3 (counts as 1 dc), 1 dc 15 times into the ring, change to color B when joining to 3rd ch of ch-3 with sl st. Break color A.
Round 2: Ch 3 (counts as 1 dc), [1 dc, ch 2, 2 dc] in same place (corner made), *1 dc in each of next 3 dc**, [2 dc, ch 2, 2 dc] in next dc, (corner made); rep from * twice more and from * to ** once again. Join to 3rd ch of ch-3 with sl st. Break color B.
Round 3: Join color C in any ch-2 corner sp, ch 3, [1 dc, ch 2, 2 dc] in same corner sp, *ch 6, skip next 7 dc**, [2 dc, ch 2, 2 dc] in next corner sp (corner made); rep from * twice more and from * to ** once again. Join to 3rd ch of ch-3 with sl st. Sl st in next dc and in next ch-2 corner sp.
Round 4: Ch 3, [1 dc, ch 2, 2 dc] in same corner sp, *ch 4, skip next 2 sts and 2 chs, 1 dc in each of next 2 chs, ch 4, skip next 2 sts and 2 chs**, [2 dc, ch 2, 2 dc] in next corner sp (corner made); rep from * twice more and from * to ** once again. Join to 3rd ch of ch-3 with sl st. Sl st in next dc and in next ch-2 corner sp. Break color C and fasten off.
Round 5: Join color D in any ch-2 corner sp, ch 1 (does not count as st), 3 sc in same corner sp, * sc in next 2 sts, sc in next 4 chs, sc in next 2 sts, sc in next 4 chs, sc in next 2 sts**, 3 sc in next corner sp (corner made); rep from * twice more and from * to ** once again. Join to first sc with sl st. Break Color D and fasten off.
One square finished.
Repeat the previous steps to make a total of 28 granny squares.
Crochet Shawl TRIANGLE Pattern
NOTE –
- Ch 1 does not count as a st, Ch 3 does count as one dc st.
With Size H-8 hook and color A yarn, ch 4 sts.
Row 1: In 4 th ch from hook (1st 3 chs count as 1 dc), work 8 dc sts, switching to color B at end of last dc. Turn. Break Color A.
Row 2: With Color B, ch 3, dc in same st, dc in next 3 sts, (2 dc, ch 2, 2 dc) in next dc, dc in next 3 sts, 2 dc in last st, switching to color C at end of last dc. Turn. Break Color B.
Row 3: With Color C, ch 3, dc in same st, ch 6, sk next 6 dc, (2 dc, ch 2, 2 dc) in ch-2 sp, ch 6, sk next 6 dc, 2dc in last st. Turn.
Row 4: Ch 3, dc in same st, ch 4, sk next st and 2 chs, 1 dc in each of next 2 chs, ch 4, sk next 2 chs and 2 sts, (2 dc, ch 2, 2 dc) in ch-2 sp, ch 4, sk next 2 sts and 2 chs, 1 dc in each of next 2 chs, ch 4, sk next 2 chs and 1 st, 2 dc in last st. Turn. Break color C and fasten off.
Row 5: Join color D to start of row. Ch 1 (does not count as st), 2 sc in first st, sc in next st, sc in next 4 ch, sc in next 2 sts, sc in next 4 ch, sc in next 2 sts, 3 sc in ch-2 sp, sc in next 2 sts, sc in next 4 ch, sc in next 2 sts, sc in next 4 ch, sc in next st, 2 sc in last st.
Break color D and fasten off.
One triangle finished.
Repeat the previous steps to make a total of 8 triangles.
Finishing/Blocking
Weave in all loose ends on WS.
Block each square to 5″.
Block each triangle to 7″ width and 3.5″ length.
Now that you have created your different shapes, assemble the squares and triangles in one large triangular pattern. Place the 8 triangles side by side at the top, with their long edges across. Next place 7 squares underneath those in a diamond shape. Next, place 6 squares under those in a similar diamond shape, etc. until you have one square left placed at the bottom.
(The pdf DIGITAL PATTERN has a helpful diagram to follow)
SEAMING:
Use color D yarn and a tapestry needle to join the squares and triangles with an invisible seam along their side edges. See THIS POST for a step-by-step tutorial on working an invisible seam.
It may be best to start at the top row and work in a zig-zag fashion across to join the 8 triangles and 7 top squares. Then continue along subsequent rows of squares, working zig-zag across until the last square at the bottom is joined.
EDGING: (with H-8 hook)
Join color B yarn to top corner of shawl.
Row 1: Ch 2 (counts as 1 hdc), work hdc sts evenly in each sc and seam st down one side of the shawl, then up the other side (not the top).
Ensure the total number of hdc sts worked is an even number. Break color B and fasten off.
Join color D yarn to top corner of shawl.
Row 2: Ch 3 (counts as 1 dc), *sk next hdc, ch 1, dc in next hdc; rep from * down one side of the shawl, then up the other side.
Row 2 continuing across top triangles of shawl:
Ch 1, 3 dc in top corner st, ch 1,
*work 1 dc into a color D row, ch 1,
[work 1 dc into a color C row, ch 1] three times,
[work 1 dc into a color B row, ch 1] two times,
[work 1 dc into a color A row, ch 1] two times,
[work 1 dc into a color B row, ch 1] two times,
[work 1 dc into a color C row, ch 1] three times,
work 1 dc into a color D row, ch 1;
rep from * across for each triangle until last st in corner.
Work 3 dc in last top corner st.
Fasten off.
Block entire finished shawl if desired.
Important Tips for Granny Square triangle shawl pattern
Some things to keep in mind as you crochet the shawl are:
- When crocheting the squares in the round, the Right Side (RS) is always facing you.
- Use a stitch marker (SM) to keep track of the first st in each round. It is usually the top of the starting chain.
- Try to crochet in a consistent manner so that the squares and triangles will be the same size.
- Make sure to block all of the squares and triangles prior to assembling them. It’s a good idea to block 4-8 squares at a time as you go along. That way you don’t have to block all 28 squares at once. (Weave in the ends as you go, too).
- Lastly, it’s a good idea to block the entire shawl when assembled and edging has been added.
Finished Size
The Granny Crochet Shawl measures approximately 66″ wingspan by 32″ length after assembled and finished.

Wearing the Ipswich Shawl
You will love wearing this modern crochet wrap as an airy and lightweight crochet shawl for cool spring mornings. The soft colors of the Lion Brand yarn are meant for the warm weather months – they are so pretty and cheerful! I think the almond colored square centers look like gold medallions, and make beautiful details. The almond, ecru, and blush heather worsted weight yarn colors have a lovely sheen to them, while the soft gray provides a classic neutral base color. The colors make a perfect wrap for meandering near the ocean or a garden in spring or summer.
And if it is more your style, feel free to use bright colors for your crochet shawl.
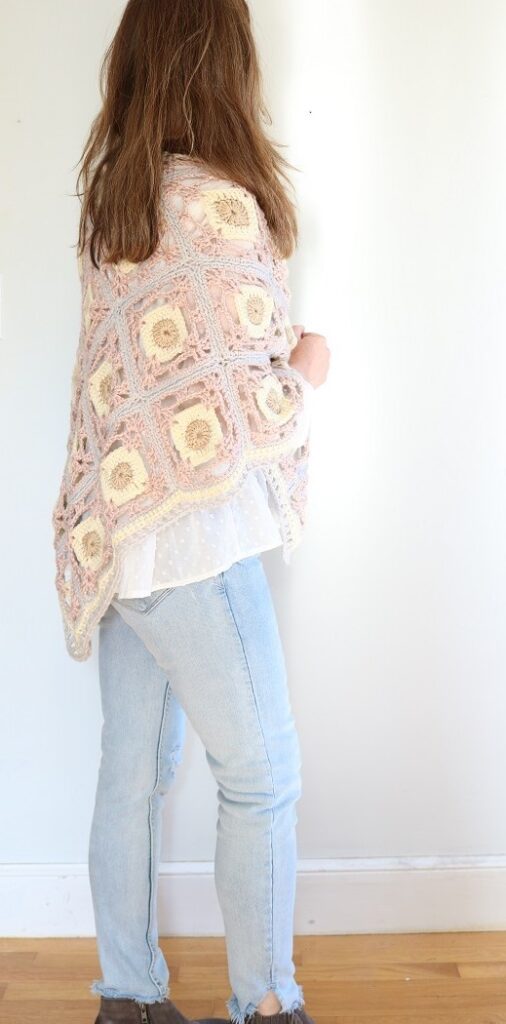
Wrap the handmade shawl lightly around your shoulders and arms for a loose fit…..(here I have paired the shawl with the perfect accessory – my DIY CHUNKY CUFF BRACELET):

Or wrap the granny shawl tightly around your body for a bit more warmth.


I think you could also add fringe to the sides with color D if you want a more Boho look for your own shawl.
Did you enjoy this easy shawl pattern? The squares and triangles are simple once you get the hang of them, then it’s just a matter of repetition to make the total pieces. Seaming them together is easy, too! The simple pattern has a beginner-friendly design, so it is not too intimidating.
Don’t forget that this simple crochet pattern for a shawl made from granny squares is also available in a digital pdf pattern. The pdf has an assembly diagram plus helpful photo tutorials. Grab the BEAUTIFUL SHAWL pattern in my pattern shop.
If you enjoyed this crochet design, you may want to check out all of my FREE CROCHET PATTERNS HERE.
===> Remember to PIN for later! <===


