
How to Join Granny Squares for Crochet Bag {free template!}
Have you ever worked with crochet granny squares or similar crochet blocks? They are perfect for granny square tote bags, shawls, afghans, dish cloths, pillows, and baskets.
Today I am going to share a step-by-step tutorial of how to seam granny squares together to assemble a simple crochet tote bag. I’ll explain the invisible seam technique, which will give you a smooth finish on one side and a visible seam on the other. Whether you are a crochet beginner or have some experience, I hope you will learn something interesting. It’s always my objective to put a classic, neutral style spin on my projects, so expect this tutorial to inspire you with that aesthetic, too!
This post may contain affiliate links. That means if you click and buy, I may make a commission at no cost to you. Please see my full disclosure policy for more details.
You can use the following supplies to practice these crochet stitches:
- Crochet hook (use the size that you made the squares with). I am using a size G/6 (4.25mm) hook in the photos.
- Yarn that you want to seam with. It’s best to match the color from the last round of your squares if you want the seam to blend in. My favorite is a cream color.
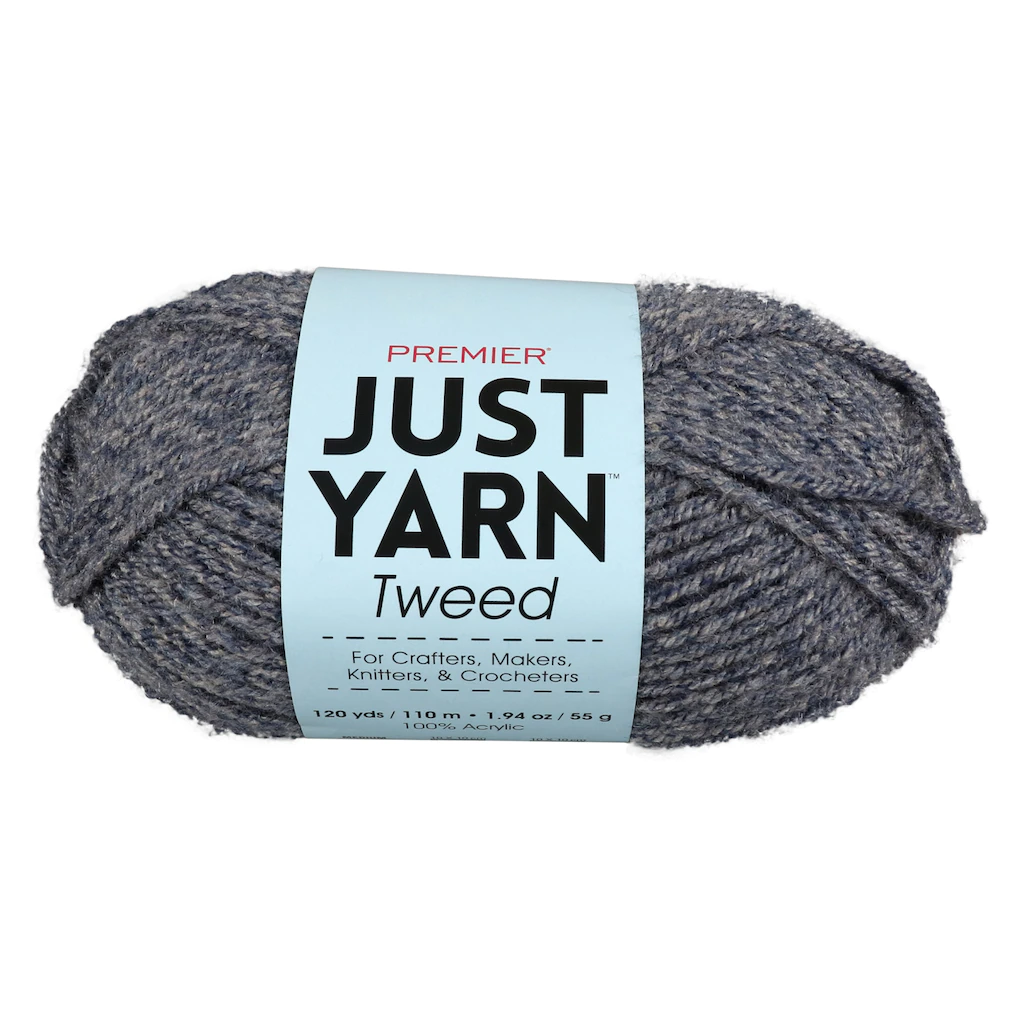
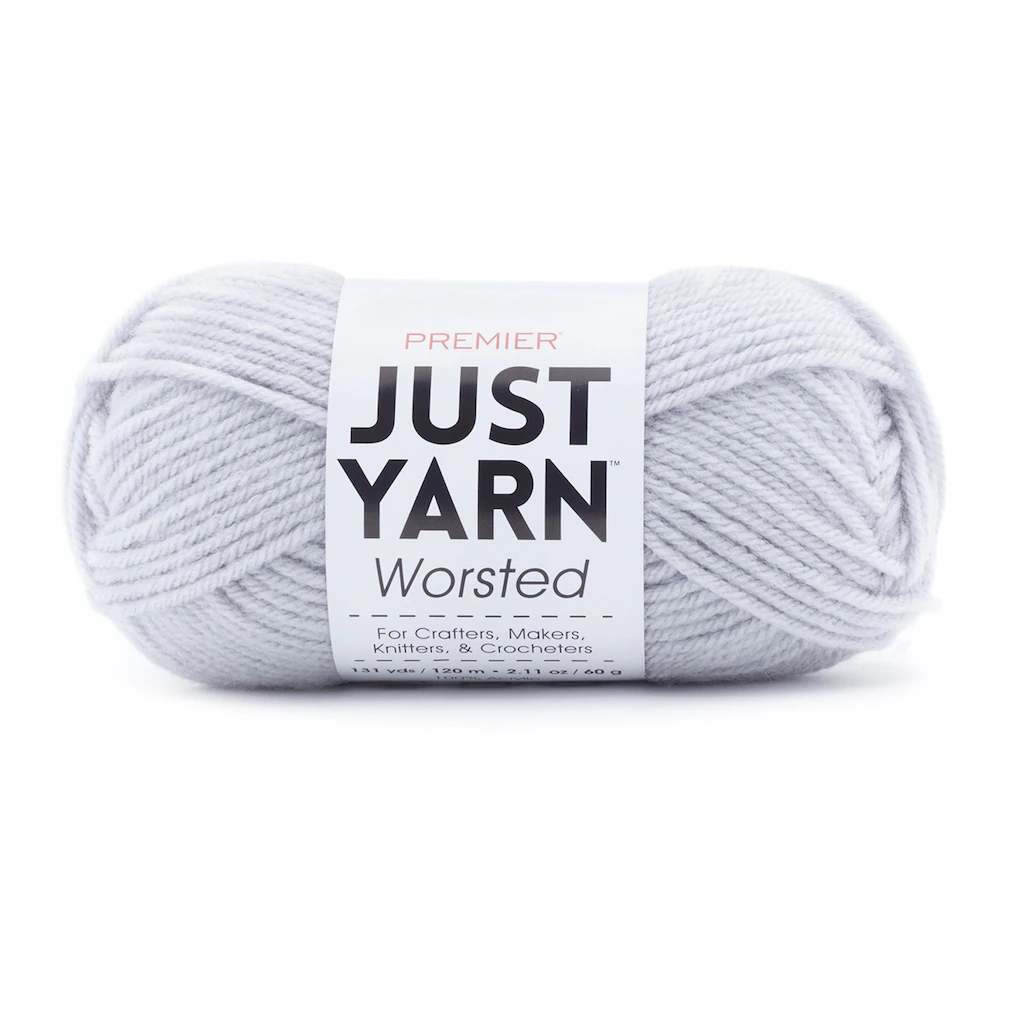
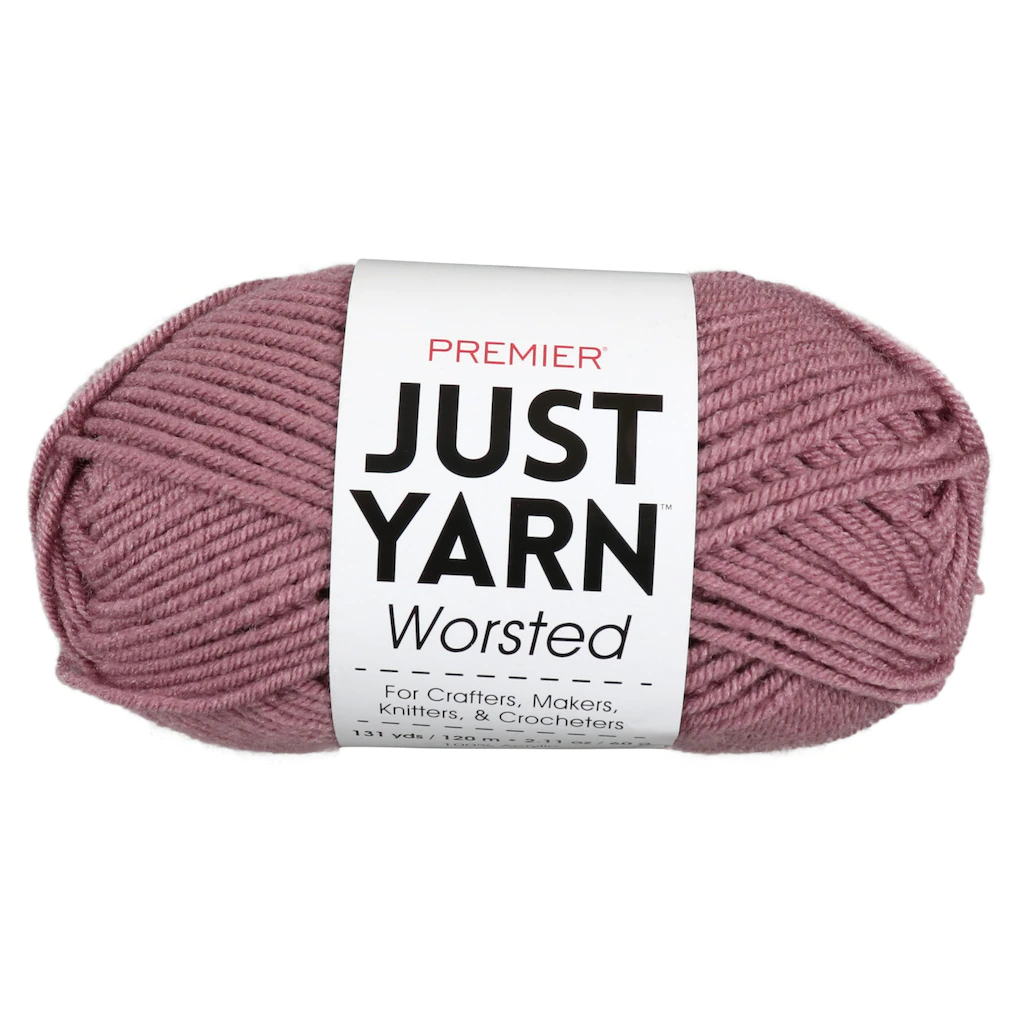
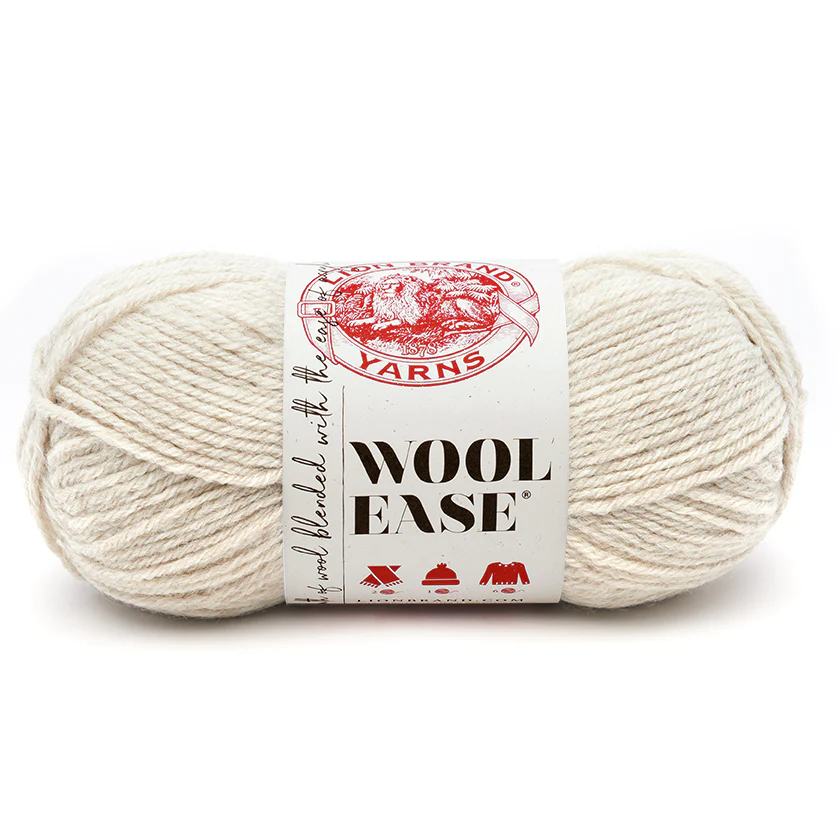
Here are some terrific neutral yarn choices for the squares (other than the Brava yarn, these are the exact brands & colors of yarn I used for my granny squares):

Should you block granny squares before joining?
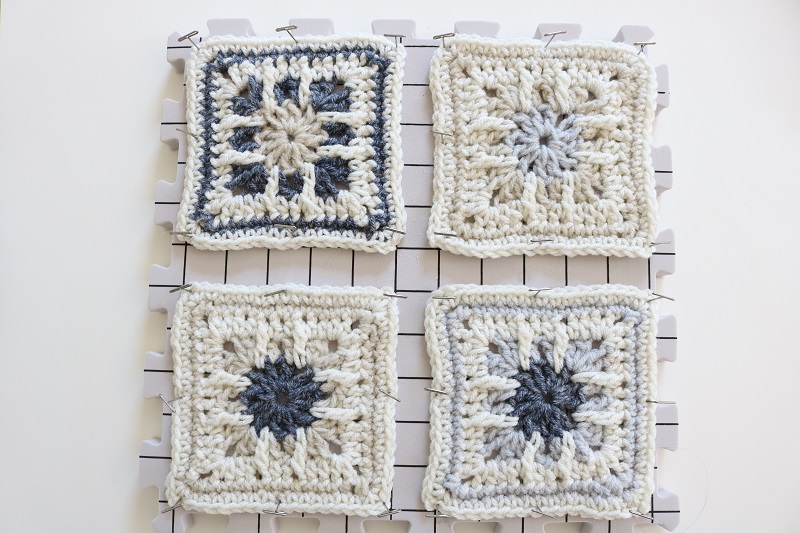
This tutorial assumes that you have already crocheted a group of squares (aka granny squares) using your desired pattern. The squares usually measure anywhere from 3″ to 5″ square. Before you consider joining these granny squares together for a project, it is imperative that you block the squares first.
What do I mean by blocking? Blocking is a familiar process in crochet and knitting where you wet your finished piece, lay it flat on a blocking mat or thick towel, pin it to your desired finished shape, then allow to dry. You can wet the piece either by washing it and gently removing excess water or spraying lightly with water. This helps the stitches relax and shapes the piece to its’ final size.
Since you are dealing with crochet squares, you want to ensure that the finished pieces are all of the same square size so that they piece together neatly. Here is an example of 4 crochet squares that are pinned on a blocking mat to 5″ square size, moistened, and left to dry:
How do you Connect Granny Squares Together?
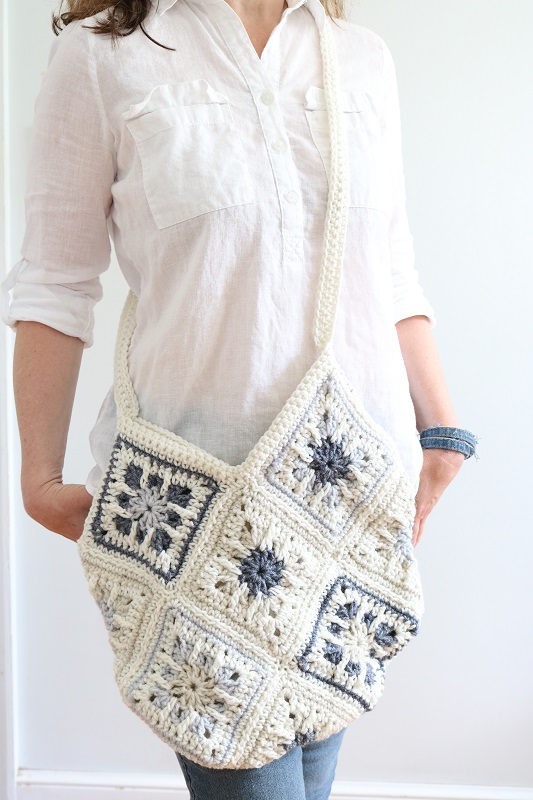
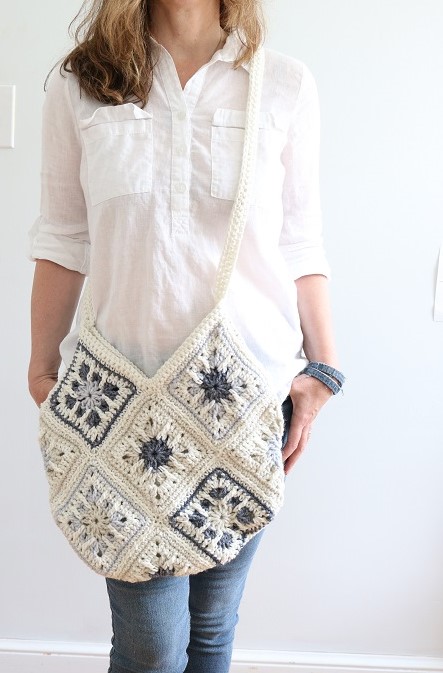
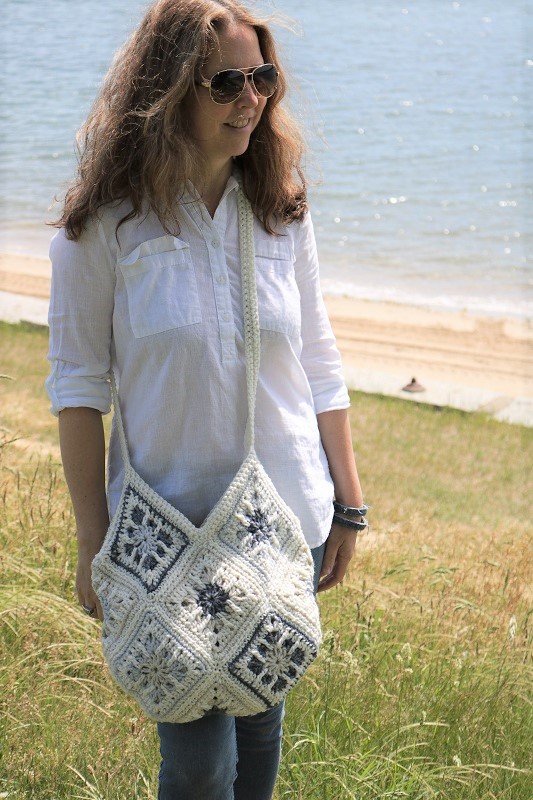
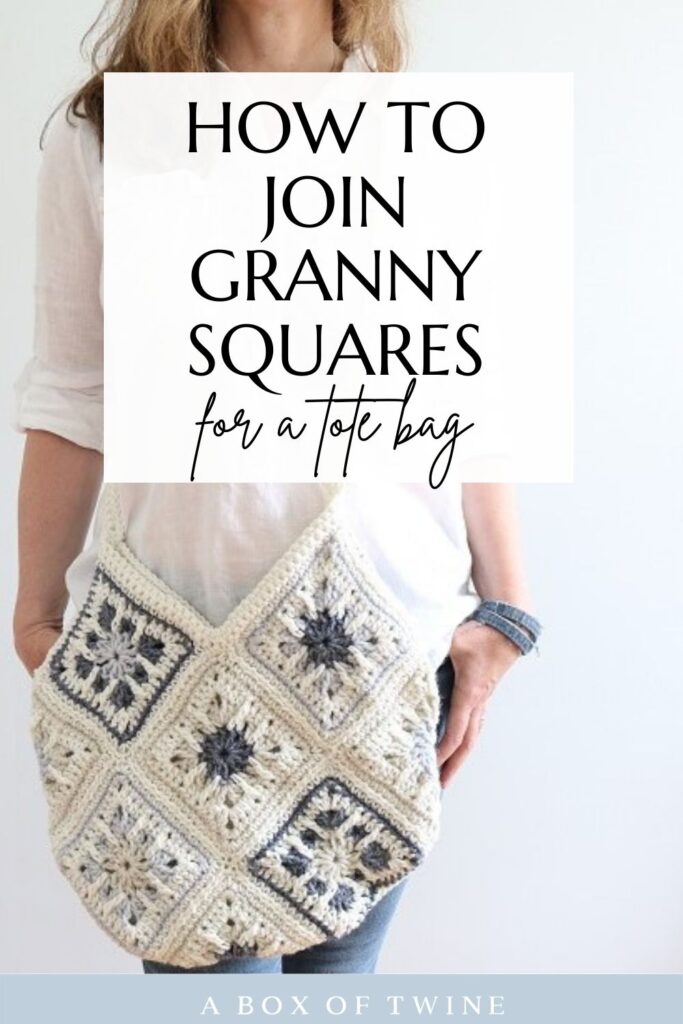
After you have made several crochet granny squares, you may wish to join them for a project. One of my favorite granny square projects is a crochet tote bag. Granny square projects are all the rage these days, especially considering the hot “Coastal Grandmother Style” trending right now. I made this Coastal Granny Tote Bag recently, and just love how the colors are perfect for a day on the coast:
You can also find this bag pattern in my ‘MOST WANTED’ pattern bundle below:
——————————————————————————————————————–
Want gorgeous (not gaudy) crochet patterns?
Click here to find 10 of my most popular crochet patterns to date – they coordinate effortlessly together and make impressive gifts!
MOST WANTED BUNDLE —>

——————————————————————————————————————–
How do you join two crochet squares together?
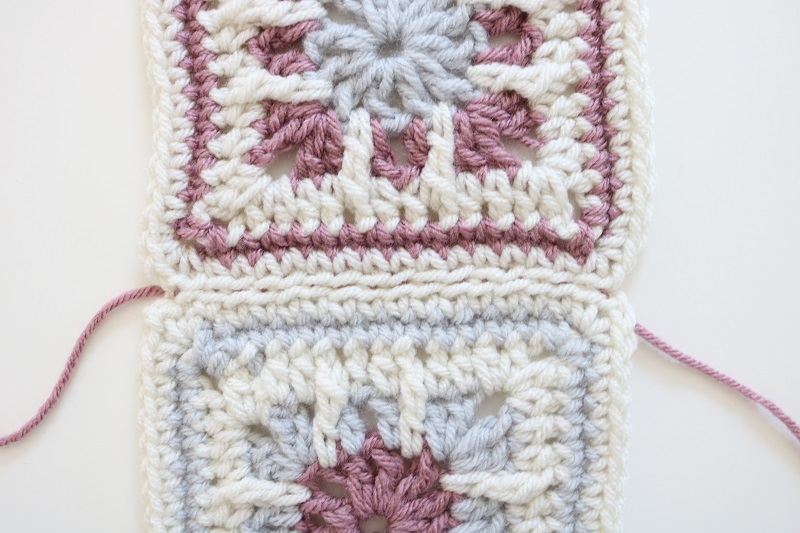
When I assembled the tote bag, I used an invisible seam to join two crochet squares together. This seam creates an ‘invisible’ seam on one side, and a noticeable seam on the other. Depending on how you want your final project to look, you can choose to work the seam on the Right Side (seen facing out) or the Wrong Side of your squares. I made my seam noticeable on the Right Side of the tote bag seen above, since I liked the look of the seam outlines around my squares.
Full disclosure: it just may be that I accidentally worked the seams on the Right Side and didn’t want to pull them all out. That forced me to decide I liked it the way it was. 🙂
Invisible Seam
Most projects may have you work the seam on the wrongs sides so that it is truly an ‘invisible‘ seam.
The tutorial for the invisible seam is as follows. For the purpose of clarity, I am using a contrasting color yarn for the seam in my photos. Normally you would use the same color as your top stitches so that the seam blends in, like so:
To begin, determine if you want your seam to be noticeable on the Right Side (like my tote) or on the Wrong Side. Normally you would want your seam to only be noticeable on the Wrong Side, since that side isn’t usually shown.
Proceed as follows to work the seam on the Wrong Side (for a seamless look on the Right Side):
How do you join granny squares seamlessly?
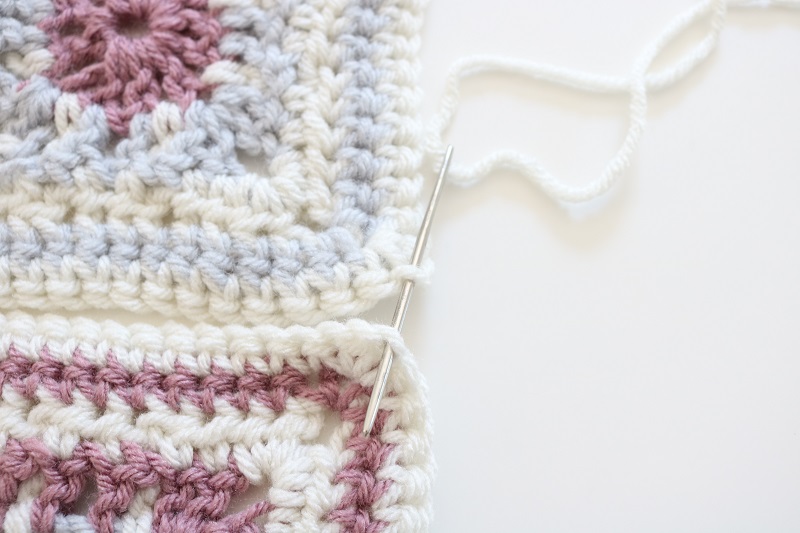
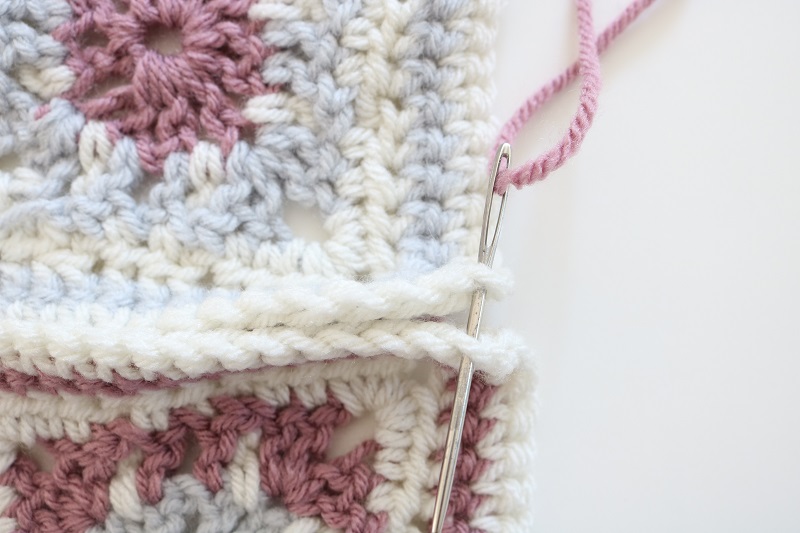
Thread a couple feet of yarn through a tapestry needle (aka yarn needle).
Hold two crochet squares with Right Sides together (or lay them side-by-side with Right Sides facing down, lining up corresponding stitches from each square.
Starting at a corner stitch on one of your squares, insert the needle through the outer loop of the stitch, toward the other square.
Next, insert the needle through the outer loop of the corresponding stitch on the 2nd square, then pull through, leaving several inches for a tail:
Move to the next stitch on the 2nd square and thread the needle through the outer loop of that stitch and through the outer loop of the corresponding stitch on the 1st square:
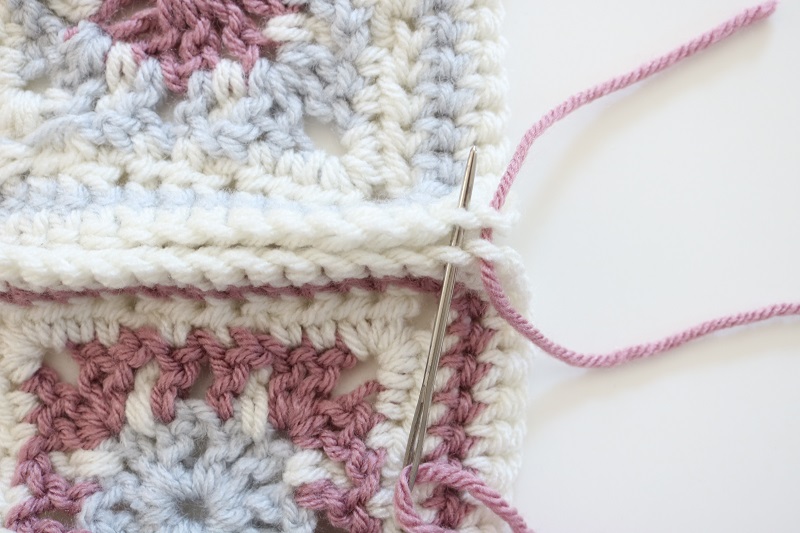
Repeat these steps back and forth across the top stitches of the squares, being sure to tug gently to tighten seam.
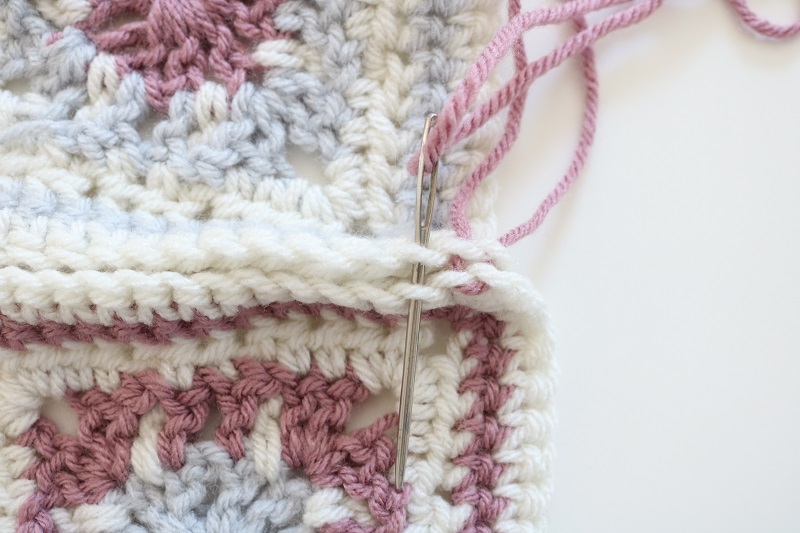
The sides of the squares you are working with (Wrong Sides facing up/out) will show the noticeable seam:
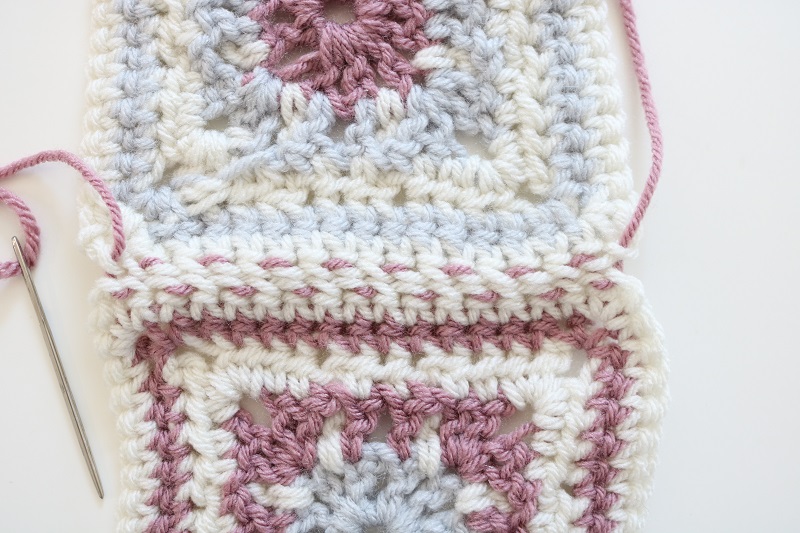
If you flip the squares over, the seam is not noticeable on the Right Sides (‘invisible’):
How do you crochet granny squares together for a bag?
Now that you know how to join two granny squares together, you may want to assemble them in a certain pattern, such as for a tote bag. There are many different shapes for tote bags; square or rectangle being the easiest to assemble.
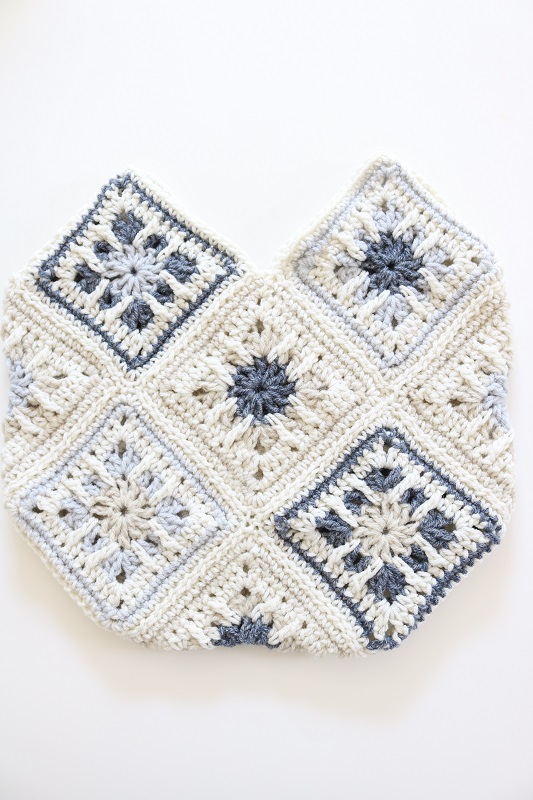
My coastal granny style tote pattern is assembled using 13 crochet squares with 6 different color combinations. Here is a free template showing the manner in which the squares are assembled:

How do you join granny squares as you go?
The best way to connect these crochet granny squares seamlessly is to do so in a zig-zag method. For instance, you could follow a zig-zag path using the diagram on the left above.
One way to begin is to join the top squares 2 & 6 together, then join 2 with 3, 3 with 1, other side of 3 with 5, 5 with another 3, 3 with another 5, 5 with the 3rd 3, 3 with a 1. Then add the two 4 squares in, as well as the last 2 and 6 at the bottom. Finish by joining any disconnected lines.
Next, fold the pieces at the dotted line shown above and seam the sides of the tote together. The seamed tote bag will look like the diagrams on the right above. Here is a photo of my seamed granny square tote (remember – I chose to expose the seams on the Right Side so it’s more noticeable)
To finish your crochet tote bag, you may want to add a few rows of SC stitches along the top of the bag, then create a short or long handle. Get creative, and work with the style you love.
I added one long strap for my Coastal Granny Tote Bag, and love how it wears like a messenger bag:
This invisible seam and zig-zag method to join granny squares can also be used for many other granny square crochet projects. For instance, I assembled 28 squares plus 8 triangles (1/2 squares) together using invisible seams and in a zig-zag format to create this PRETTY GRANNY SHAWL:
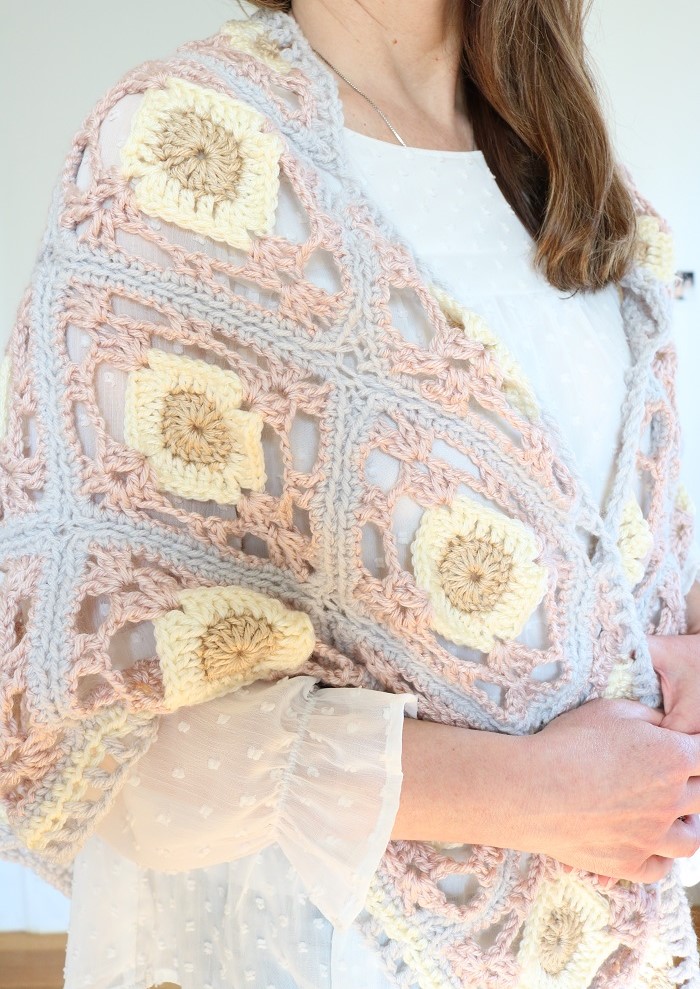
You can also find this granny square shawl pattern in my ETSY SHOP (which includes step-by-step tutorial photos).
What do you think? Isn’t it easy to seam together pretty crochet squares?
Let me know in the comments if you have any questions.
===> Remember to PIN for later! <===


4 Comments
Sue
Loved making the purse. As you assemble the squares what do you do t attach the thread and end it?
Susan
Hi Sue, glad you enjoyed making the purse. As far as assembling the squares, I assume that you’re wondering how to use the yarn to seam the squares together? I just cut a very long piece of yarn and began seaming the squares in groups, following the diagram. I would pull the yarn through the stitches with a tapestry needle, making sure to pull most of the long stretch of yarn through as I go. When seaming the very first stitches together, I would leave a small tail to weave in later. As I neared the end of the piece of yarn, I would also leave a small tail to weave in later. Then I would begin seaming again with another long piece of yarn.
Hope that helps,
Susan
Angela L
Hi I really like the granny squares you’ve used for this project, do you have a pattern for this style?
Susan
Hi Angela,
I’m so glad you like the granny squares. Yes, I have a pattern that uses these squares. It is for a tote bag and you can find it in my Etsy shop: https://www.etsy.com/listing/1254803885/crochet-patterns-crochet-tote-pattern.
Even if you don’t make a tote bag, you can use these squares for any type of granny square pattern. Each square measures about 4.5-5″.
Enjoy!