Upcycle Mason Jars to Hygge Candle Holders
If you visit any thrift or vintage store, you are bound to come across mason jars. They’re ubiquitous! You’ll find jars in all sorts of styles: plain glass, lidded, vintage, and colored. The mason jars are usually inexpensive and ideal for an upcycle project. Today I’m going to show you a fun way to upcycle mason jars or jam jars with Hygge appeal.
If you’re unfamiliar with the Danish word Hygge, pronounced (hoog-uh), it is defined as the feeling of coziness and contentment evoked by simple comforts. I’m all about that particular word: simple. And who doesn’t love coziness and contentment, especially as winter wanes on?
With Hygge in mind, let us gather some simple supplies and make candle holders.
This post may contain affiliate links. That means if you click and buy, I may make a commission at no cost to you. Please see my full disclosure policy for more details.
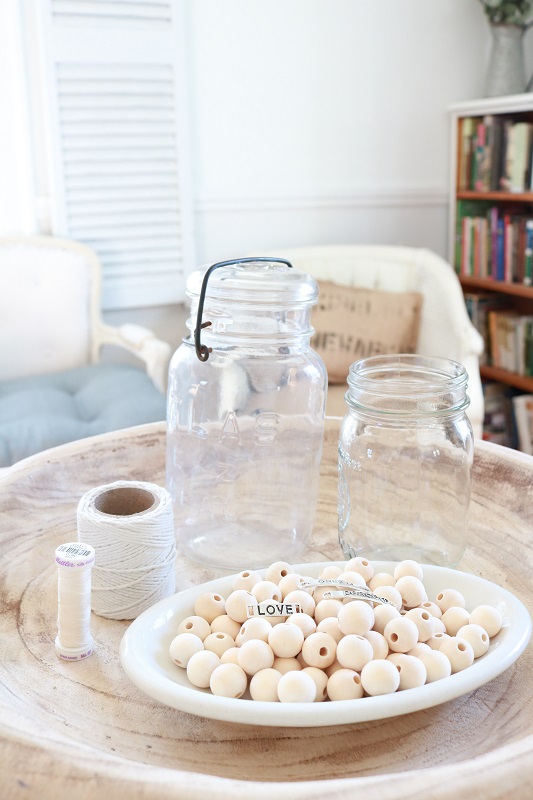
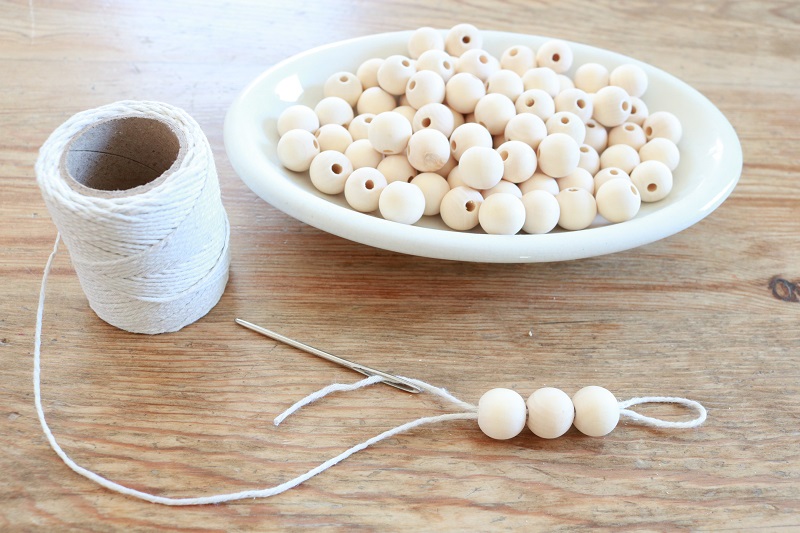
Supplies
- Thrifted mason jars or jam jars in various sizes
- white twine
- jewelry charms
- wood beads
- scissors, yarn needle


Hygge Candle Holders from Mason Jars
Step 1 – Gather mason jars
The first step in making your Hygge candle holders is to gather mason jars from your home or thrift stores. We’re trying to upcycle those interesting jars with various sizes, colors and shapes. The more interesting the jar, the better!
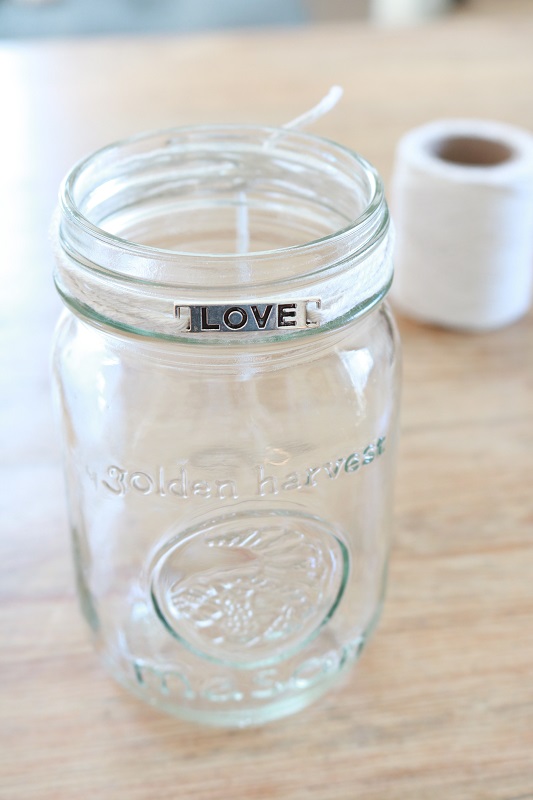
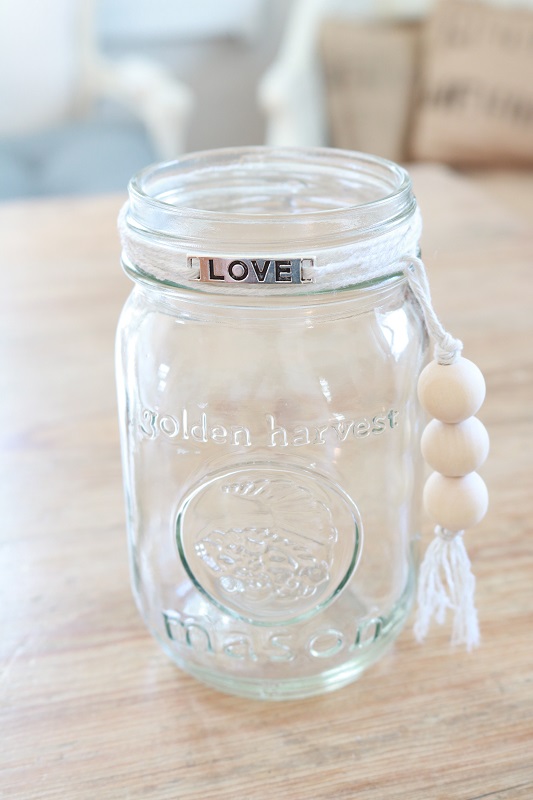
Step 2 – Attach jewelry charm with white twine
Next, you’ll want to choose a favorite phrase from the jewelry charms, and thread the twine through it.

Center the charm on the top rim of the mason jar, and continue wrapping the twine several times around the rim. Cut the twine and loosely tie a knot at the back of the jar. You could stop here, or keep going to add a wood bead tassel.
Step 3 – Make a wood bead tassel
Gather several natural wood beads to use for a decorative tassel. (I used the 16mm size)
Thread the white twine with a yarn needle and pull through the holes of the beads.
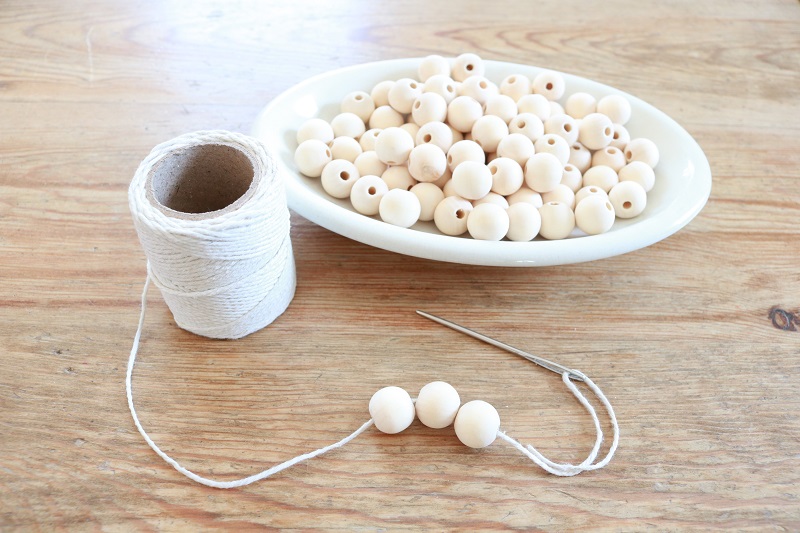
Then reverse back again through those same beads, leaving a small loop at the top.
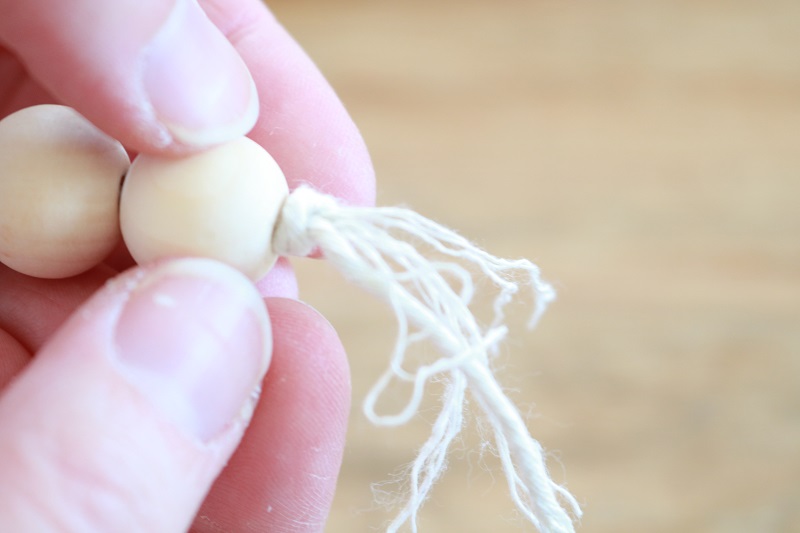
Trim the white twine under the bottom of your beads, leaving a long enough length to make the tassel. Tie knots at each end to hold the beads in place.
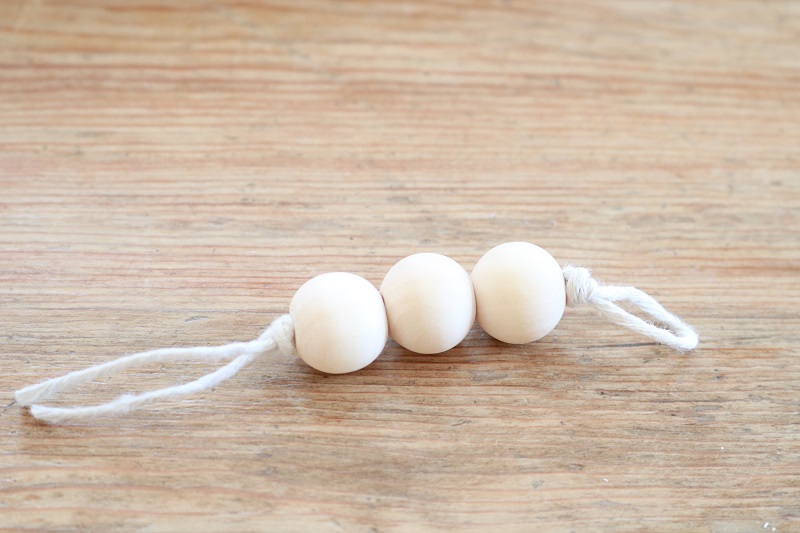
Lastly, spread out the threads of the twine tails using your fingers or a small pin. You could also gather & tie the threads together using matching sewing thread.
Step 4 – Attach the wood bead tassel
To attach the wood bead tassel to the mason jar, simply untie your loose knot from the back of the mason jar and thread the twine through the top loop of your tassel.
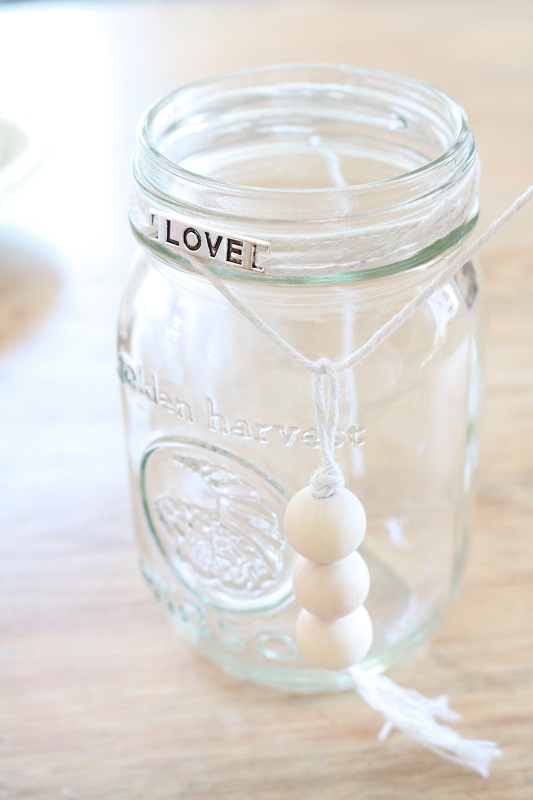
Adjust the placement of the wood bead tassel and re-tie the twine in a tight knot at the back of the jar.
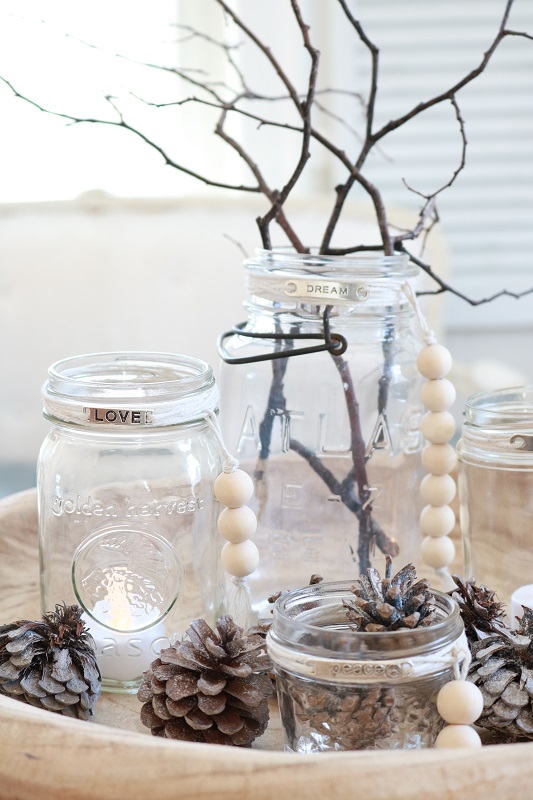
Step 5 – Display your Hygge Candle holder!
Here’s the fun part…gathering your Hygge candle holders and displaying them. Place some battery-operated candles inside the mason jars (or real candles if you plan to attend them closely) and gather them together.
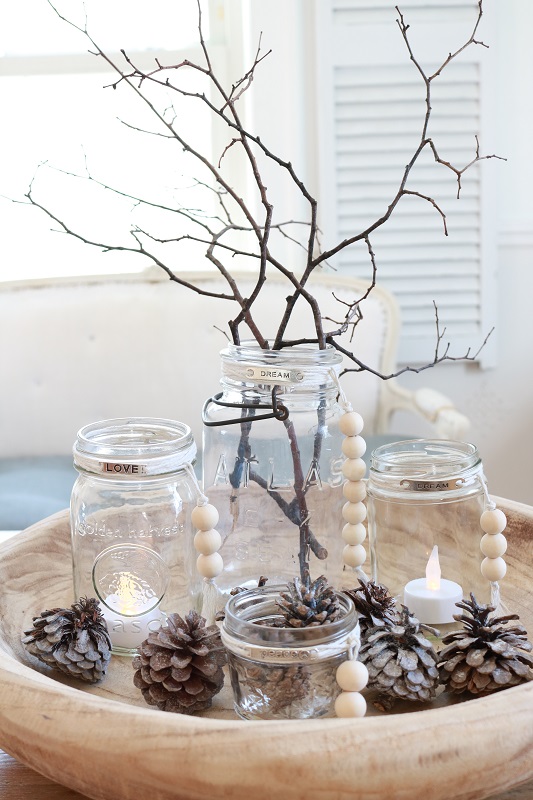
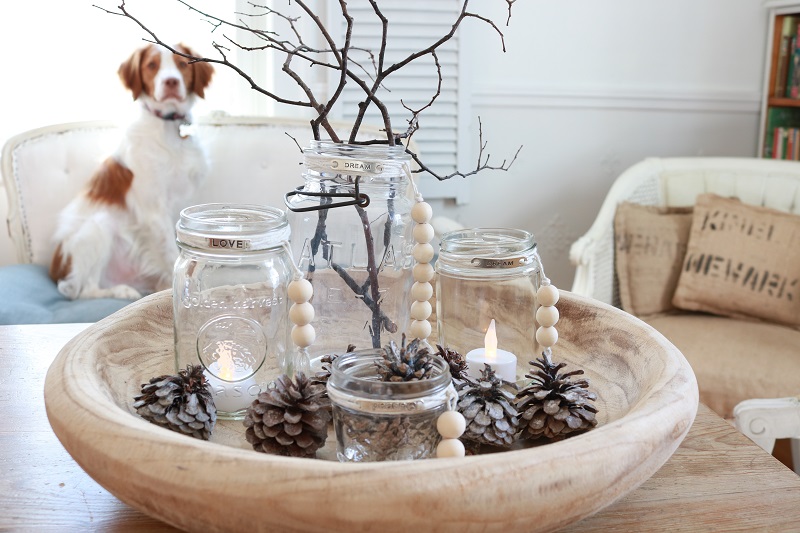
I think the candle holders would look lovely grouped on a tray or wood bowl, along with other winter elements such as pine cones and bare branches.
They also look awesome with a handsome dog in the background (photobomber Louis)!
I can imagine gathering these Hygge candle holders on the table for a dinner party, or giving them as a hostess gift. You can find a similar project in my twine vases post if you’re thinking of a spring project or gift.
How would you display these Hygge mason jars? I’d love to see!
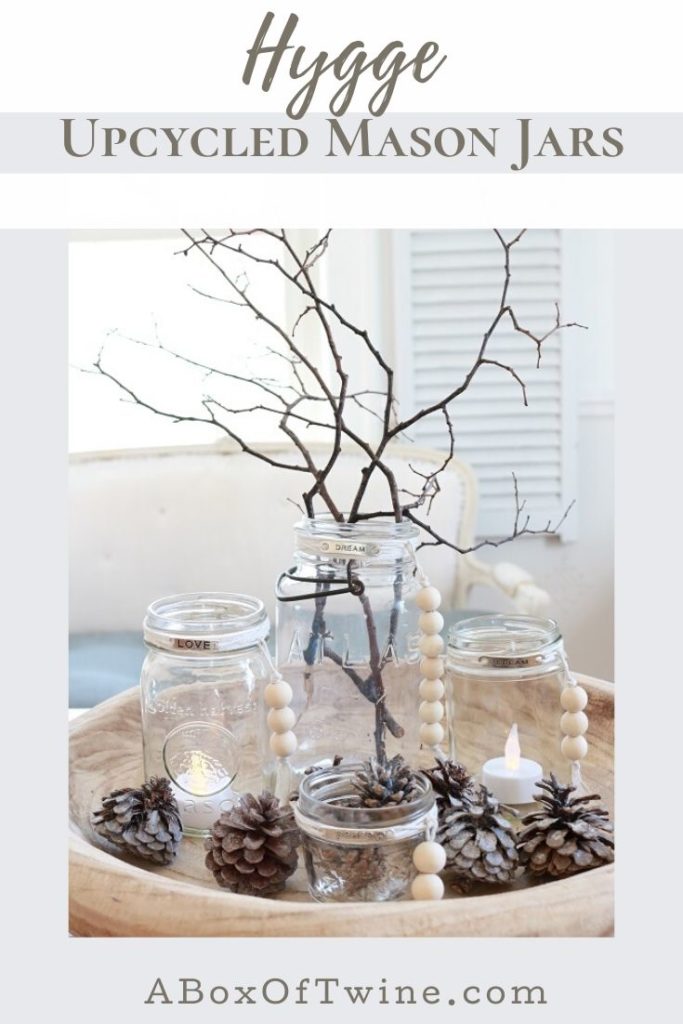
Want to remember this craft? Post this upcycled mason jar project to your favorite Pinterest board!


2 Comments
Michelle
I adore these Susan! They are so sweet and can be used in so many different ways. Thank you for always sharing these inspiring ideas!
Susan
Thank you Michelle! I can imagine them fitting right in with your decor, my friend.