How to Make Shibori Tie Dye Pillows
This DIY tie dye pillow project has me SO excited!! I used a fun Shibori tie dye technique to dye patterns in linen fabric, and the results were better than I expected. Did you ever tie dye t-shirts as a child? It was so much fun, wasn’t it? Now you can enjoy the same craft for your home decor by following the instructions for this project.
Are you wondering how to make tie dye pillows? Keep reading for the simple steps…
I was able to prepare and dye my fabric in under an hour, so this project is also quick! The traditional way to dye fabrics with the Shibori technique is more involved and requires special indigo dyes. Instead of going that route, I chose to use Rit dye and only soaked my fabric in the dye once.
If you’ve visited this blog often enough, you know I like to provide you with SIMPLE projects, because we’re all short on time, right? But you shouldn’t have to compromise the quality look you love.
Keep reading to see the supplies I used, as well as the exact steps I took to create my tie dye pillow patterns.
This post may contain affiliate links. That means if you click and buy, I may make a commission at no cost to you. Please see my full disclosure policy for more details.
Supplies
To tie dye and sew your own pillow covers, you’ll need to gather the following supplies:
- 1 yard of white cotton or LINEN FABRIC. I upcycled an old linen duvet we owned (which had teared).
- Rit liquid dye in your choice of color. I purchased 8 OZ. OF THE PEARL GRAY color.
- ELASTIC BANDS, WOOD JUMBO POPSICLE STICKS (to create the ‘resist’ in the pattern). I used 0.72″ by 5.86″ wood craft sticks.
- fabric scissors, fabric pen, measuring tape
- iron, sewing machine
- PILLOW FORMS
- salt


Shibori tie dye fabric
To make your pillow covers in the same color shade as mine, follow these instructions below. If you’d like to make your pillow covers in a different color, feel free to use these steps as a guide.
Cut fabric
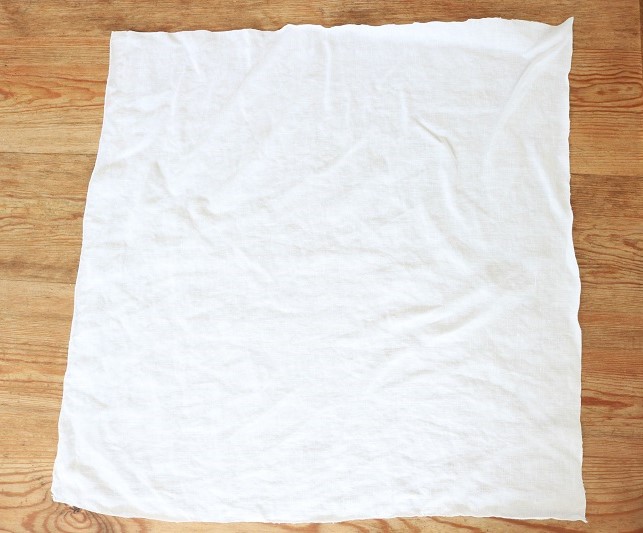
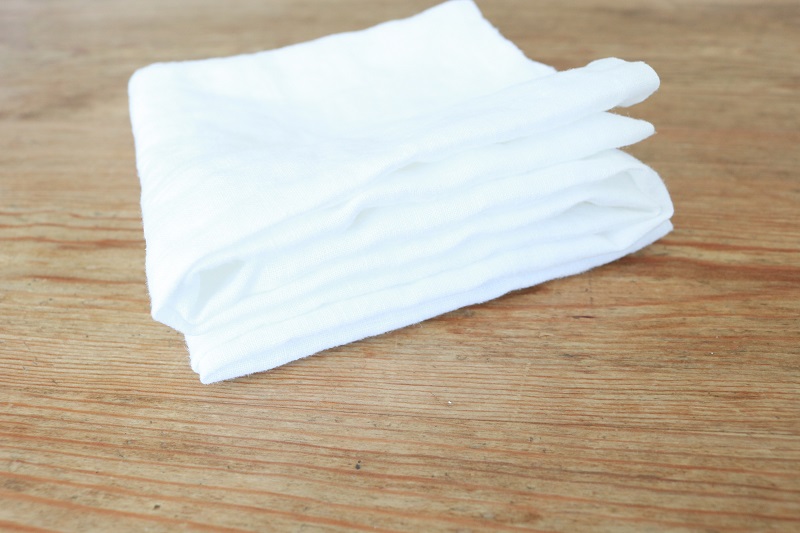
To start the process, you’ll want to prepare your cotton or LINEN FABRIC. Pre-wash and dry the fabric.
Using the fabric pen, mark where you want to cut your fabric for the front of your pillow squares. I measured my 2 pillow square covers at 21″ square. I am making them to cover a pair of 20″ down pillow forms.
Using fabric scissors, cut out your pillow square fronts first (we will cut out the fabric for the back of the pillows later). These pillow square fronts will be the pieces you will dye.
Prepare fabric for patterns
At this point you will need to fold your pillow square fabric to create the Shibori pattern you desire.
How do you make tie dye pillows?
Try these unique patterns to create the Shibori tie dye look:
V-style tie dye pattern:
For my first pillow, I folded the white square of fabric accordion-style into 4 layers.
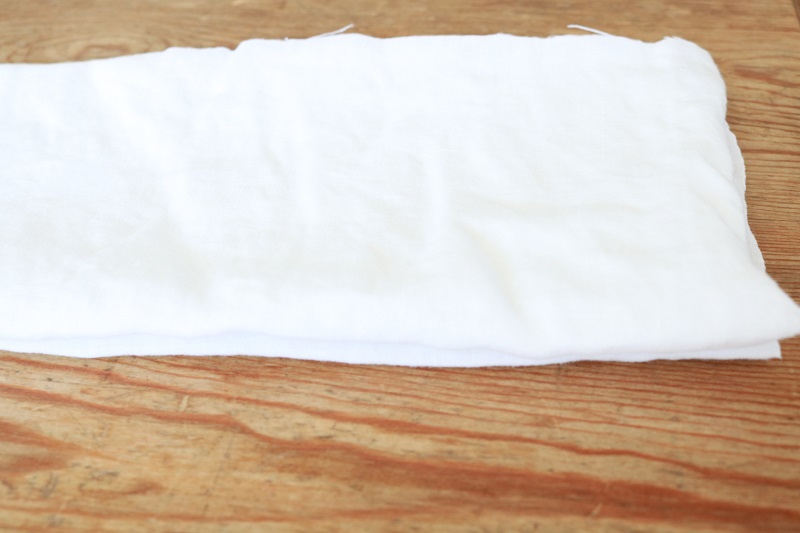
Next, I folded the long length of fabric accordion-style again in the other direction, to form a smaller square.
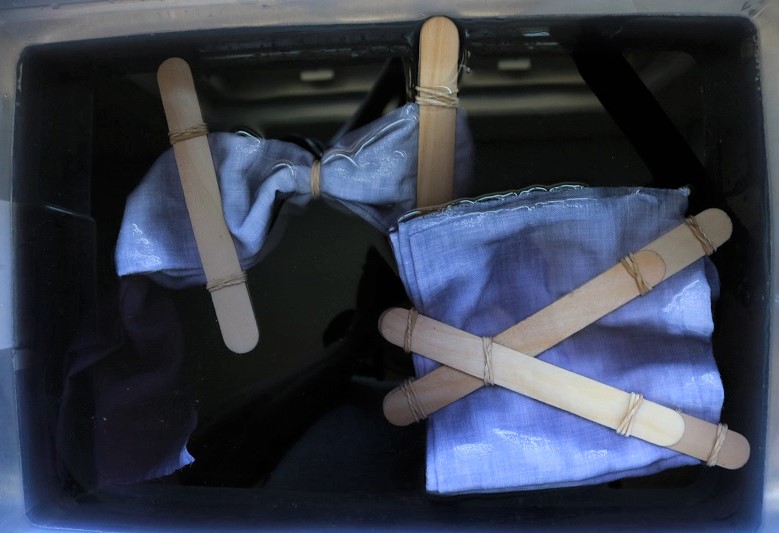
Using small elastic bands, I joined two WOOD JUMBO POPSICLE STICKS together in the center, then repeated with 2 more sticks. I joined these lengthened wood sticks together in a ‘V’ fashion using more elastic bands. This first ‘V’ will go on top of the fabric square.
I repeated the same steps above to create another ‘V’ to put underneath the fabric square.
Lastly, I placed these two ‘V’ shaped stick formations underneath and on top of my folded fabric square. I secured the two ‘V’s together at each end using more elastic bands.
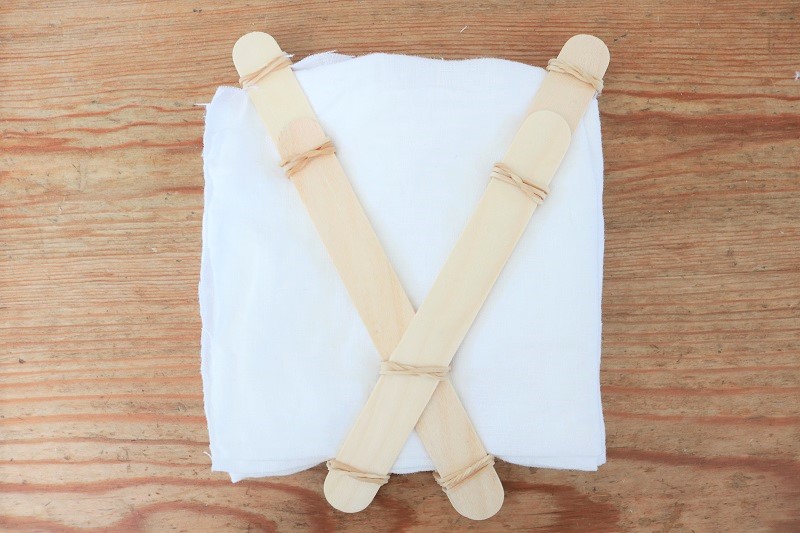
Make sure the bands are secured tightly if you use this pattern!

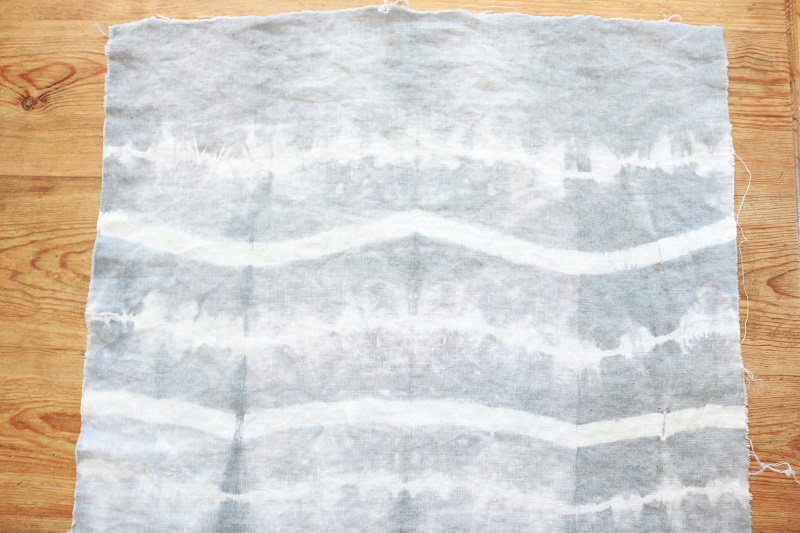
Striped tie dye pattern:
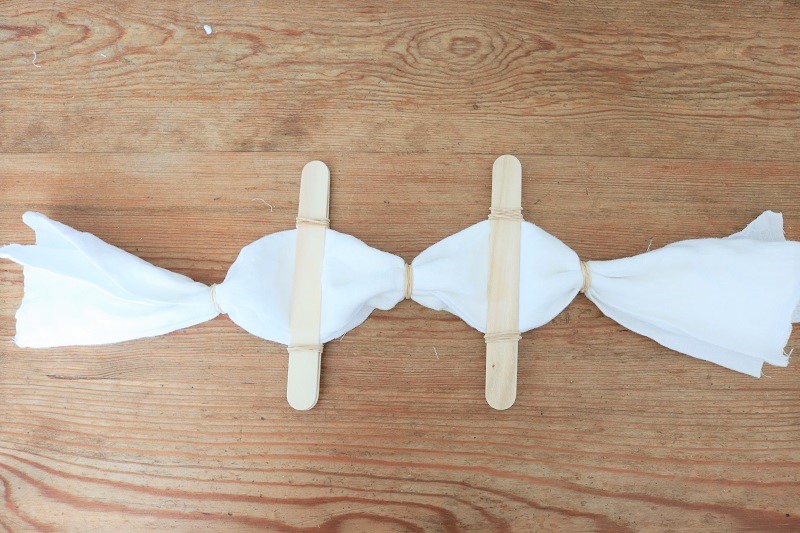
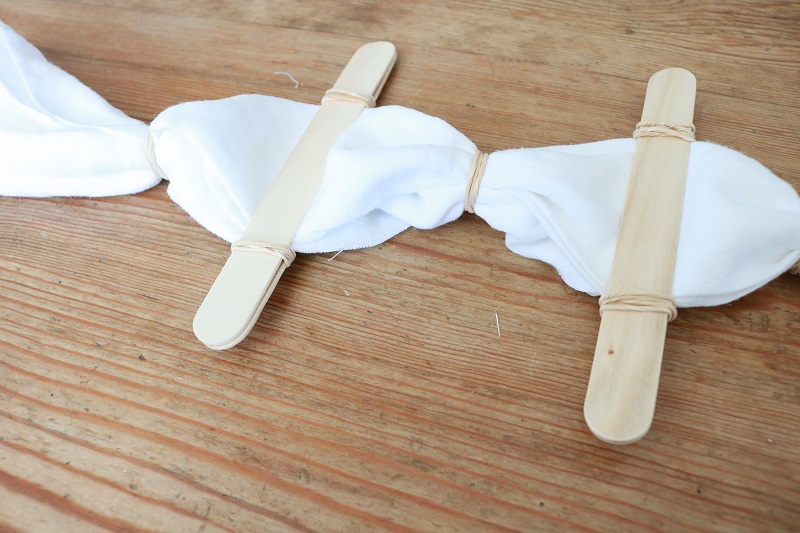
For my second pillow, I began by folding the white square of fabric accordion-style into 4 layers as above.
Next, I secured elastic bands equally along the fabric lengthwise, segmenting the length into quarters. Make sure your elastic bands are secured tightly here. The thicker your bands (or more layers of elastic tightening), the bigger your white ‘stripe’ will be in the final result.
Lastly, I placed a pair of wood popsicle sticks halfway between the center elastic and next elastic, putting one stick under the fabric & the other over. I secured this pair of wood sticks together tightly with elastic bands on both ends. I repeated these steps on the other side of the center elastic with two more wood sticks.
Feel free to experiment here with elastic bands, wood craft sticks, wood blocks, or circles to create your own unique patterns.
Dye fabric
Next you’ll dye the prepared fabric squares. I followed the directions on the 8 OZ. OF RIT PEARL GRAY, customizing a bit as follows:
First, thoroughly wet the fabric squares.
Next, fill the container you will use for dyeing with 2 gallons of HOT water. (I filled 1/2 of a 4-gallon/16-quart plastic bin)
Add approximately 1/8 cup of RIT PEARL GRAY color to your hot water and stir. It’s a good idea to add salt to the mixture as well, as this helps the dye to adhere. (UPDATE – I do strongly recommend adding salt to help the dye adhere. I didn’t add salt and after a year with my pillow cases, I noticed the dye faded after several washes!)
Add the fabric pieces to your container, ensuring enough room for them to move freely when stirred.
Stir the fabric gently every so often, keeping them in the container for 30 minutes total. Try to make sure they don’t float on top, but stay under the mixture.
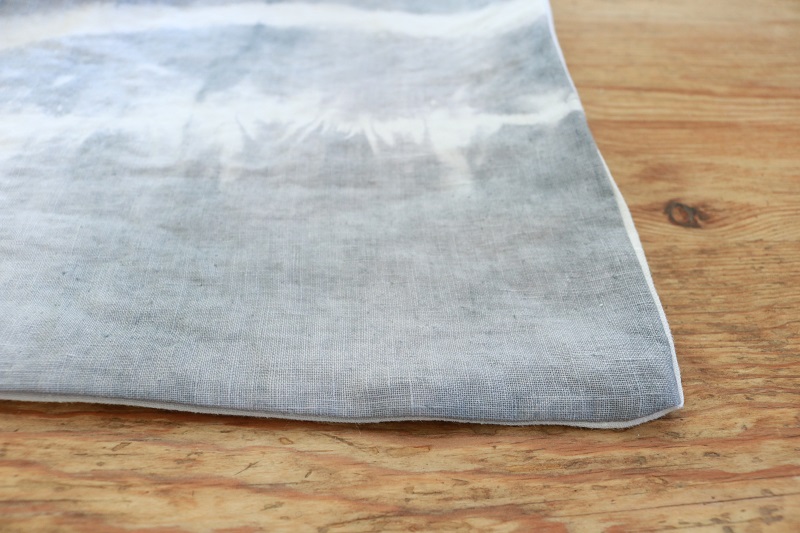
Remove the fabric pieces from the container at the end of 30 minutes. Next remove the wood sticks & elastic bands and rinse the fabric with cool water.
Set the fabric pieces on an old towel to dry a bit. I put mine outside in the sun for a little while to dry quickly.
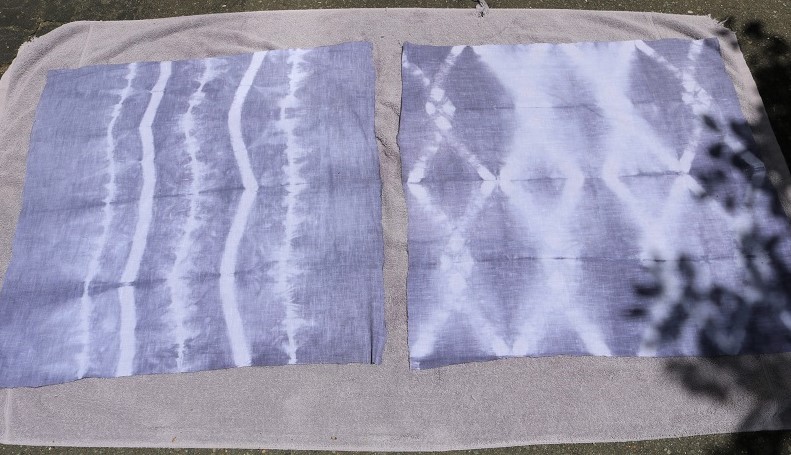
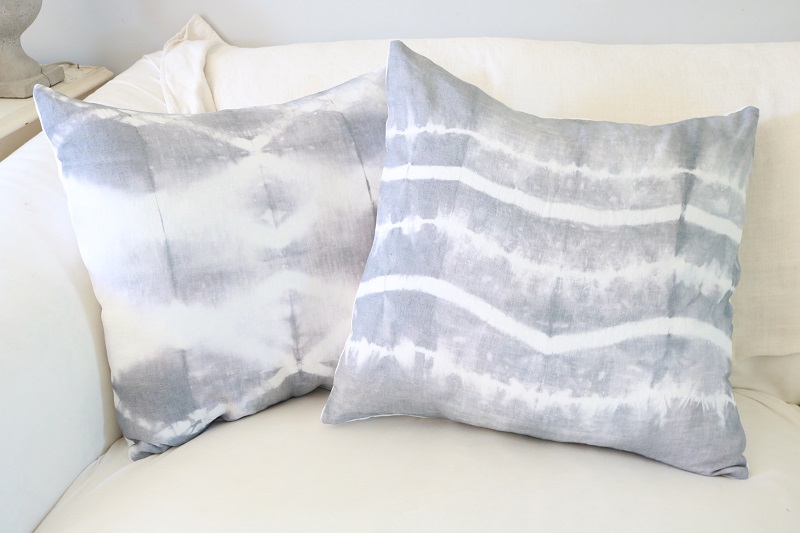
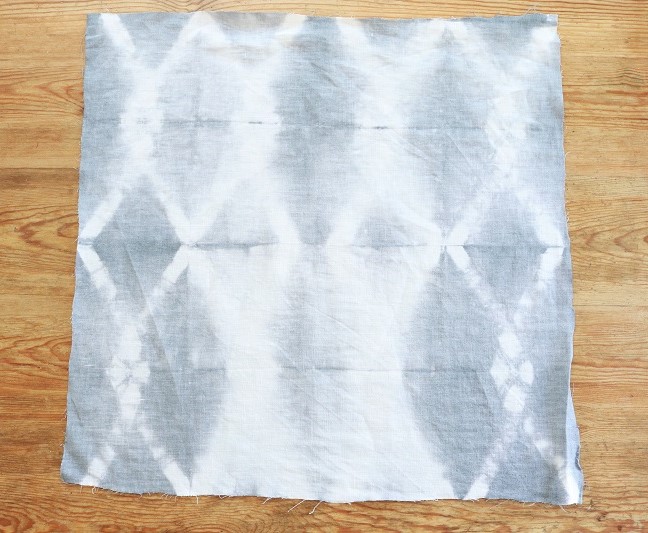
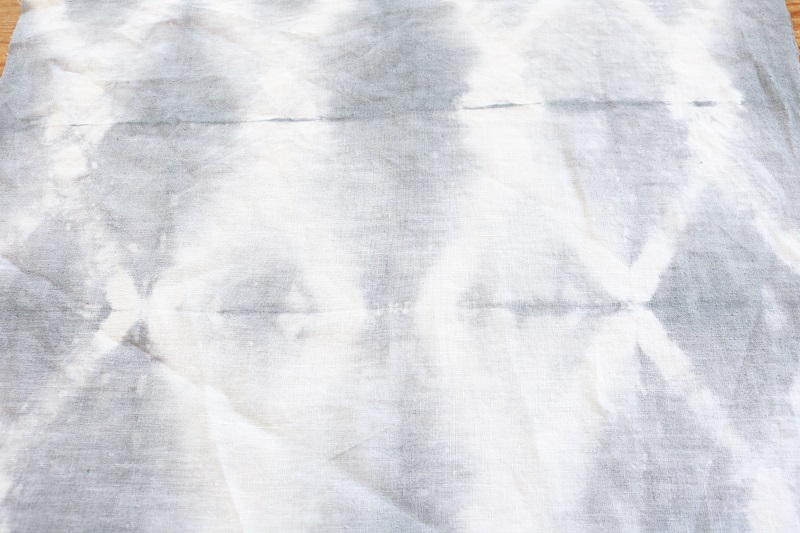
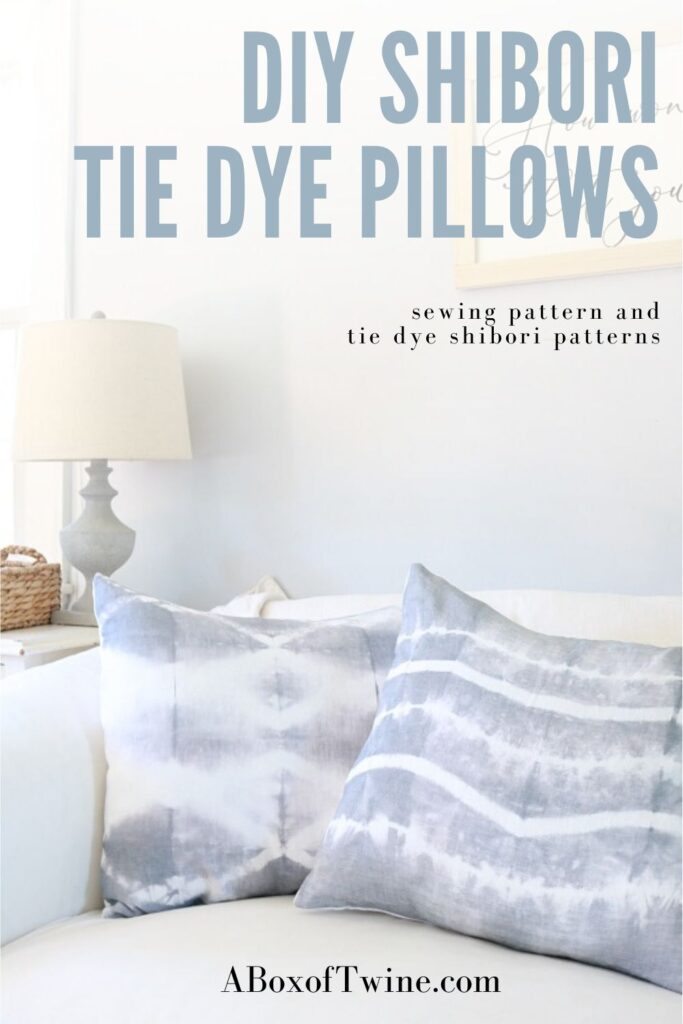
Here is my finished fabric square for the ‘V-style’ pattern:
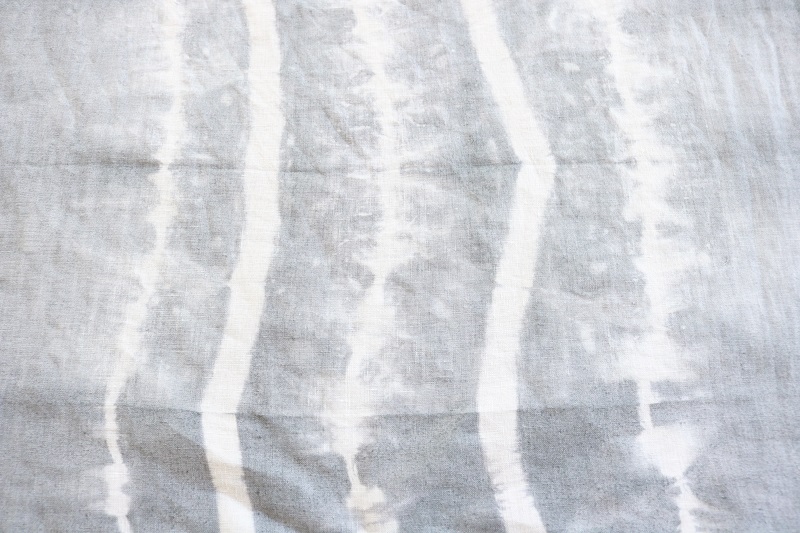
And here is my finished fabric square for the ‘striped’ pattern.
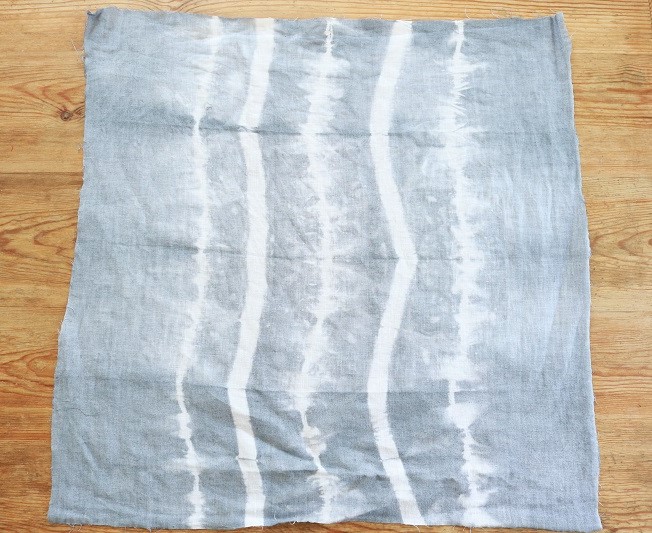
You can see the difference between the stronger wood stick stripes versus the smaller elastic band stripes:
Wash and Iron fabric
Once you’ve finished dyeing the pillow covers, you’ll need to run them through the washing machine on a delicate wash cycle with an old towel (using a gentle cleanser).
Dry pieces with the towel in the dryer (or air dry).
Iron the finished fabric squares.
(Psst…Are you hooked on dyeing now? Check out my hand-dyed muslin ribbons to use for gift wrapping.)
How to Sew Shibori tie dye pillow covers
You are now ready to sew your pillow covers! The following instructions are for pillow covers that close in the back ‘envelope’ style.
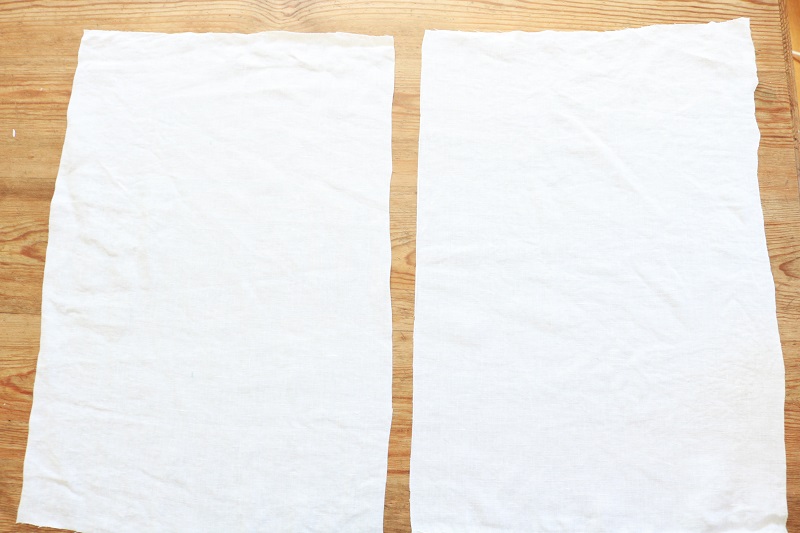
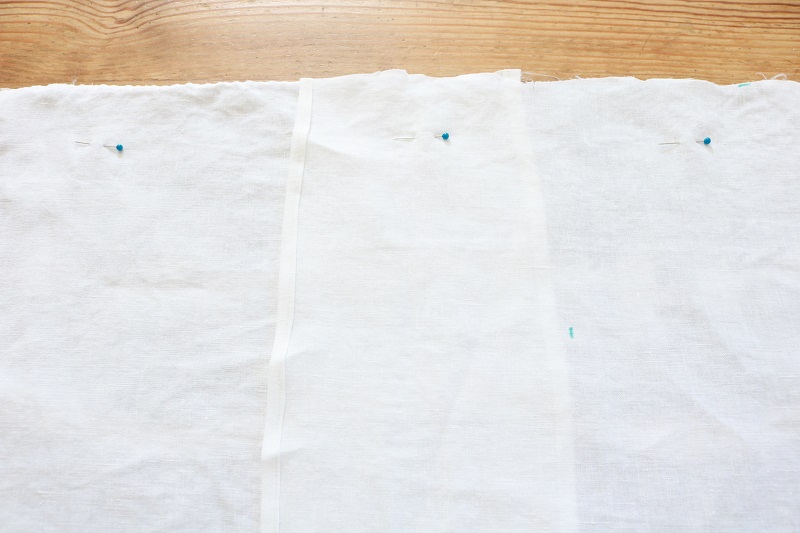
Cut more plain white linen fabric pieces for the back of your pillows. You will want them to be the same height as your pillow fronts (mine are 21″) and a length of that amount plus 5-7″. This will allow for an envelope closure at the back.
I cut my back piece 21″ by 27″.
Next, cut that same back piece in half lengthwise (in my case, two pieces at 21″ by 13.5″).
Press one side of the longer length of the 2 pieces inward 1/4″, then press inward another 1/4″.
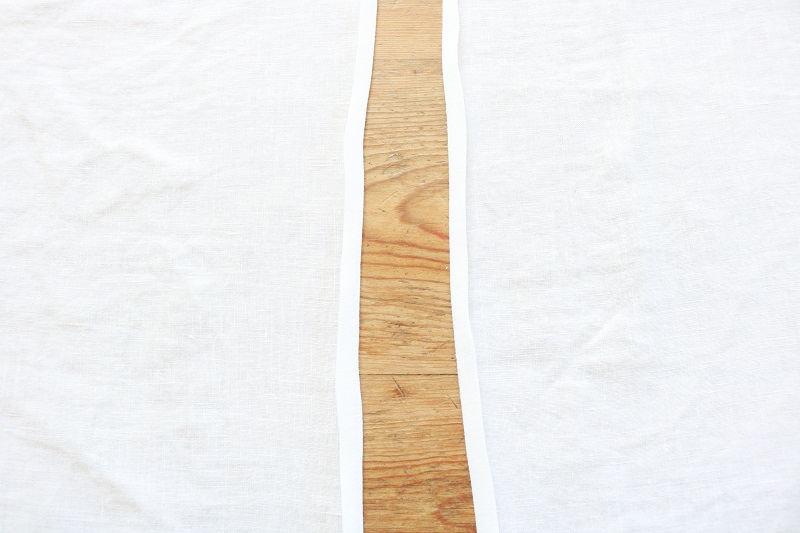
Pin in place and sew a 1/4″ hem down the pressed sides of each piece.
Place your dyed fabric front piece on a work space, Right Side up.
Next, place each of your two back pieces down on top of this front piece, Right Sides down and hemmed sides overlapping in center. This should form your pillow ‘square’. Pin these pieces together. (You can see my overlapping isn’t precise. I don’t always strive for perfection!) 🙂
Sew a 1/2″ seam all around the edges of this square. Clip the corners.
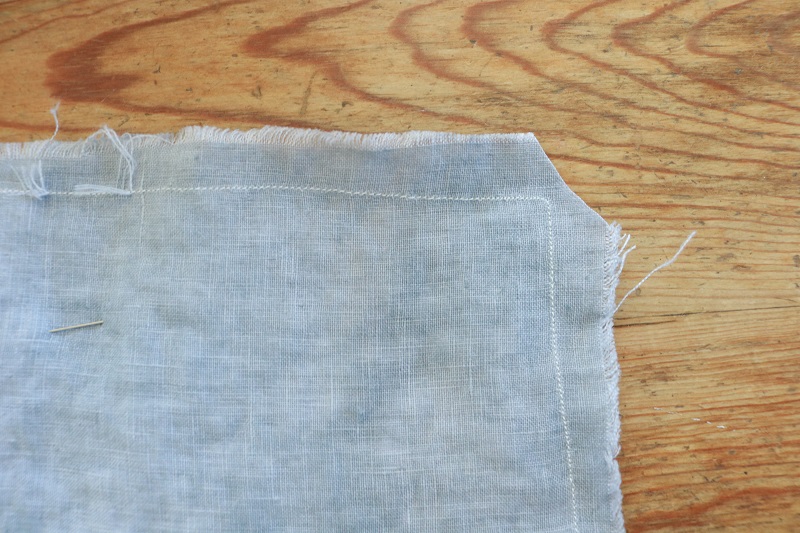
Turn Right Side out and press the pillow cover at the seams.
Insert your PILLOW FORM via the back envelope closure.
Finished! (If you like this ‘envelope closure’ technique to sew pillow covers, check out my farmhouse style tassel pillows, too.)
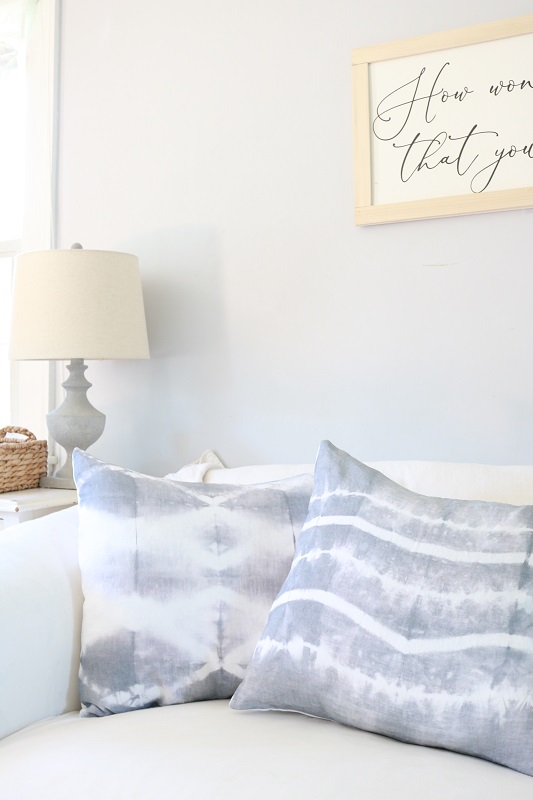
Display Your Shibori Tie Dye Pillows!
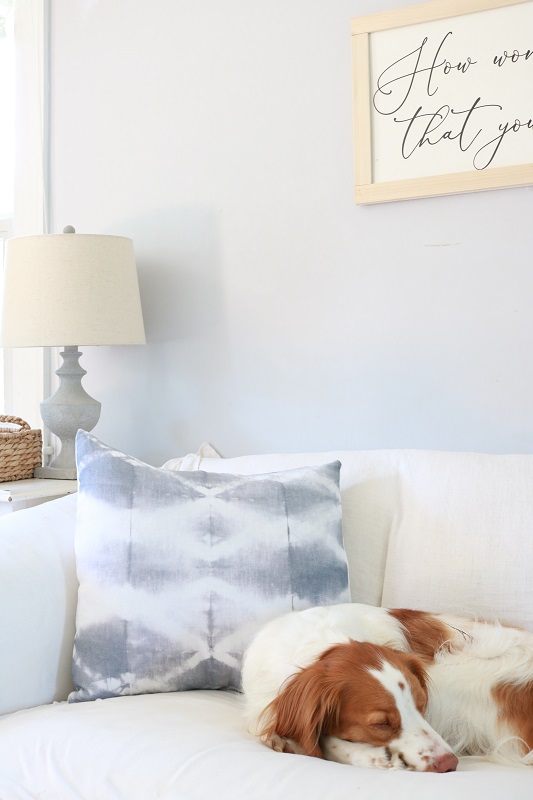
Now comes the fun part – you get to show off your unique, handmade tie dye pillows! They will make quite the bold statement on your sofa, chairs, or outdoor seating.
I have my pillows displayed on our white comfy sofa in the living room. It is very light and bright in here, especially during the summer. These new pillow covers give the room a Scandinavian/Boho/Farmhouse vibe. Is that a thing? I’m enjoying a mix of those styles lately…

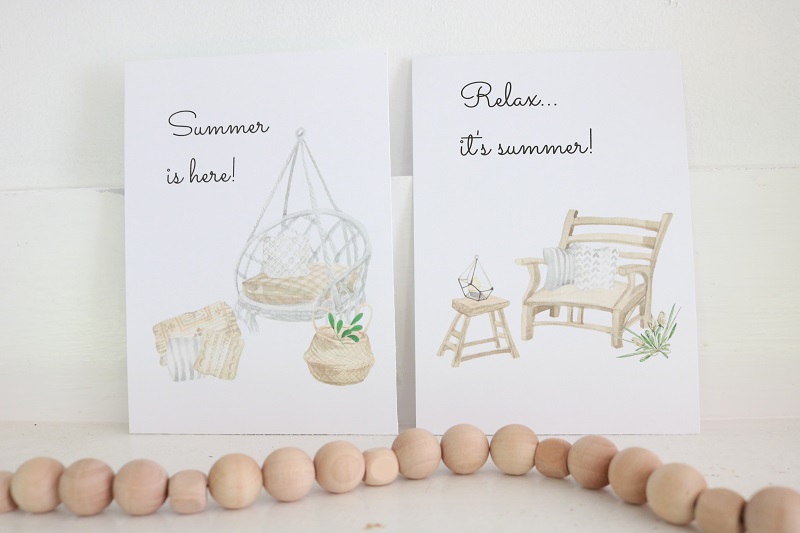
These pillows remind me of the cozy ones in my Scandinavian summer wall art printables. They just beckon you to relax and take a seat…
Even our dog Louis is getting into the relaxation thing..
So what do you think? Isn’t this a perfect summer project to take on? Try these patterns, or experiment with your own unique pattern for a tie dye pillow, and let me know how it goes.
Buy a Shibori Pillow Instead
If you love the look of Shibori pillows but don’t have the time to make any, check out these other tie dye pillow options online (just click the photos to view):


Like this style? Visit my SHOP MY FAVORITES page for more ideas!
Want to remember this pillow idea? Post this Shibori tie dye pillow craft to your favorite Pinterest board!


4 Comments
Jeanne Scott
Thanks, I love the look of the Shibori pillows !! I also went to your resource library and printed the Summer Printables and will put them in frames! Love your content!
Susan
Thank you Jeanne! I hope you enjoy the summer printables!
Lorena Holiday
Thanks for sharing this. I am inspired. The pillows are awesome.
Susan
Oh, thanks so much! Let me know if you give the project a try. I’d love to see how they come out!