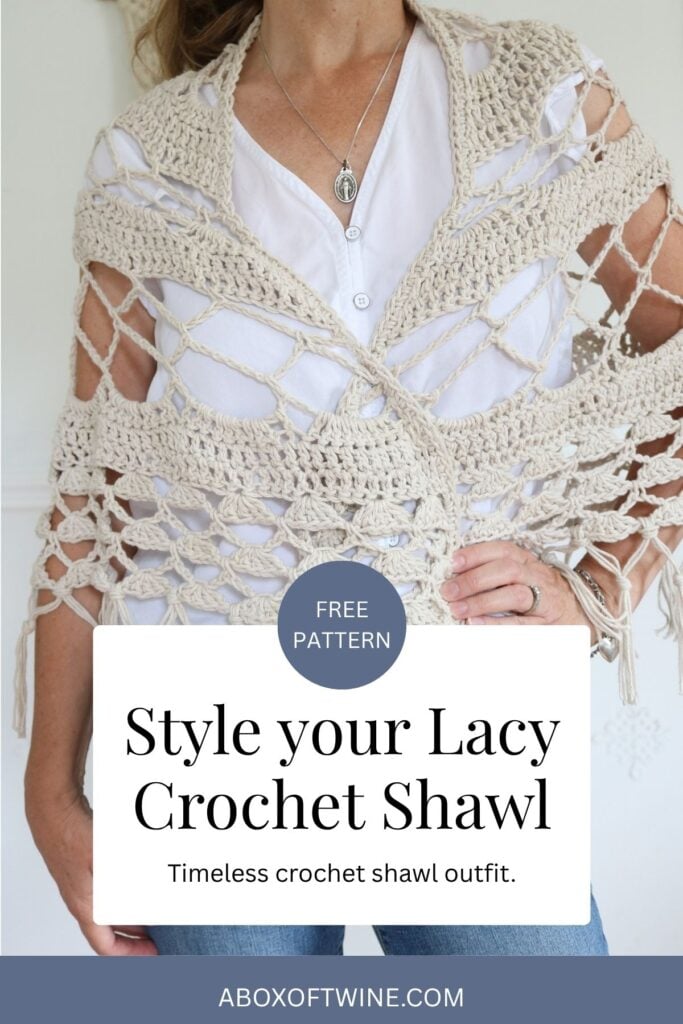
Free Crochet Shawl Pattern (Lacy Boho Wrap with Fringe)
First Published: August 2026 | Skill Level: Intermediate | Technique: Lace Stitches | Season: Year-Round
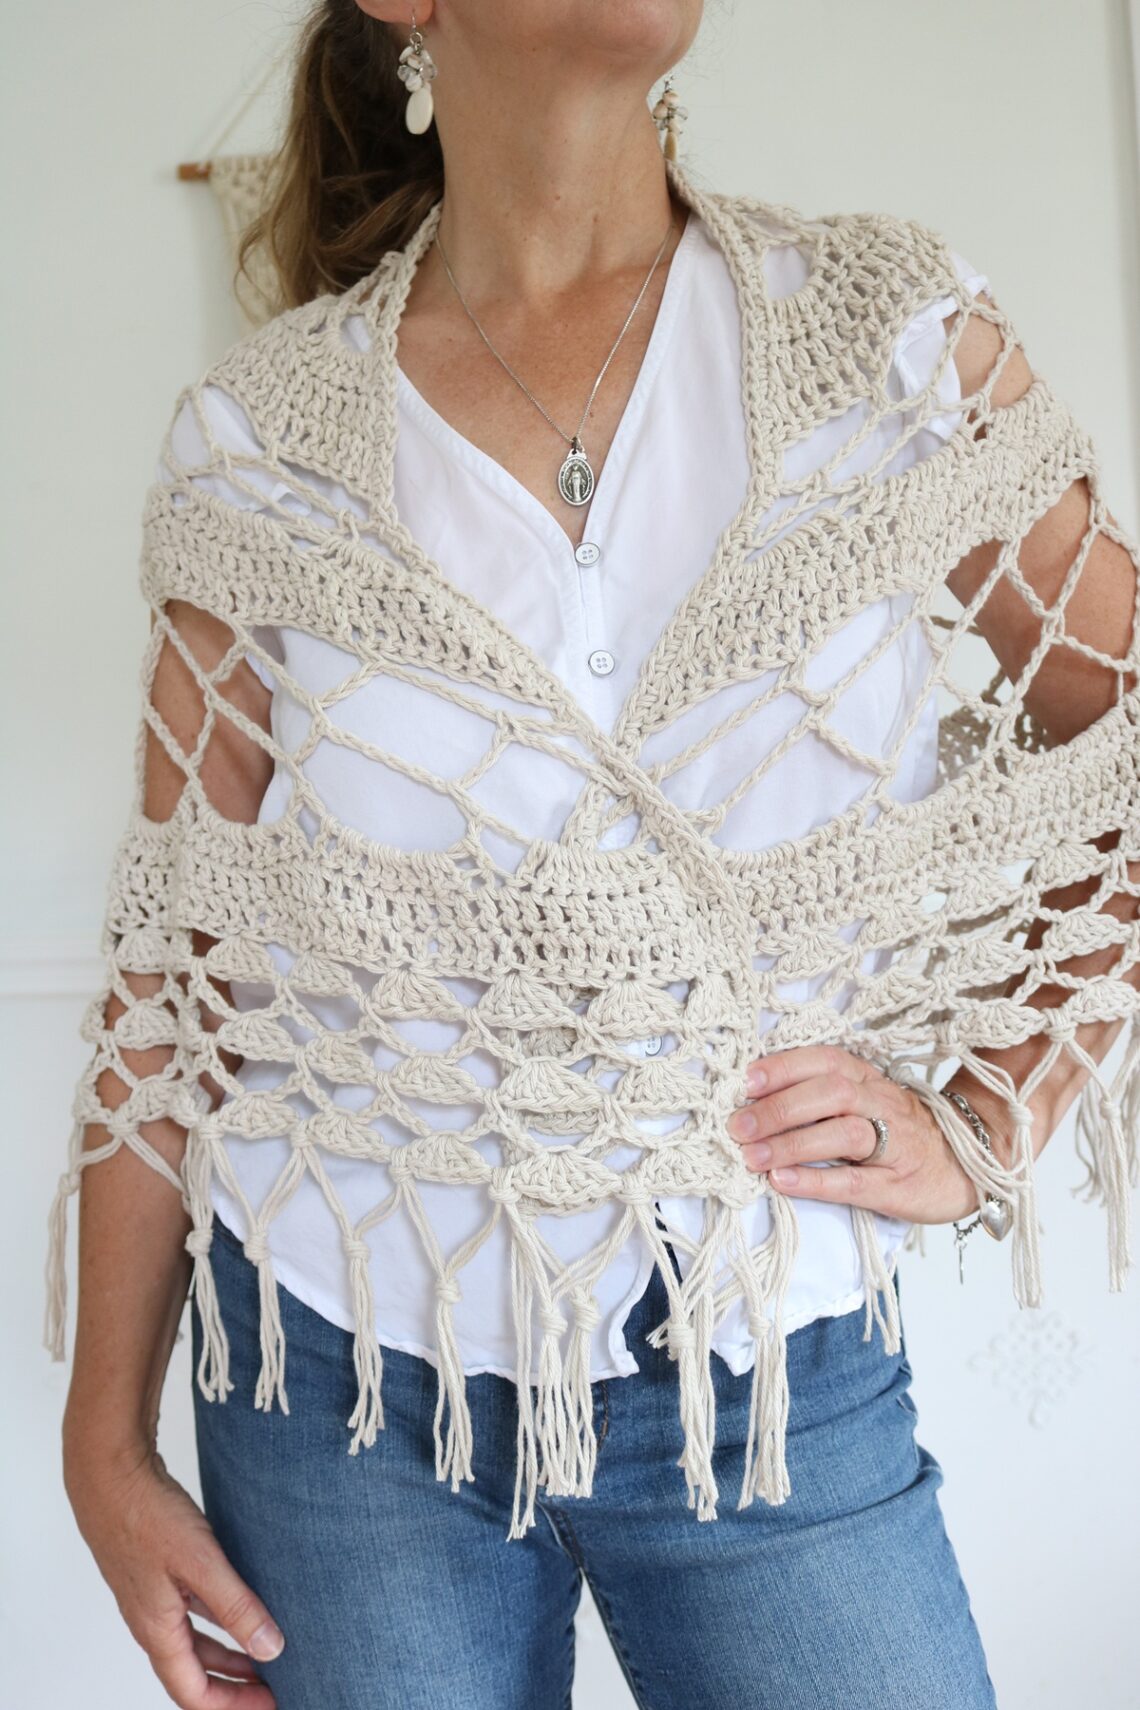
If you’ve been dreaming of a free crochet shawl pattern that feels like it belongs in a vintage boutique rather than a big brand store, meet the Brimfield Shawl. This lacy crochet wrap is crocheted top-down in four dreamy panels, opening into a wide, airy mesh that drapes beautifully over the shoulders. It’s made in a soft neutral cotton, so it pairs with absolutely everything already in your closet, and it finishes with your choice of playful fringe or elegant tassels. If you love pieces that feel timeless rather than trendy, this is the shawl you’ll reach for on repeat.
How did I come up with the “Brimfield” name? I found a pretty crochet shawl at the Brimfield Flea Market in Massachusetts several years ago, and was entranced by it. This inspired version is a little more lacy & doily-like, but I stayed true to the multi-panel construction.
Crochet it for yourself, or get a head start on a thoughtful handmade gift. This boho crochet shawl pattern is a satisfying make with a seriously showstopping result.
Why You’ll Love This Free Crochet Shawl Pattern
This isn’t just another basic triangle wrap. Here’s what makes the Brimfield Shawl worth the hook time:
- A dramatic, lacy drape. The open mesh panels move beautifully and give the shawl a romantic, vintage feel without any bulk.
- Reversible stitch pattern. No wrong side to worry about, so it looks just as lovely folded, draped, or wrapped.
- Neutral and endlessly wearable. Made in a soft “Vintage” cotton tone, this shawl was designed to be timeless, not trendy. It works with your existing wardrobe instead of fighting it.
- One size fit. A 48″ wingspan and 25″ length (before fringe) means it drapes beautifully on everyone.
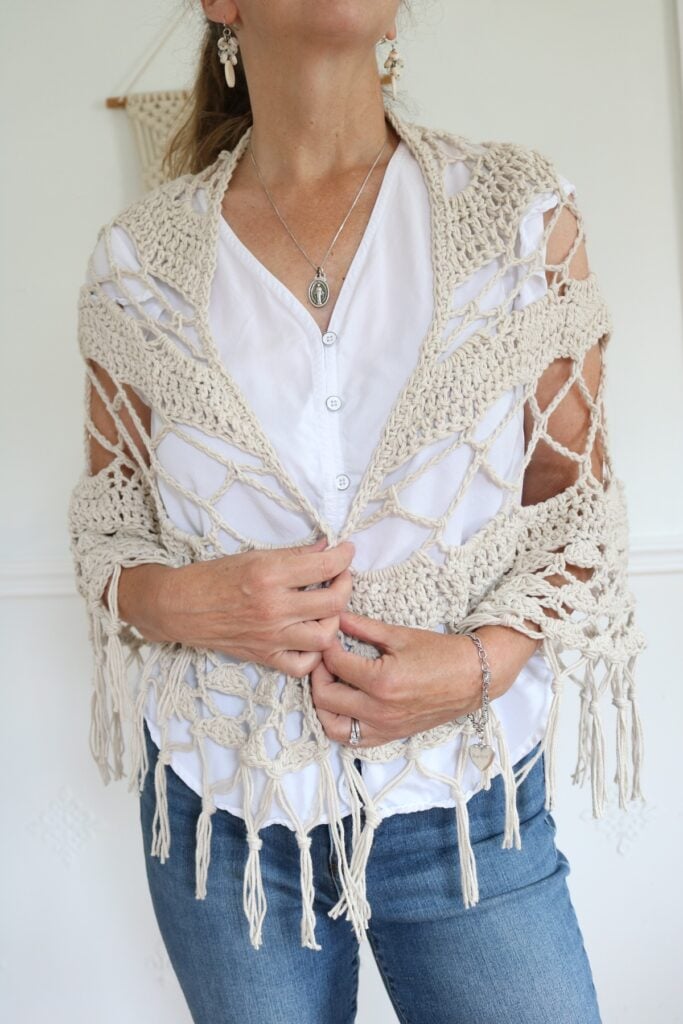
- Customizable finish. Add knotted fringe for a boho edge, or finish the corners with soft tassels for a more polished look.
- A cotton yarn you’ll enjoy working with. Pima cotton has a lovely stitch definition and drape that’s perfect for showing off the lace pattern.
This post may contain affiliate links. That means if you click and buy, I may make a commission at no cost to you. Please see my full disclosure policy for more details.
At a Glance
| Skill Level | Intermediate |
| Finished Size | 48″ wingspan x 25″ length (before fringe) |
| Yarn Weight | Medium Weight (4) Cotton |
| Yardage | Approx. 400 yards (3 skeins) |
| Hook Size | Size J (6.0 mm) |
| Gauge | 11 sts x 6 rows = 4″ (in dc rows pattern) |
| Construction | Top-down, worked in 4 triangular panels |
Supplies & Materials Needed
To make this crochet lace shawl, you’ll need the following:
Yarn
- Yarn Weight: Medium Weight (Size 4) Cotton
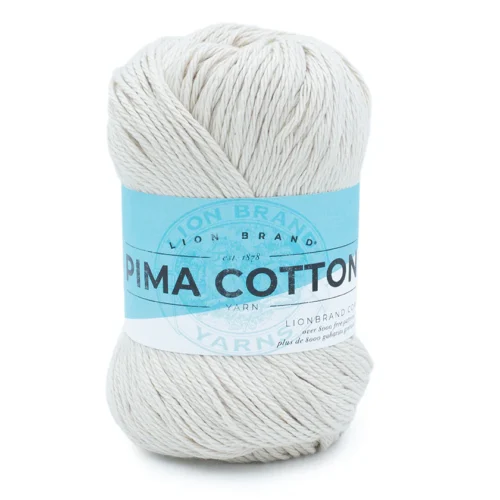
- Used in Sample: Lion Brand Pima Cotton, color “Vintage,” approx. 400 yds (3 skeins)
Substitution Tip: Any similar Size 4 medium cotton yarn will work beautifully. Cotton gives this shawl its structured drape and helps the lace stitches hold their shape after blocking.
Hook
- Size J (6.0 mm) crochet hook, or size needed to meet gauge
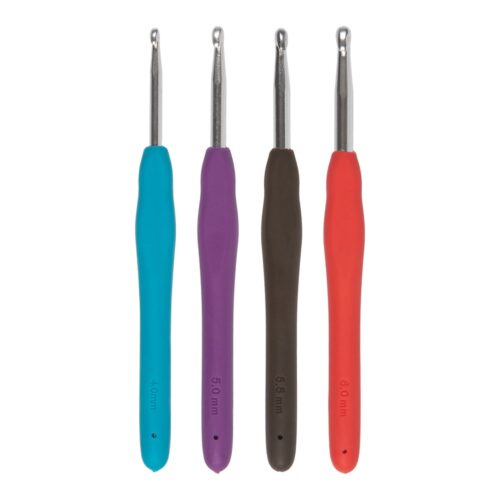
Crochet Notions
Crochet Abbreviations
US Crochet terms are used.
Ch – chain
Ch- – refer to chain or space previously made, e.g., ch-1 sp
dc – double crochet
rep – repeat
sc – single crochet
sk – skip
st(s) – stitch(es)
tch – turning chain
[ ] – repeat what is inside brackets or parentheses # of times indicated
pm – place marker
sm – stitch marker
Gauge
4″ (10 cm) square: 11 sts by 6 rows (in Double Crochet Row pattern)
Upgrade to the Printable PDF
The free crochet shawl pattern is provided below, but you can also grab the ad-free, printable PDF pattern in my shop with helpful photo tutorials:
(The premium Ad-Free PDF can also be purchased on ETSY)
Crochet Shawl Pattern
Sizing
This pattern is one size:
| Inches | Centimeters | |
|---|---|---|
| Wingspan width | 48″ | 122 cm |
| Length (without fringe) | 25″ | 64 cm |
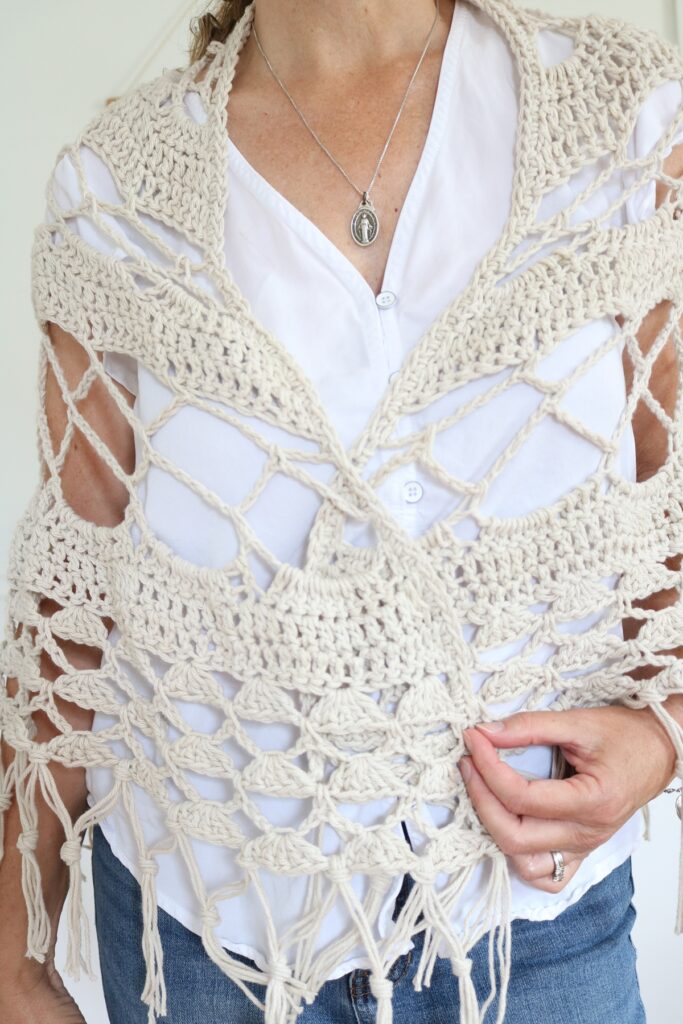
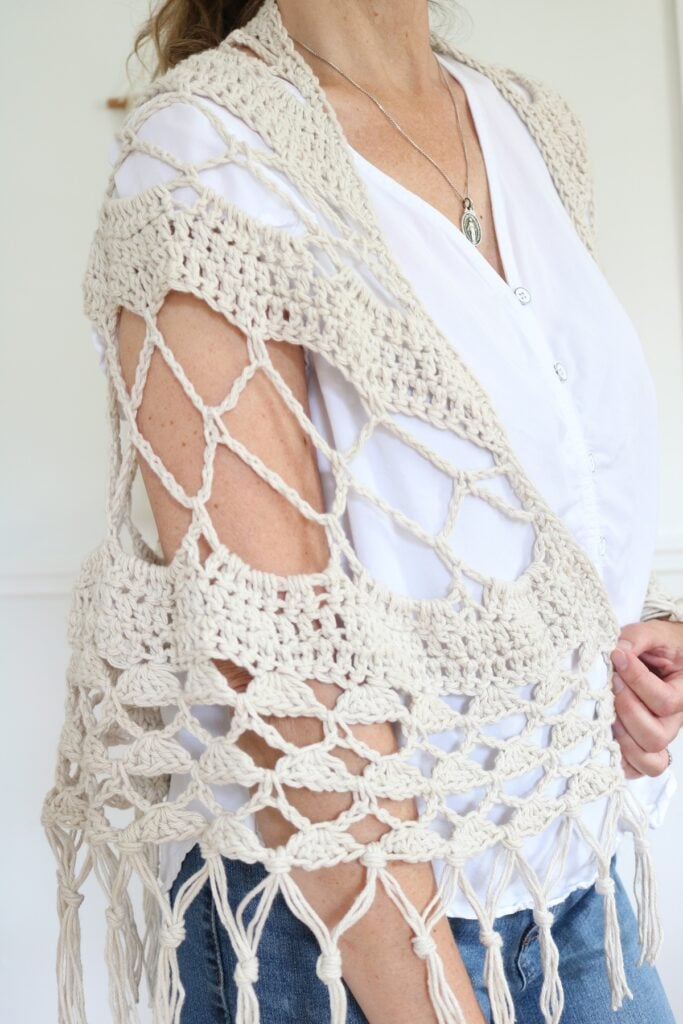
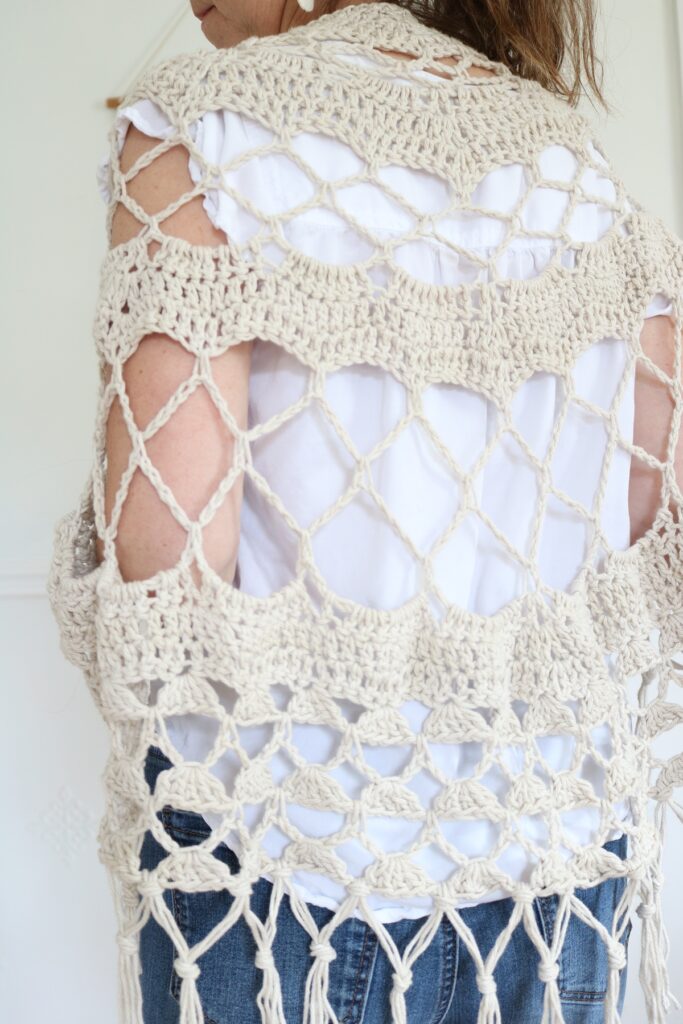
Construction overview: You’ll crochet the shawl top-down, shaped into 4 triangular panels. First you’ll work a few starting rows at the top center. Next, you’ll work levels of increase rows to enlarge the triangular panels outward. Lastly, you’ll block the shawl, add a top edging, and finish with optional fringe or tassels along the bottom.
NOTES:
- All “Ch 3” count as 1 dc.
- All “Ch 1” count as a st, except when worked at the start of a row.
- Each double crochet row increases the stitch count by 8, allowing the shawl to expand outward. The increase stitches are worked at the start and end of each row, as well as at the 3 stitch markers separating each panel.
Important tip: Use stitch markers to separate the 4 triangular panels, and place markers at the first and last stitches of each row too . This makes each increase row much easier to follow. The stitch pattern is fully reversible, so there’s no wrong side to worry about.
Level 1 Rows
Starting Double Crochet Rows
Using size J crochet hook, ch 7 with yarn.
Row 1: Dc in 4th ch from hook (1st 3 chs count as 1 dc), dc in each ch. Turn. (5 sts)
Row 2: Ch 3 (counts as 1 dc here and throughout), dc in same st, *(dc, ch 1, dc) in next dc; rep from * two more times until tch, 2 dc in 3rd ch of tch. Turn. (13 sts)
Place markers in the three ch-1 spaces. These will separate the 4 triangular panels, and indicate where you will be working the increase stitches at those places.
Row 3: Ch 3, dc in same st, *dc in each dc across until ch-1 sp, (dc, ch 1, dc) in ch-1 sp, pm in new ch-1 sp just made; rep from * two more times, dc in each dc across until tch, 2 dc in 3rd ch of tch. Turn. (21 sts)
Row 4: Rep Row 3. (29 sts)
Chain 5 Space Rows
Row 5: Ch 1, sc in first st, *ch 5, sk next 3 dc, sc in space before the next dc, ch 5, sk next 3 dc, sc in next ch-1 sp, pm in new sc just made; rep from * two more times, ch 5, sk next 3 dc, sc in space before next dc, ch 5, sk next 3 dc, sc in 3rd ch of tch. Turn. (8 ch-5 spaces, 9 sc sts)
Row 6: Ch 5 (1st 3 ch counts as 1 dc), sc in next ch-5 sp, *ch 5, sc in next ch-5 sp; rep from * across, ch 2, dc in last sc st. Turn. Place markers in the 3 ch-5 spaces directly above the 3 marked sc sts. (7 ch-5 spaces, 2 ch-2 spaces, 8 sc sts)
Row 7: Ch 1, sc in first st, *ch 5, sc in next ch-5 sp; rep from * until tch, ch 5, sc in 3rd ch of tch. Turn. Place markers in the 3 sc sts directly above the 3 marked ch-5 spaces. (8 ch-5 spaces, 9 sc sts)
Level 2 Rows
Double Crochet Rows
Row 8: Ch 3, dc in same st, *work 6 dc sts in each ch-5 sp across until next sc with sm, (dc, ch 1, dc) in sc with sm, pm in new ch-1 sp just made; rep from * two more times, work 6 dc sts in each ch-5 sp across until last sc st, 2 dc in last sc st. Turn. (61 sts)
Row 9: Ch 3, dc in same st, *dc in each dc across until ch-1 sp, (dc, ch 1, dc) in ch-1 sp, pm in new ch-1 sp just made; rep from * two more times, dc in each dc across until tch, 2 dc in 3rd ch of tch. Turn. (69 sts)
Row 10: Rep Row 9. (77 sts)
Chain 7 Space Rows
Row 11: Ch 1, sc in first st, *[ch 7, sk next 6 dc, sc in space before the next dc] two times, ch 7, sk next 6 dc, sc in next ch-1 sp, pm in new sc just made; rep from * two more times, [ch 7, sk next 6 dc, sc in space before the next dc] two times, ch 7, sk next 6 dc, sc in 3rd ch of tch. Turn. (12 ch-7 spaces, 13 sc sts)
Row 12: Ch 7 (1st 3 ch counts as 1 dc), sc in next ch-7 sp, *ch 7, sc in next ch-7 sp; rep from * across, ch 4, dc in last sc st. Turn. Place markers in the 3 ch-7 spaces directly above the 3 marked sc sts. (11 ch-7 spaces, 2 ch-4 spaces, 12 sc sts)
Row 13: Ch 1, sc in first st, *ch 7, sc in next ch-7 sp; rep from * until last tch, ch 7, sc in 3rd ch of tch. Turn. Place markers in the 3 sc sts directly above the 3 marked ch-7 spaces. (12 ch-7 spaces, 13 sc sts)
Level 3 Rows
Double Crochet Rows
Row 14: Ch 3, dc in same st, *work 8 dc sts in each ch-7 sp across until next sc with sm, (dc, ch 1, dc) in sc with sm, pm in new ch-1 sp just made; rep from * two more times, work 8 dc sts in each ch-7 sp across until last sc st, 2 dc in last sc st. Turn. (109 sts)
Row 15: Ch 3, dc in same st, *dc in each dc across until ch-1 sp, (dc, ch 1, dc) in ch-1 sp, pm in new ch-1 sp just made; rep from * two more times, dc in each dc across until tch, 2 dc in 3rd ch of tch. Turn. (117 sts)
Row 16: Rep Row 15. (125 sts)
Chain 9 Space Rows
Row 17: Ch 1, sc in first st, [ch 9, sk next 7 dc, sc in space before the next dc, ch 9, sk next 8 dc, sc in space before the next dc, ch 9, sk next 7 dc, sc in space before the next dc, ch 9, sk next 8 dc, **sc in next ch-1 sp, pm in new sc just made] three times, then work steps inside brackets one more time until **, sc in 3rd ch of tch. Turn. (16 ch-9 spaces, 17 sc sts)
Row 18: Ch 9 (1st 3 ch counts as 1 dc), sc in next ch-9 sp, *ch 9, sc in next ch-9 sp; rep from * across, ch 6, dc in last sc st. Turn. Place markers in the 3 ch-9 spaces directly above the 3 marked sc sts. (15 ch-9 spaces, 2 ch-6 spaces, 16 sc sts)
Row 19: Ch 1, sc in first st, *ch 9, sc in next ch-9 sp; rep from * until last tch, ch 9, sc in 3rd ch of tch. Turn. Place markers in the 3 sc sts directly above the 3 marked ch-9 spaces. (16 ch-9 spaces, 17 sc sts)
Level 4 Rows
Double Crochet Rows
Row 20: Ch 3, dc in same st, *work 9 dc sts in each ch-9 sp across until next sc with sm, (dc, ch 1, dc) in sc with sm, pm in new ch-1 sp just made; rep from * two more times, work 9 dc sts in each ch-9 sp across until last sc st, 2 dc in last sc st. Turn. (157 sts)
Row 21: Ch 3, dc in same st, *dc in each dc across until ch-1 sp, (dc, ch 1, dc) in ch-1 sp, pm in new ch-1 sp just made; rep from * two more times, dc in each dc across until tch, 2 dc in 3rd ch of tch. Turn. (165 sts)
Row 22: Rep Row 21. (173 sts)
Level 5 Rows
At this point, you’ll stop increasing the stitch count for the 4 triangular panels and work a shell pattern for 5 more rows.
Abbreviation: Shell – work 5 dc sts in the designated st.
Shell Rows
(For Row 23, be sure to count the marked ch-1 increase points as sts.)
Row 23: Ch 3, sk next 3 sts, Shell in next st, *sk next 4 sts, Shell in next st; rep from * across until last 3 sts, sk next 2 sts, dc in 3rd ch of tch. Turn. (172 sts – 34 shells, 2 dc sts)
You can now remove the stitch markers at the increase points, as they’re no longer needed.
Row 24: Ch 1, sc in first st, *ch 5, sc in sp between next 2 shells; rep from * across until last shell, ch 5, sc in 3rd ch of tch. Turn. (34 ch-5 spaces, 35 sc sts)
Row 25: Ch 3, *Shell in 3rd ch of next ch-5 sp; rep from * across, dc in last sc st. Turn. (172 sts – 34 shells, 2 dc sts)
Rows 26–27: Rep Rows 24–25.
Fasten off.
Finishing & Blocking
Block Shawl: Block the shawl to open up the lace stitches, to approx. 48″ wingspan by 25″ length.
Add Finished Edge to Top: It’s best to add the finished edge at the top of your shawl after blocking.
Proceed as follows:
- Join yarn to a top corner of the shawl.
- Work sc sts evenly across the top edge of the shawl.
- Fasten off.
Weave in all loose ends.
Add Optional Tassels or Fringe
Tassels: If you’d like to spruce up the shawl with tassels, they’re easy to make and attach. Simply make 5 yarn tassels (approx. 5–8″ tall) using the same yarn you used for the shawl, then attach them to the two corners and 3 increase points of the shawl.
Fringe: Another option is to add knotted fringe to the bottom edge of the shawl as follows:
- Cut 105 strands of yarn, 16″ long each, and divide into 35 sets of 3 strands.
- Secure one set of 3 strands to the first st in Row 27 as fringe, using a crochet hook to pull the strands through. Repeat for the last st in Row 27.
- Secure the remaining 33 sets of fringe centered between each shell in Row 27.
- Row of knotted fringe: Hold 3 inner strands from the first fringe group and 3 strands from the next group, then tie them in an overhand knot about 2″ down from the edge. Repeat across the bottom edge, tying the last knot before the last fringe group and leaving its 3 strands hanging.
- Trim fringe ends evenly. Fringe will add approx. 5″ to the shawl’s length.
Tips to Customize Your Shawl
One of the best parts of this pattern is choosing how to finish it. Here are your options:
Add Fringe
Knotted fringe along the bottom edge gives the shawl a relaxed, boho edge and adds about 5″ to the overall length. It’s the perfect finishing touch if you love a little movement.
Add Tassels
For a slightly more polished, elevated look, skip the fringe and add five yarn tassels to the two corners and three increase points instead. Tassels read a little more refined and work especially well if you plan to wear the shawl for a dressier occasion.
Try a Different Neutral
While the sample is worked in a soft “Vintage” tone, this shawl would be just as beautiful in oatmeal, warm white, or a soft taupe. Stick to a neutral palette to keep the piece as versatile as possible.
How to Wear & Style the Brimfield Crochet Shawl
This shawl is one of those pieces that instantly elevates a simple outfit. Here’s how to wear it:
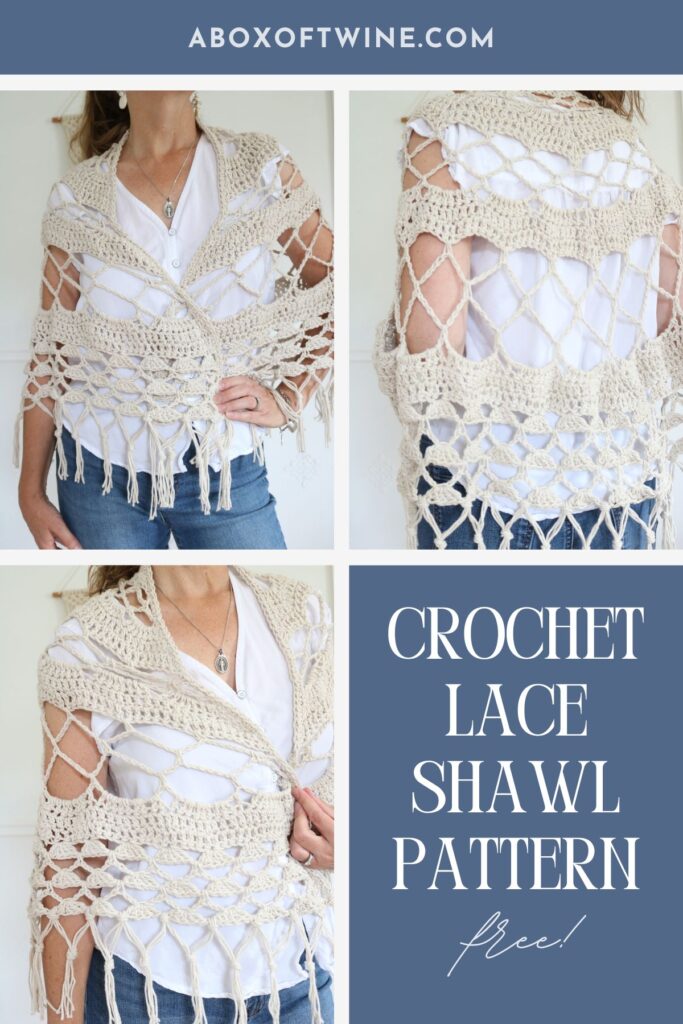
- Layer it over a white button-down or tee for that easy, effortless boho look — drape it loosely over the shoulders and cross the ends at the front, like a wrap cardigan.
- Wear it as a scarf by folding it and looping it around your neck for cooler weather, letting the fringe or tassels hang free.
- Dress it up for date night over a simple slip dress or fitted top. The lace texture adds romance without needing any extra jewelry.
- Transition it into fall by layering it over a long-sleeve top or thin sweater once the weather cools. The open mesh makes it a lightweight layer rather than a heavy one.
- Secure it with a shawl pin or brooch at the front if you want it to stay put through a full day of wear.
- Wear it to a wedding as a bridal wrap over the shoulders of a fitted gown for that “something soft and handmade” touch, or as an elegant guest cover-up for an outdoor or evening ceremony. Drape it loosely and pin it at one shoulder so it stays put through the dancing.
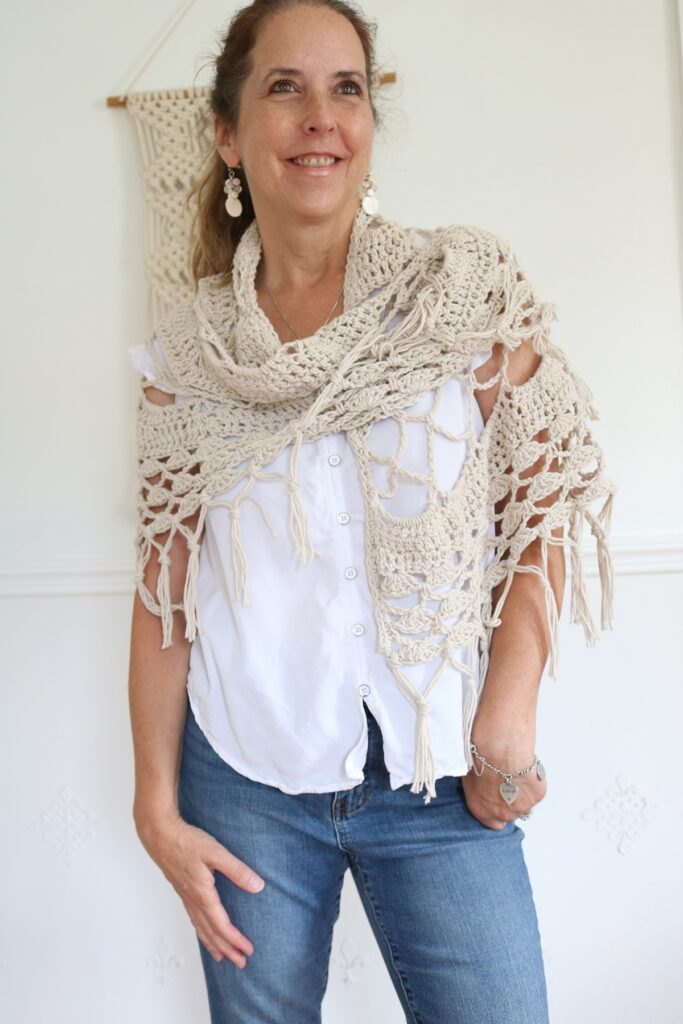
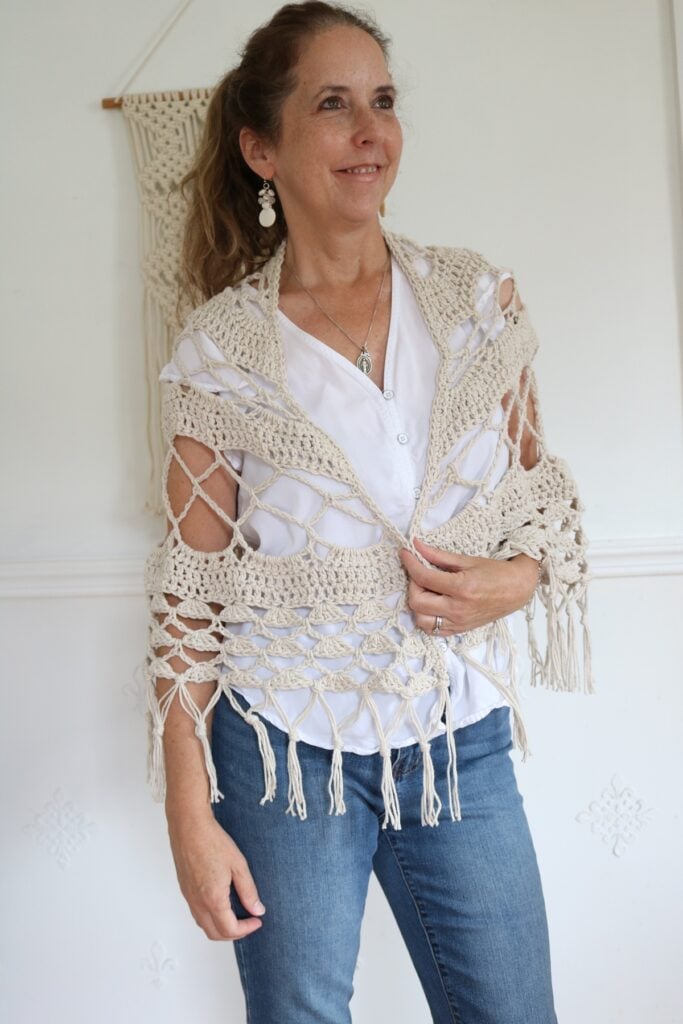
Because it’s made in a soft neutral, the Brimfield Shawl works with denim, linen, dresses, and everything in between. There’s no need to plan an outfit around it.
Caring for Your Cotton Shawl
Cotton yarn is naturally durable and easy to care for. Hand wash in cool water and lay flat to dry, reshaping gently while damp to maintain the blocked lace pattern. Avoid wringing or twisting the fabric, since this can distort the open mesh stitches. With proper care, cotton actually softens beautifully over time.
Don’t forget this shawl pattern is also available as an ad-free, printable PDF with helpful photos. Grab the Crochet Brimfield Shawl pattern in my shop.
Related Patterns You’ll Love
If you enjoyed this free crochet shawl pattern, here are a few more cozy makes to add to your queue:
- More lace and wrap patterns from the Scarves/Cowls/Ponchos archive
- Browse more free crochet patterns for your next project
Final Thoughts
The Brimfield Shawl is proof that a handmade piece can be both simple to wear and special to make. The subtle lacy triangle panels, soft neutral cotton, and customizable fringe or tassel finish come together into a shawl you’ll genuinely reach for season after season, outfit after outfit.
Grab your cotton yarn, pull out your hook, and let’s get stitching.
Did you make this shawl? Share your finished project on Instagram and tag @aboxoftwine — I’d love to see it!
===> Remember to PIN for later! <===