Farmhouse Style Skirt Pattern
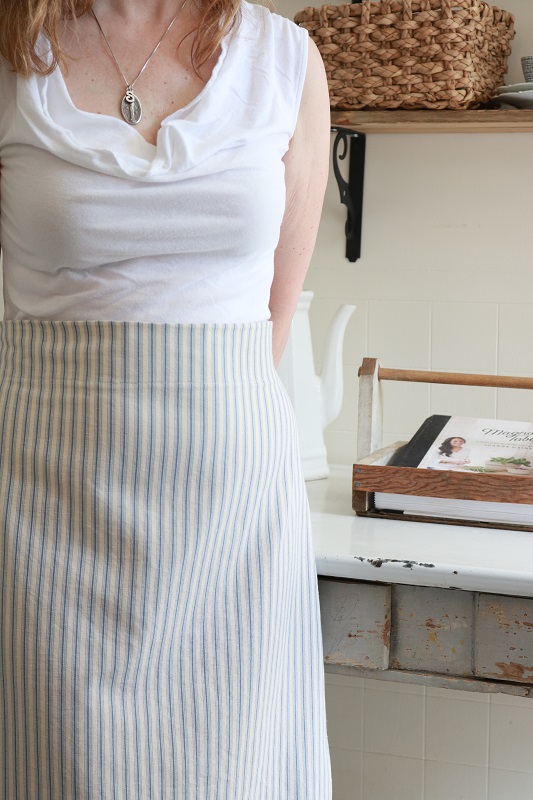
I love the Magnolia Home Fashions Cottage Stripe Tranquil fabric so much that I decided to use it for a simple summer skirt. Today I’m sharing this easy farmhouse skirt pattern with you, and it only requires one yard of fabric! For that reason, I’m including it in my One Yard Wonders series.
This farmhouse skirt pattern was inspired by simple flat-front aprons. I wanted a smooth front along with a gathered back for contrast, as well as a long flowing length. It’s a lightweight fabric for summertime ease, and I didn’t bother to line it. Simplicity is the focus here at A Box of Twine!
This post may contain affiliate links. That means if you click and buy, I may make a commission at no cost to you. Please see my full disclosure policy for more details.
Here are the supplies you will need to make your own, as well as the sewing instructions. Have a go at it!
Supplies
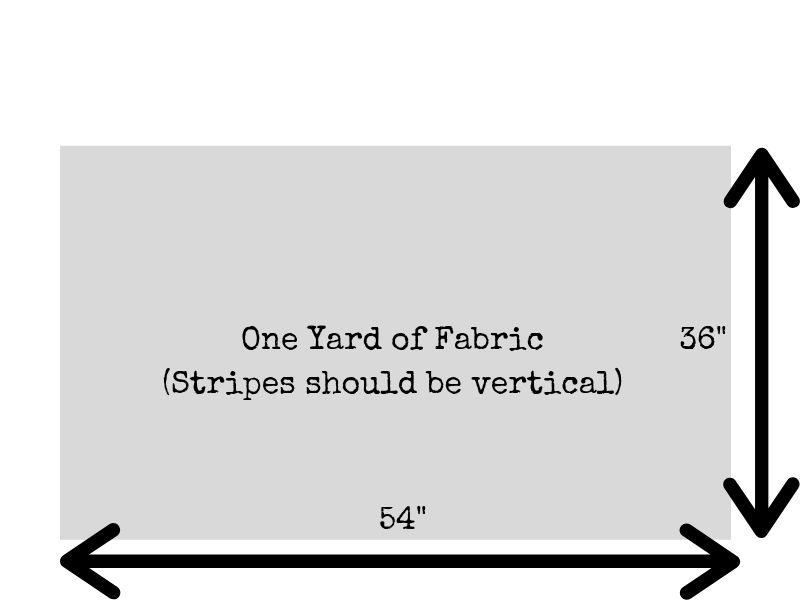
- one yard of fabric (36″ x 54″). I used Cottage Stripe Tranquil by Magnolia Home Fashions.

- one yard of 2 inch ribbed non-roll elastic (I used Dritz)
- coordinating thread, sewing scissors, measuring tape
- sewing machine
Fabric Cutting
Start with one yard of 54″ width fabric. Since I used ticking striped fabric, the stripes are vertical.
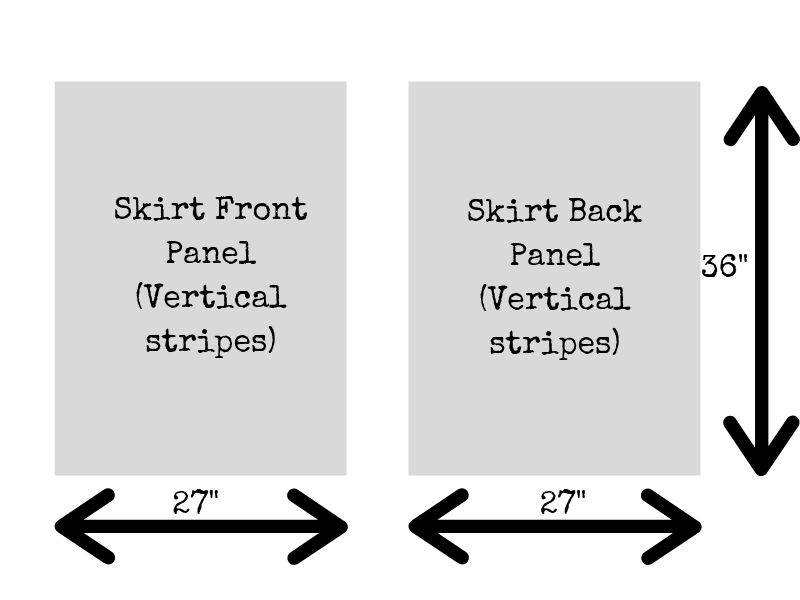
Begin by folding this yard of fabric in half width-wise and cutting in half down the fold. These will be your front and back panels to the skirt:
Trim panels to Trapezoid shape
Next, wrap a measuring tape around your waist at the narrowest part to your comfort level. This is where the skirt waist will rest. Jot down this waist number – for example, 30″.
Take that waist number, and cut it in half (e.g. 15″). Add 5″ to that number (e.g. 15″ + 5″ = 20″). This will be your total front width of your skirt, including seam allowance.
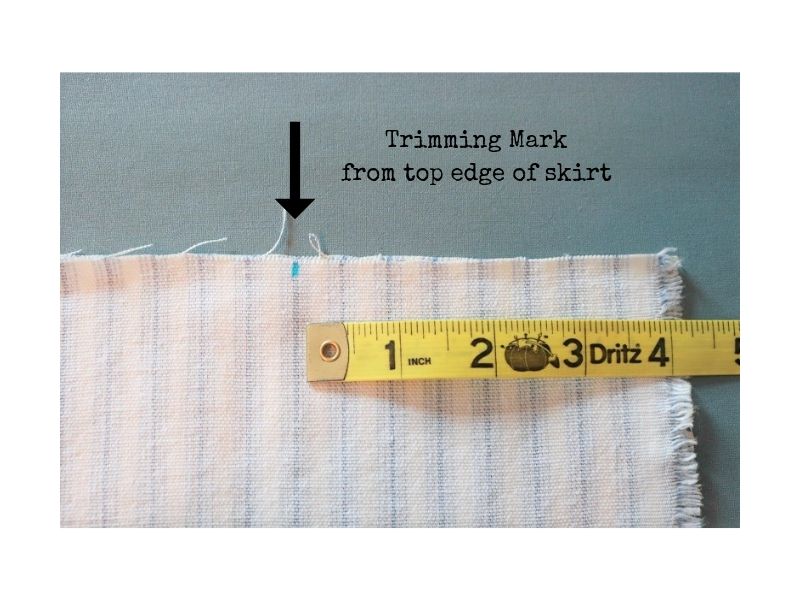
The two skirt panels you had cut should be about 27″ in width. (We want to trim this width down at the top of your panels to make trapezoid-shaped panels.) Subtract your front width number (determined in previous step, e.g. 20″) from this panel width. For example, 27″ – 20″ = 7″. Take this result (e.g. 7″) and determine 1/2 of it. For example, 1/2 of 7″ = 3.5″. You will use this number for your trimming mark.
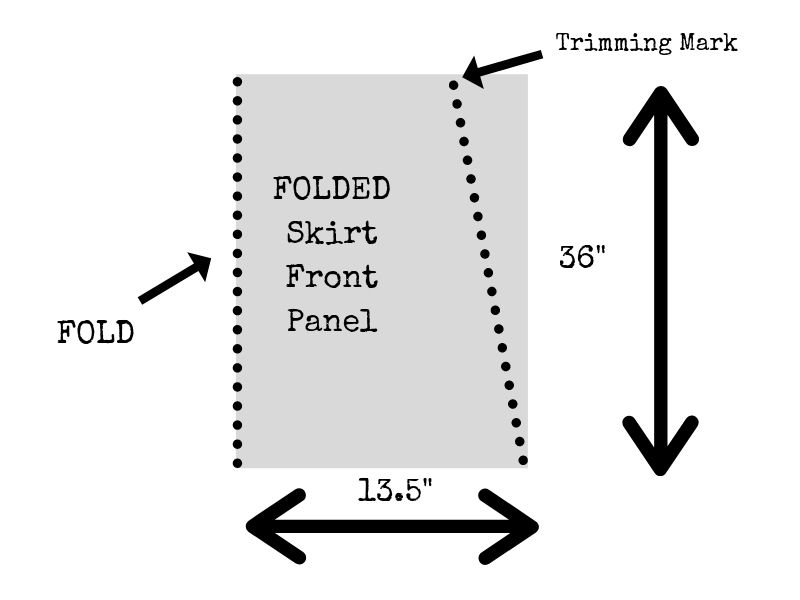
Fold your front skirt panel in half width-wise, right sides together. (The width will now be about 13.5″). Measure and mark your trimming mark from the top edge of your front panel. Since my fabric was actually 56″ in length, my personal trimming mark ended up being 4″ as seen below:
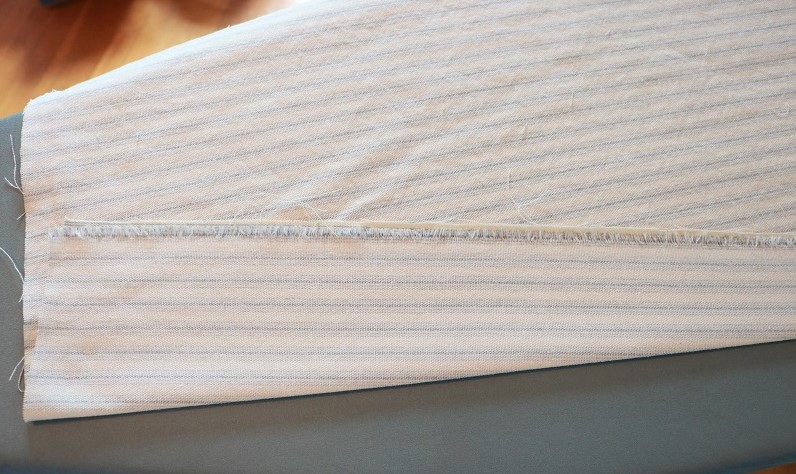
Next, fold and press your (already folded) panel from the trimming mark to the corresponding bottom corner. In the diagram below, the slanted dotted line represents this fold from the trimming mark at the top to the bottom corner of your panel:
Here is what my slanted fold looked like from a sideways view (the top of my panel is on the left):
The bottom of my panel is on the right:
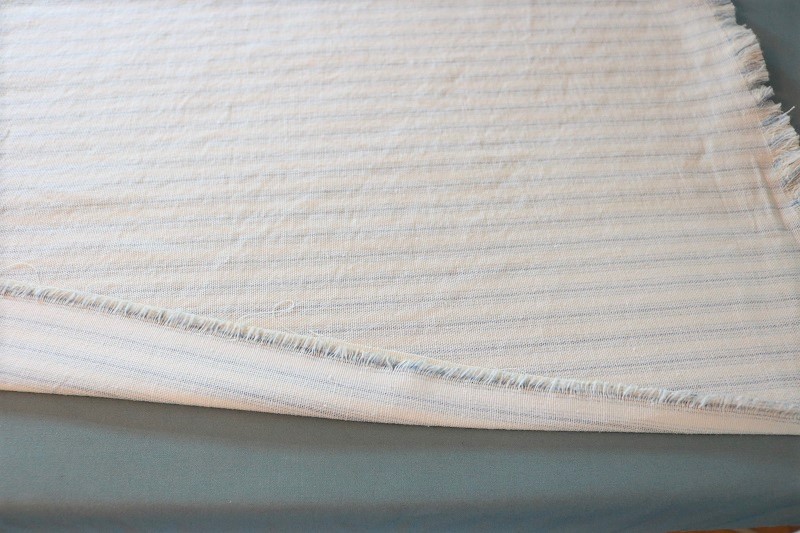
After pressing this fold, cut at the fold mark. Your skirt panel will now be wider at the bottom than at the top (trapezoid-shaped).
Follow the same steps to cut your back skirt panel. They should be identical.
Sew Skirt Together
Next, put the front and back skirt panels right sides together and pin one long side:
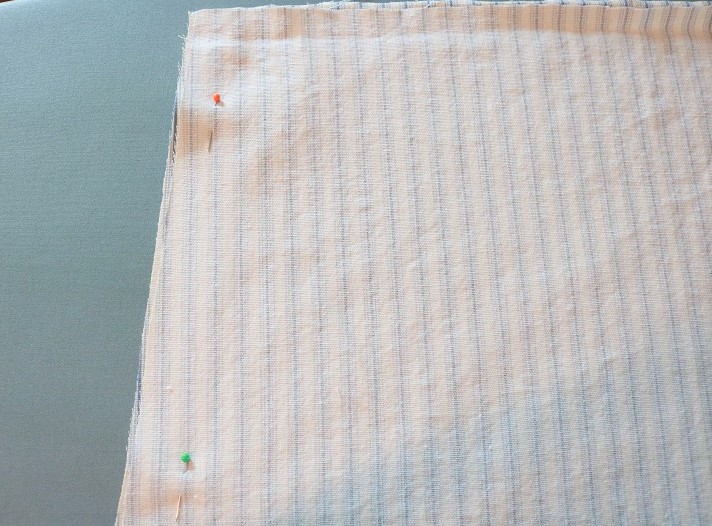
Sew this skirt side up using a 1/2″ inch hem. I just left my edges raw, but you can be creative with a finishing seam if you’d like.
Press this skirt seam open:
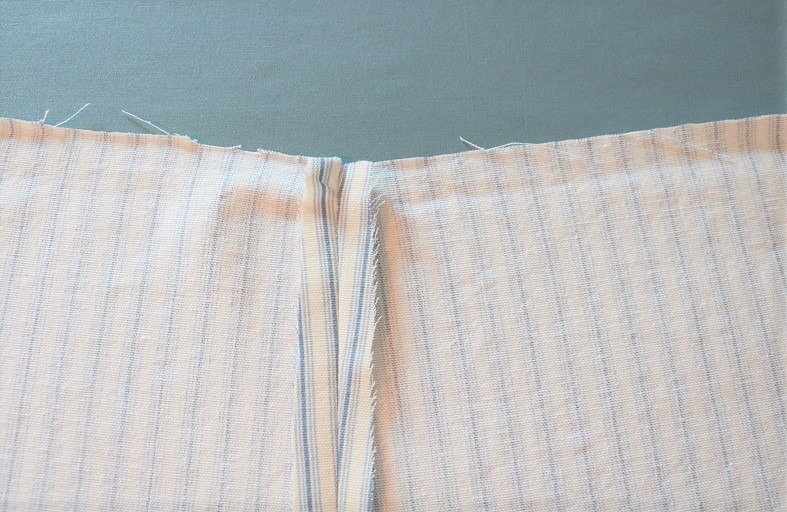
You could also fold the raw seam edges under and use fabric glue to hold:
Make channel for elastic
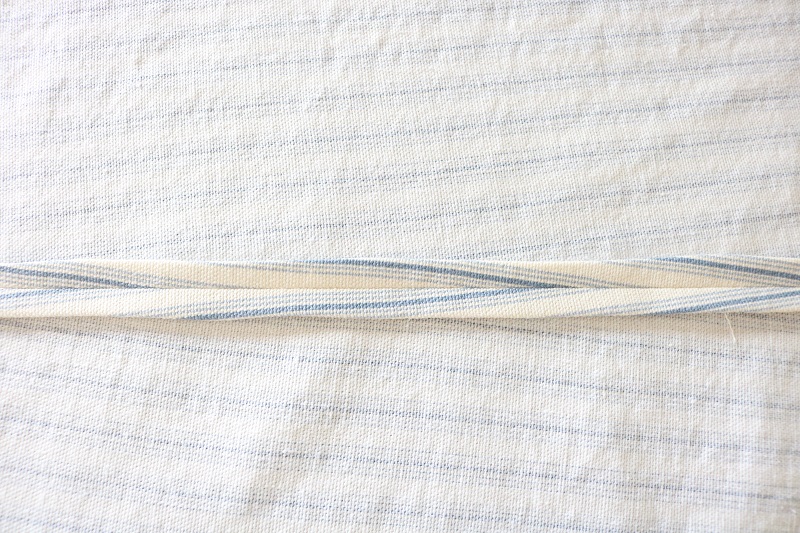
Fold the top edge of your skirt over 1/4″ toward wrong side and press:

Fold this again 2 1/2″ over toward wrong side and press. Make sure to align your side seam when folding:
Pin this fold in place.
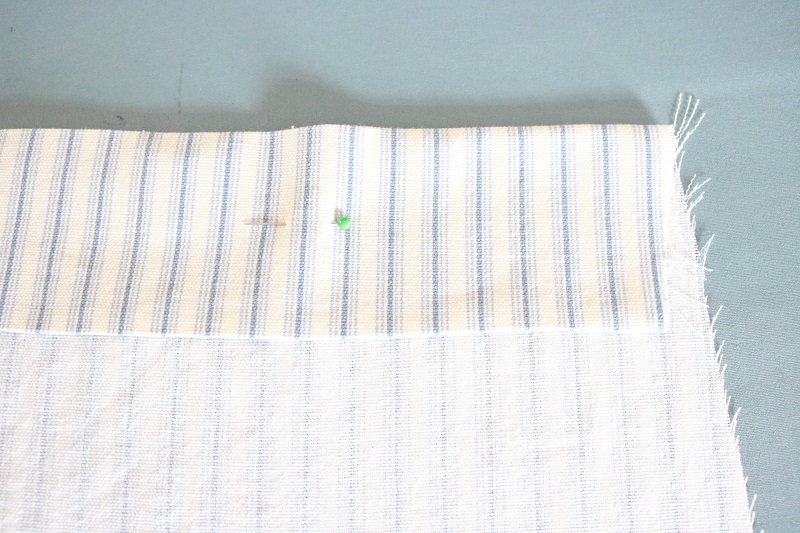
Sew a seam 1/4″ from its bottom edge. This will be the channel to slide your 2″ width elastic waist band into:
Attach elastic to back panel.
Next, slide in the 2″ elastic into this channel, stopping at the side seam. (Whichever route you take into the channel, this will be the back panel of your skirt). Pin the elastic in place at this seam:
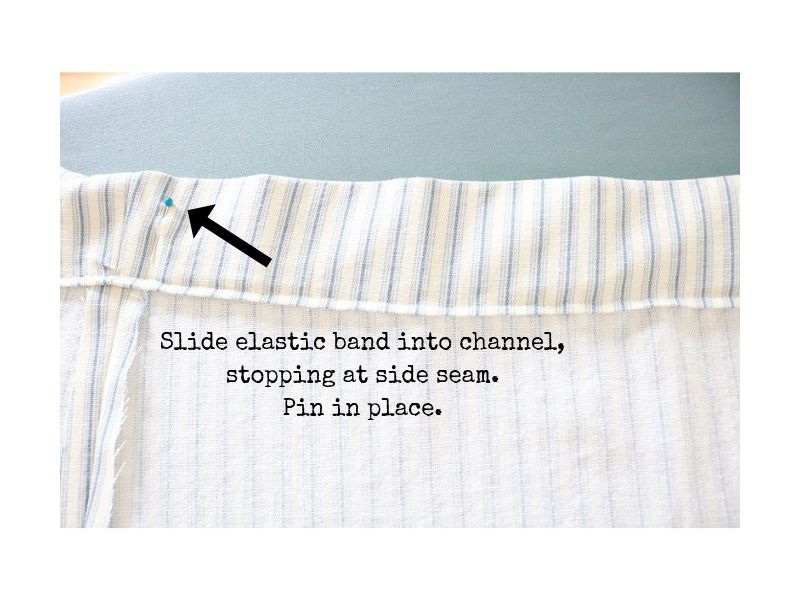
Secure the elastic at this side seam by sewing up and down several times. The rest of the elastic band will be hanging out of the raw edge of the channel as follows:

Try the skirt on to determine waistline
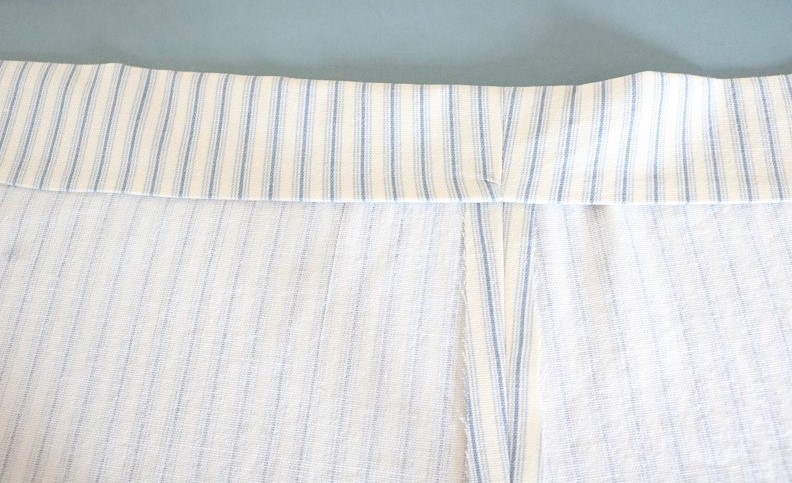
Next, you can ‘try’ the unfinished skirt on by wrapping it around your waist. The sewn side seam will be on one side, while the open side will be on the other. Gather the fabric along your back panel by pulling the elastic out the raw edge of the channel. (You eventually want your finished back panel to be gathered like this:)

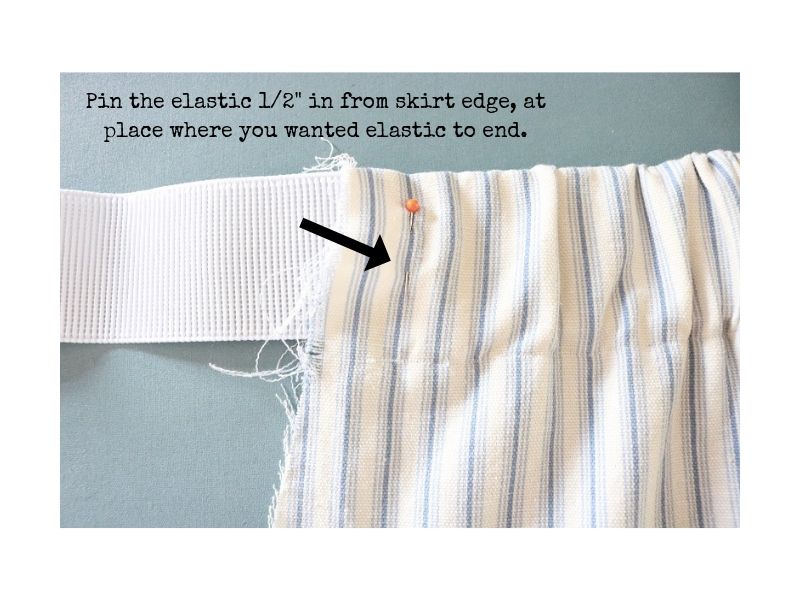
When you try the skirt on for fit, be sure to pull the elastic as tight as you can for a comfortable fit around your waist. Mark your ‘comfort’ spot on the elastic band with a pin:
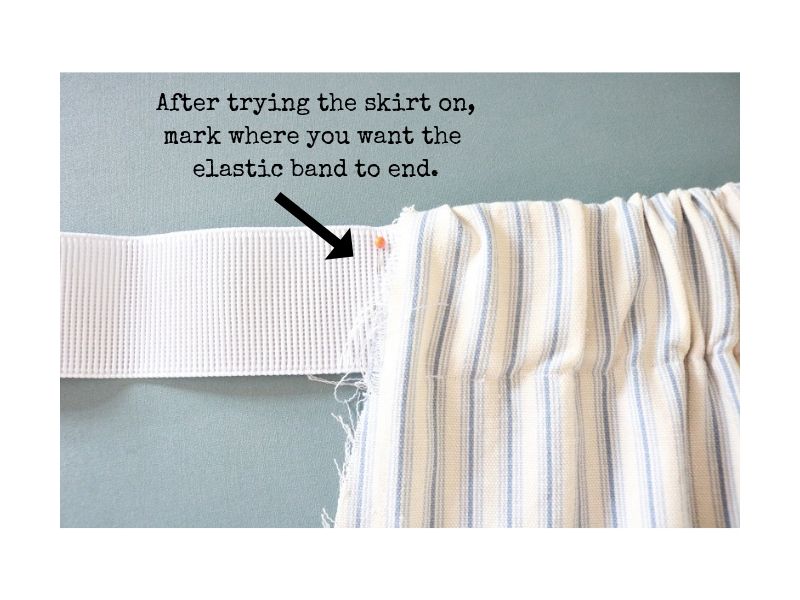
Keeping this ‘comfort’ spot on the elastic in mind, move it 1/2″ inside the channel and pin over the fabric:
Secure the elastic in place at this point using the same up and down sewing method as earlier.
Finish side seam and hem your skirt
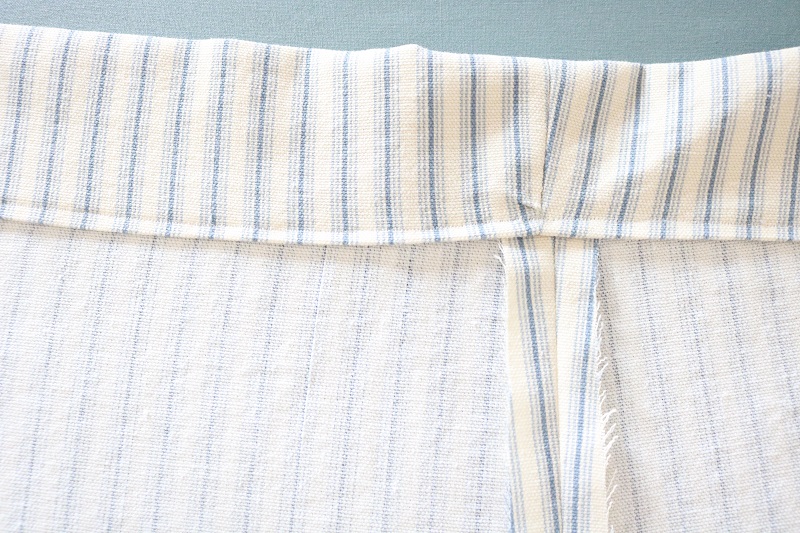
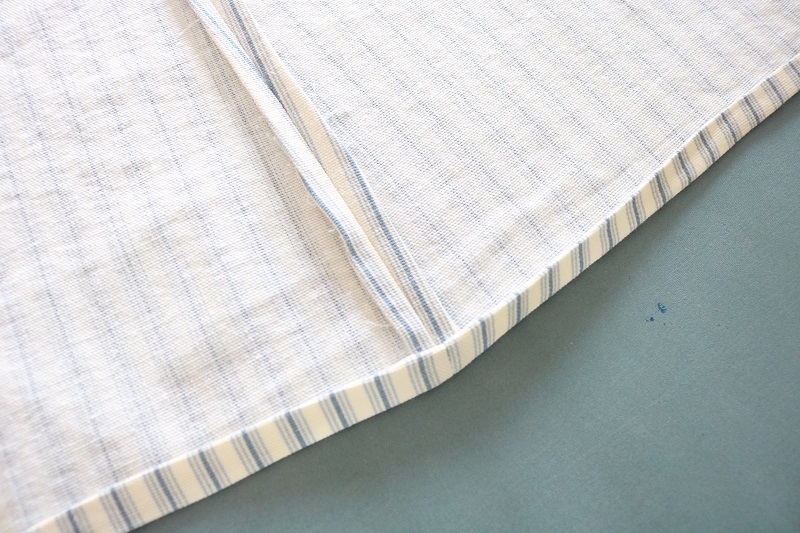
After securing this end of the elastic band, cut the excess elastic and pin the raw skirt side edges right sides together.
Sew up your final side seam to attach the front and back skirt panels. Press the side seam open as before.
Try the skirt back on and mark where you want your hem to be.
Hem your skirt by pressing 1/4″ toward wrong side, then 1/4″ again.
Sew up the hem and you are done!
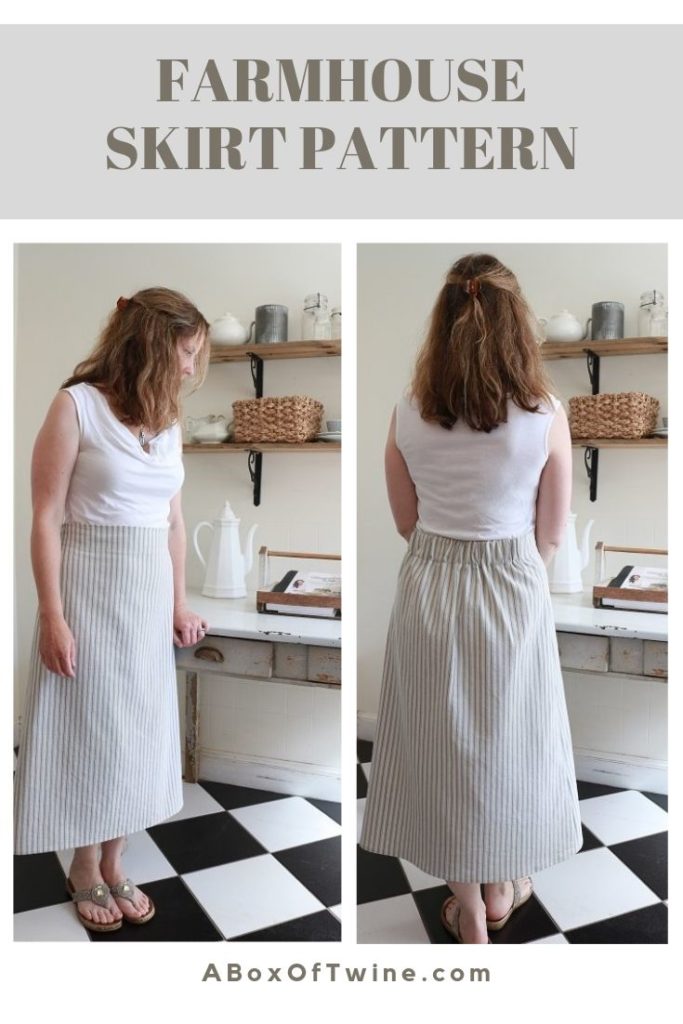
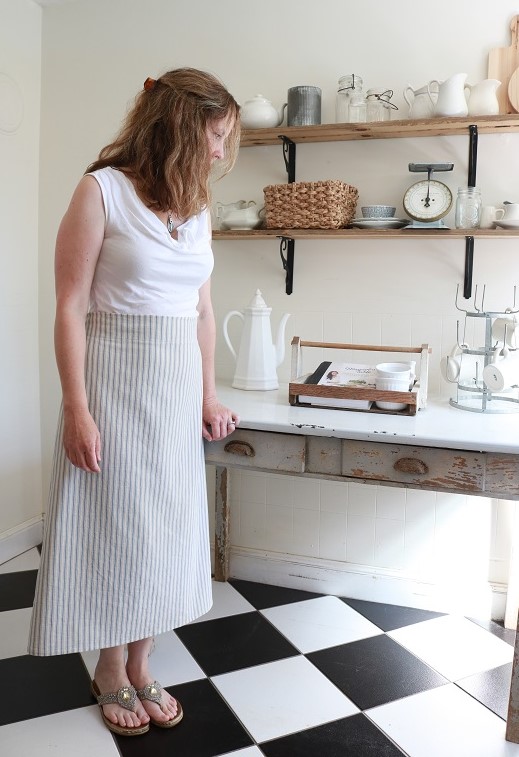
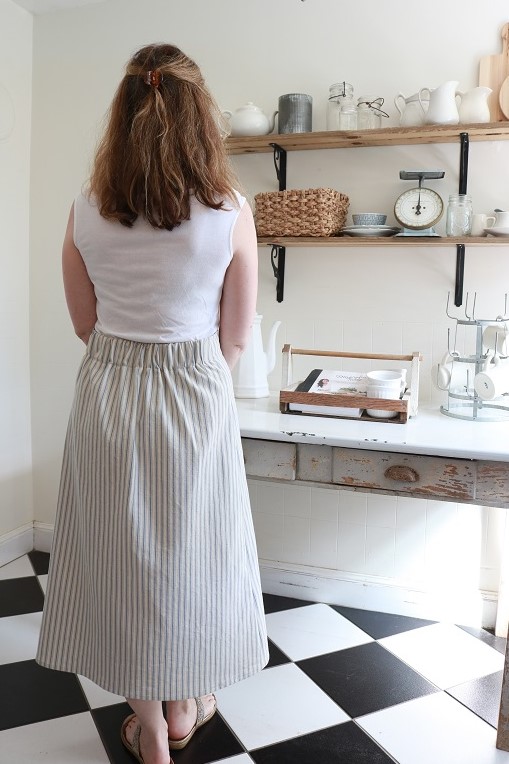
Finished Farmhouse Skirt
My finished skirt length ended up being 31″. I like the long and flowing look in summer, but feel free to shorten yours.
The gathered back skirt panel looks so cute, and helps to determine a good fit. In retrospect, I wish I had pulled my elastic band a bit more for a tighter fit because it can certainly stretch:
The flat front is such a simple look!

Let me know if you give this pattern a try. I’d love to see!
For other farmhouse style sewing ideas, be sure to check out my simple linen apron and cross-back apron patterns. I also used this same striped fabric for pillow covers. It’s ubiquitous!

