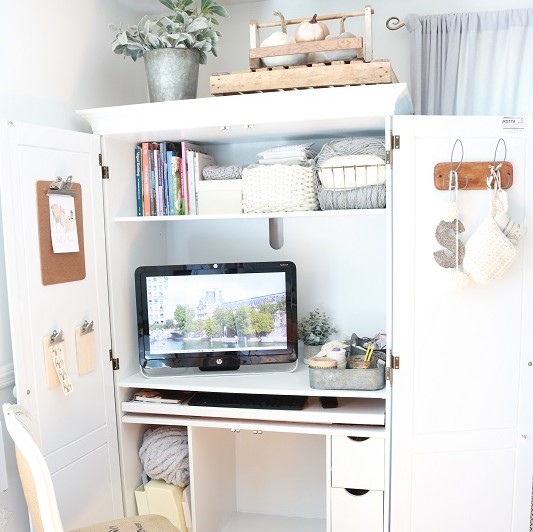
How to Repurpose a Computer Armoire for Crafting
Like many of you, our family’s lives have been changed dramatically these many months. COVID-19 is forcing so many people to work from home instead of in an office building. My husband used to commute to Boston each day, but is now working out of a desk in our bedroom. That left me to get creative with my work space, which I need for blogging and crafting. A computer armoire from Craigslist filled that need! Let me show you how to repurpose a computer armoire to make your own at-home office space – it was so easy and inexpensive. It only took me 3 days!
First, you will need to scour Craigslist or Facebook Marketplace to find an ideal computer armoire (aka computer cabinet) for your space. My plan was to place a computer armoire in our dining room on our first floor, away from my husband’s dedicated ‘office’ space. The lighting is ideal in our dining room and I can use our dining table to spread out sewing or craft projects. I was looking for a large armoire, with shelves and cubbies to use for storage. If you also require much storage for your supplies, try to find a taller armoire. I found one 72″ high and 39″ wide.
This post may contain affiliate links. That means if you click and buy, I may make a commission at no cost to you. Please see my full disclosure policy for more details.
Supplies I used:
- BEHR ULTRA WHITE PAINT & PRIMER IN ONE
- Benjamin Moore paint in color Marilyn’s Dress
- SATIN POLYURETHANE
- 6″ PAINT ROLLER and ROLLER REPLACEMENTS
- SMALL PAINT BRUSH
- MEDIUM GRIT SANDPAPER
How to Makeover a Computer Cabinet
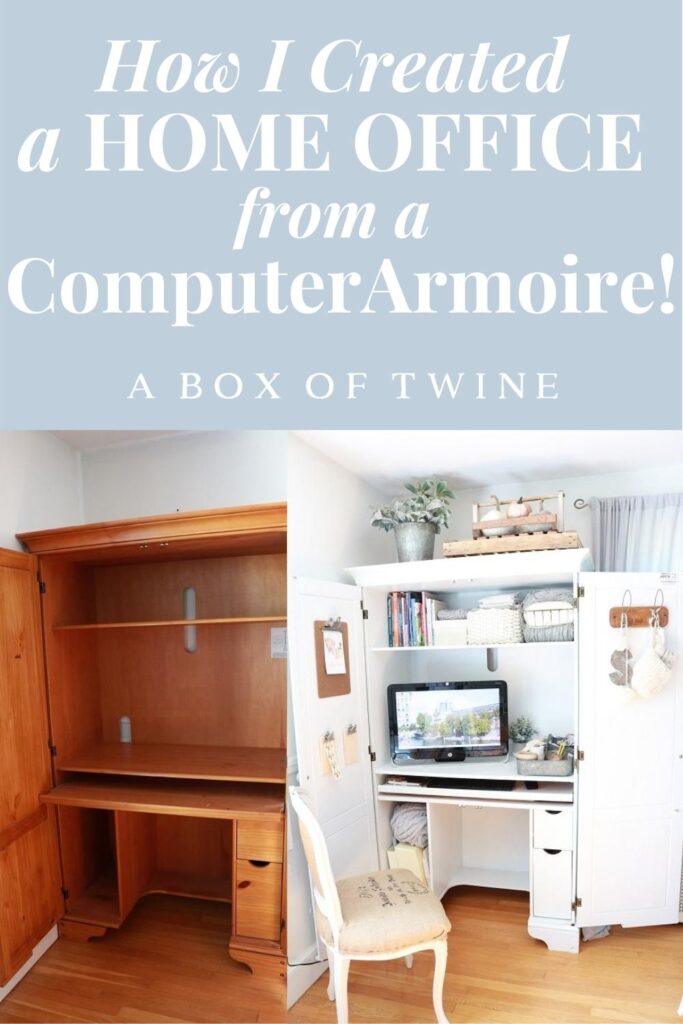
After searching for a few weeks (patience is necessary), I found this computer cabinet on Craigslist for $150. It is a solid hardwood piece:
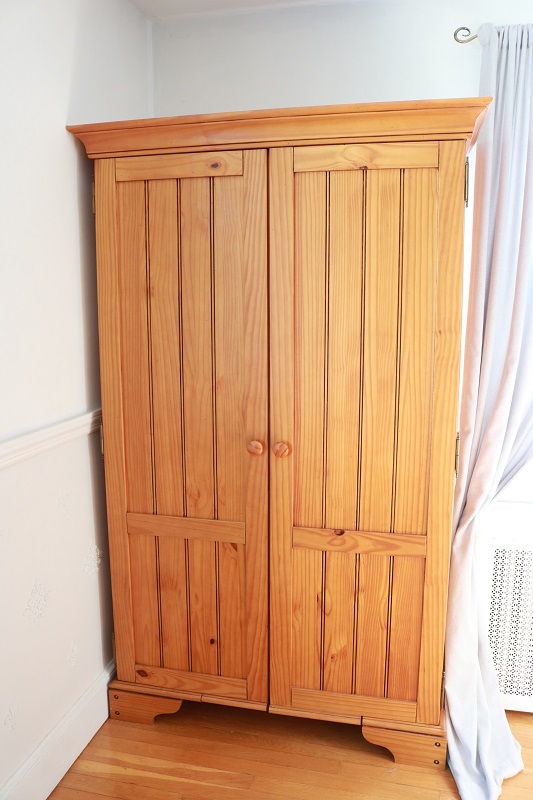
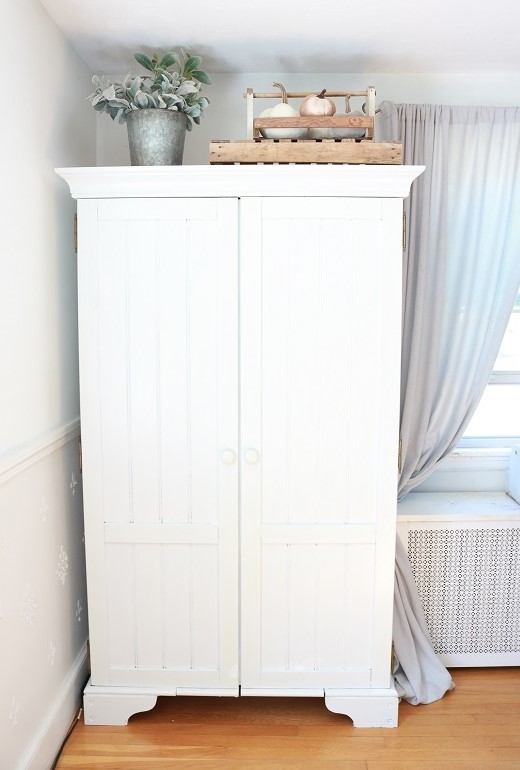
Although the armoire is not a vintage piece, I love the rustic look of the paneled doors and wooden knobs. I knew it would fit with my FARMHOUSE STYLE DINING ROOM.
The inside of the computer armoire is ideal! There is a large shelf for the computer with a sliding keyboard tray underneath. Two drawers provide ample closed storage, while an open cubby on the bottom left is the perfect spot for my sewing machine. Lastly, a large shelf above can hold my SEWING and KNIT/CROCHET craft books and other supplies.
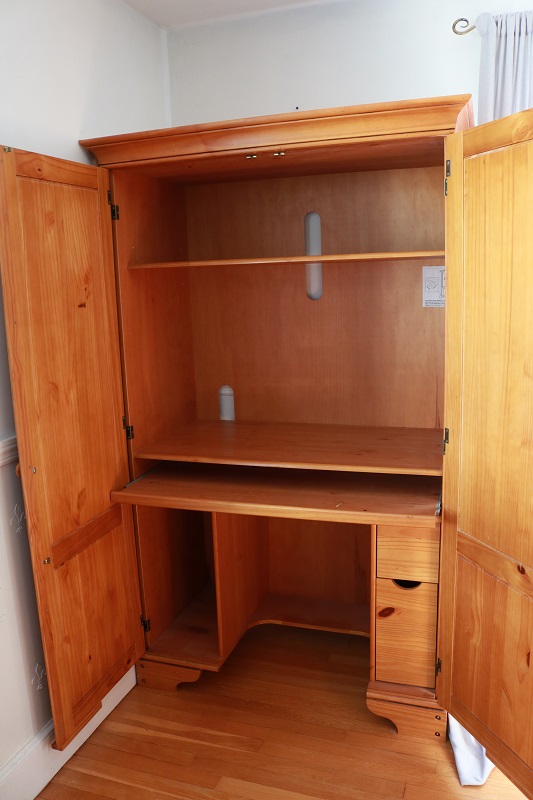
After bringing the computer armoire home, the only thing I did not love about it was the orange stain color. Paint to the rescue!
Paint the Computer Armoire
The biggest step I took as part of my computer armoire restoration was to paint it. Fortunately, we had plenty of left-over paint from previous projects in our basement. I used Behr white paint (with primer mixed in) for the first coat on the armoire.
On the first day I removed the two paneled doors, large shelf above, and the drawers. I sanded and painted those pieces outside, then also sanded & painted the armoire indoors. I chose not to paint the back of the drawer space to conserve paint, knowing that area would not be seen.
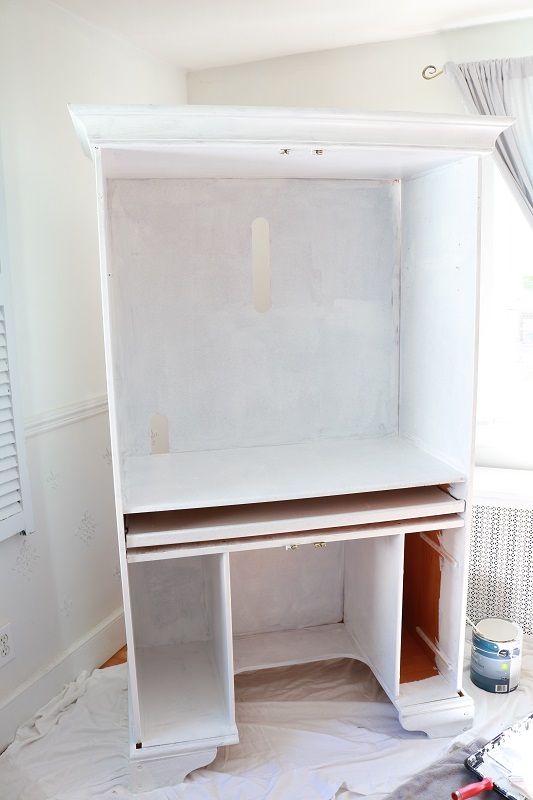
On the following day, I painted all pieces with a coat of Marilyn’s Dress by Benjamin Moore. It is a very light gray, which also matches the shutters on my dining room wall. I finished that coat by sealing it with POLYURETHANE.
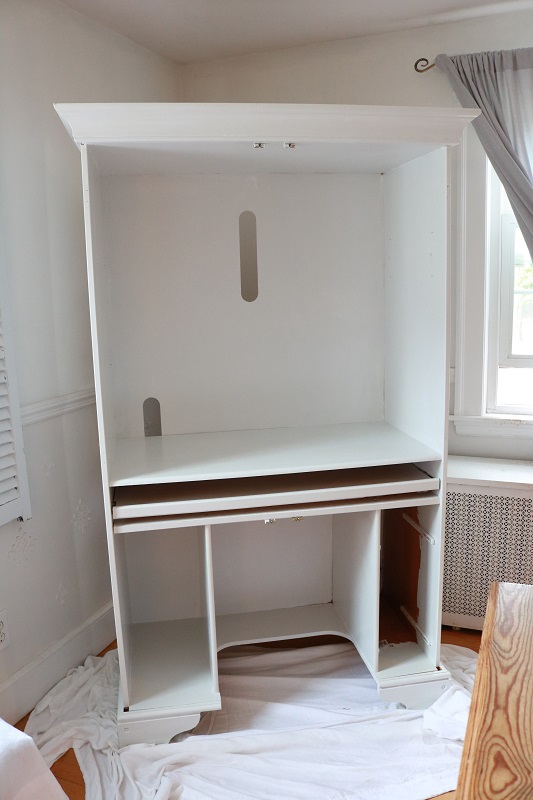
It is important to seal the working surfaces of a computer armoire since they will receive the most wear and tear.
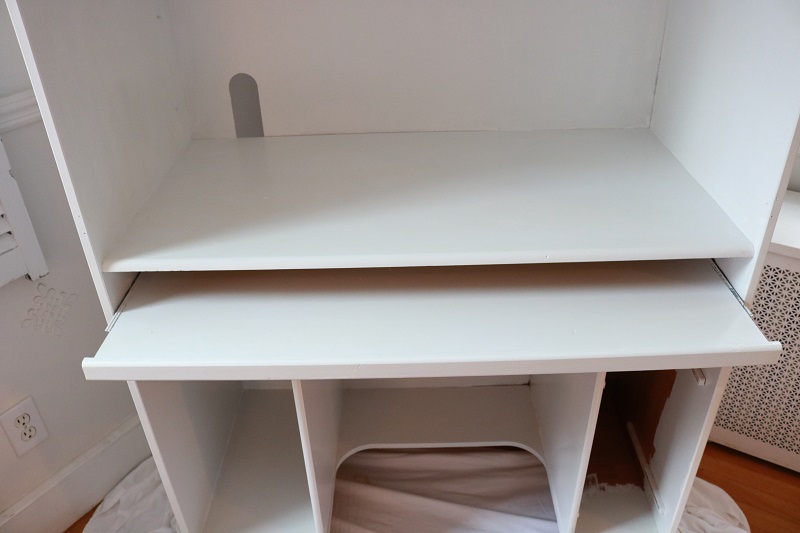
Upcycled Computer Armoire
After all the painted armoire pieces had fully dried, I re-installed the paneled doors, shelf, and drawers on the 3rd day. I love how the painted armoire easily blends in with my light dining room now. I didn’t want such a large piece to stand out (as it did with the orange stain).
Next came the best part…making my new blogging and crafting armoire functional! Now the piece is truly an upcycled computer cabinet with purpose.
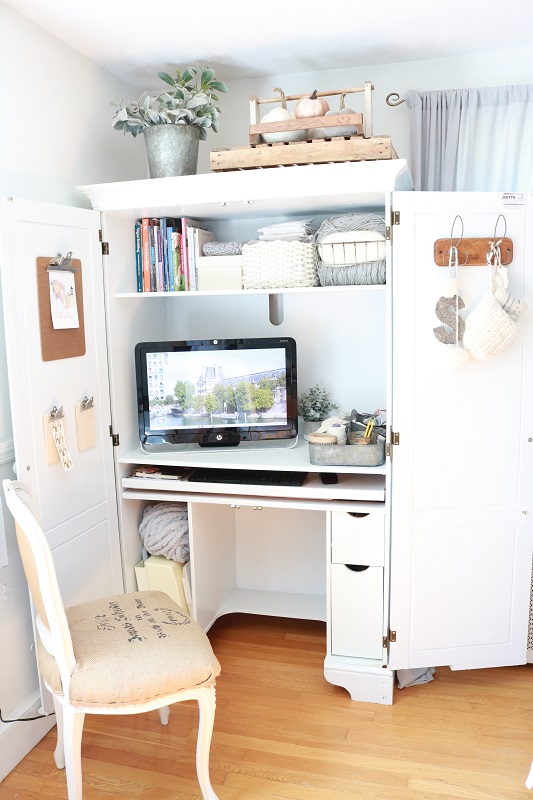
I was able to plug our computer in easily, since the back of the cabinet had openings for wires. I’m using the keyboard tray for my keyboard, mouse, and daily blogging calendar.
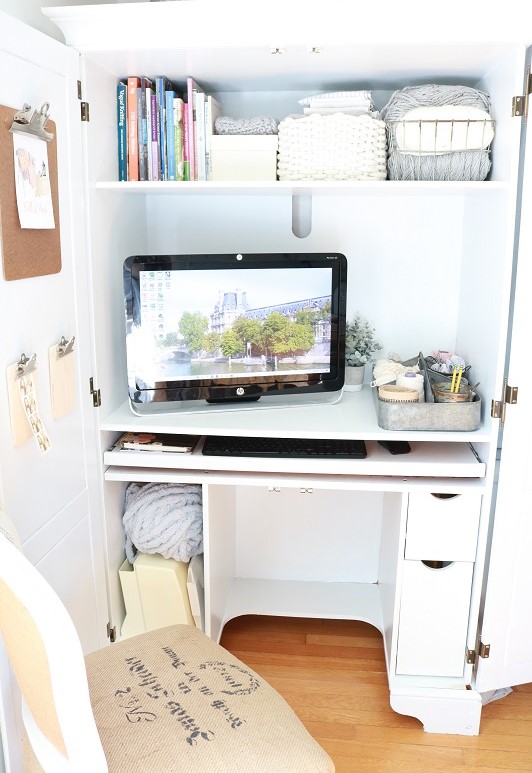
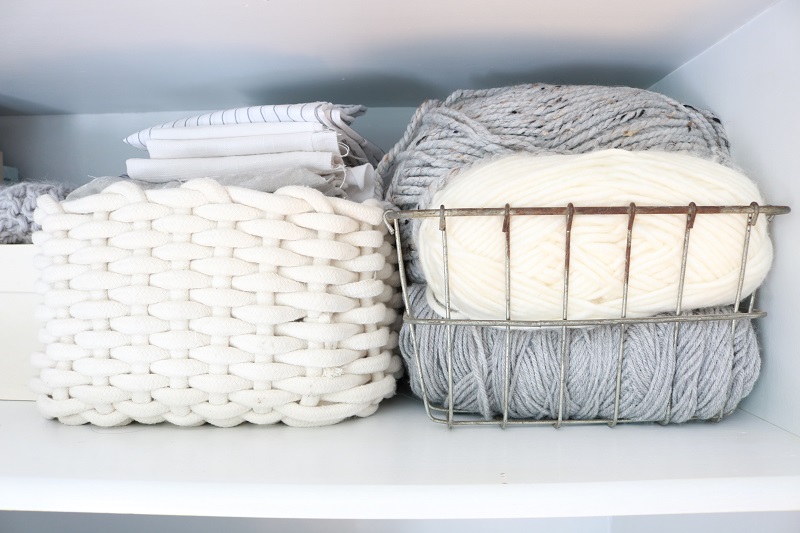
My sewing machine fits perfectly in the bottom left cubby and all of my craft books rest on the top shelf. Bins of craft supplies, camera supplies, and FAVORITE YARNS also fit on that shelf.
A galvanized cubby full of lightweight yarn, ribbons, and twine rests next to the computer. It is a handy spot to grab a pencil, too.
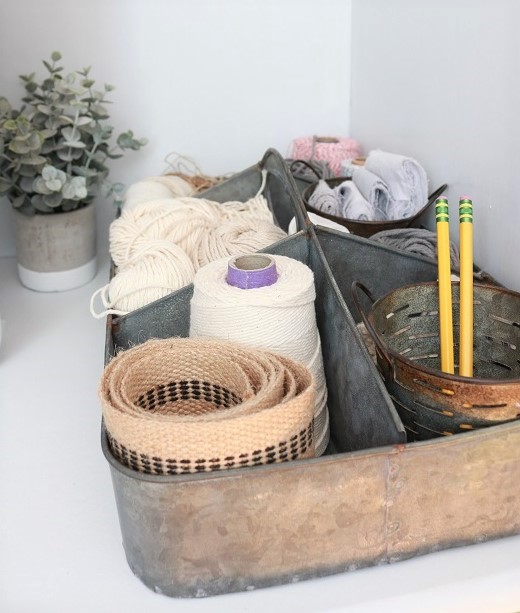
Find similar galvanized office caddies below: (just click on the photos)
Making the Computer Armoire Doors Functional
If you ever decide to restore a computer armoire as a home office space, I would also advise using the inside of the doors as functional space. It’s great for bonus storage!
I hung a cute PAIR OF HOOKS on the right door to hold craft projects in progress or anything to motivate ideas. That is also where I tucked in some LAVENDER SACHETS and sweet CROCHET TAGS to help make my work space soothing and inspirational.

I used the inside of the left door to hold clipboards, which I plan to use for blogging to-do lists and reminders. For now I am showcasing one of my FALL PRINTABLES there.

When I am finished working at the end of the day, I can simply close the doors to hide the mess. The paneled doors are my favorite part of the computer armoire!
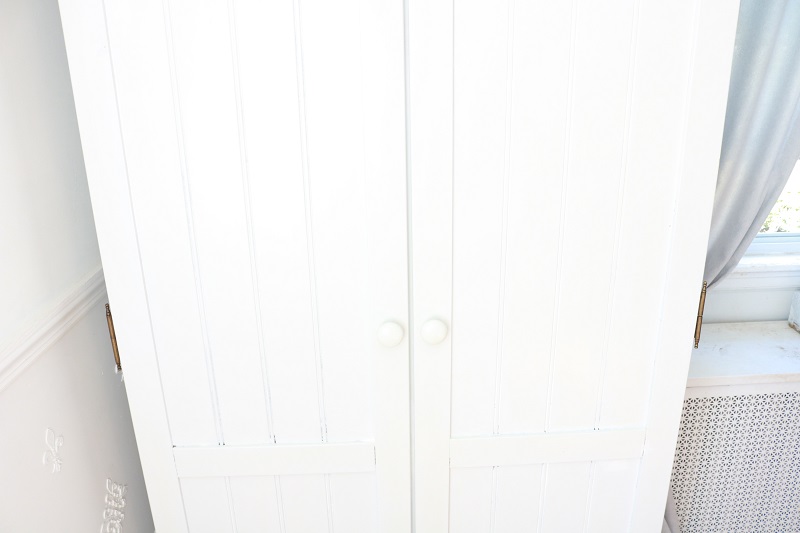
This fall I topped the cabinet with fabric pumpkins that blend with my upcycled DIY FABRIC PUMPKINS and HARVEST BASKET on the table. The large cabinet fits in well with the farmhouse style in this room.

Do you think you would give a project like this a try? Knowing how to repurpose a computer armoire is such a simple way to create an office space in a small home. Many of us do not have dedicated rooms for crafting or working, yet we can carve out a space in a dining room or living room for that purpose. The possibilities are always there, as long as we keep our minds and imagination open.
If you really enjoy crafting, you may also enjoy my (FREE) GUIDE of 12 Farmhouse Style Crafts!
Want to remember this idea? Post this restored computer armoire project to your favorite Pinterest board!


2 Comments
Joy
Love the armoire repurpose- perfect for down sizing craft/sewing storage
Susan
So glad you like it – yes, it’s a good solution to craft storage and working!