Upcycle Thrift Store Art with Paint Sticks and Trim!
Have you ever run across a framed art print at the thrift store that caught your eye, but the frame was totally not your style? Don’t walk away! I’m going to show you a trick to upcycle thrift store art with a new custom frame made from paint sticks or wood trim. I promise this project is super easy and cheap.
This post may contain affiliate links. That means if you click and buy, I may make a commission at no cost to you. Please see my full disclosure policy for more details.
Supplies
You’ll need the following supplies to upcycle your thrift store art with new frames:
- thrift store art
- pieces of wood trim long enough to frame the art (I used a 1.5″ by 1/4″ by 4′ maple piece) OR
- unused paint sticks for smaller art (free at the hardware store!)
- HAND SAW to cut wood pieces (or have them cut for you at the hardware store)
- sandpaper
- tape, twine, STAPLE GUN, FROG TAPE
How to Upcycle Thrift Store Art
Here are the steps you’ll need to take to completely transform a cast off piece of wall art:
Find Thrift Store Art
Your first step is to fall in love with a unique art piece at the thrift store. There are so many options there! Someone else’s trash is your treasure.
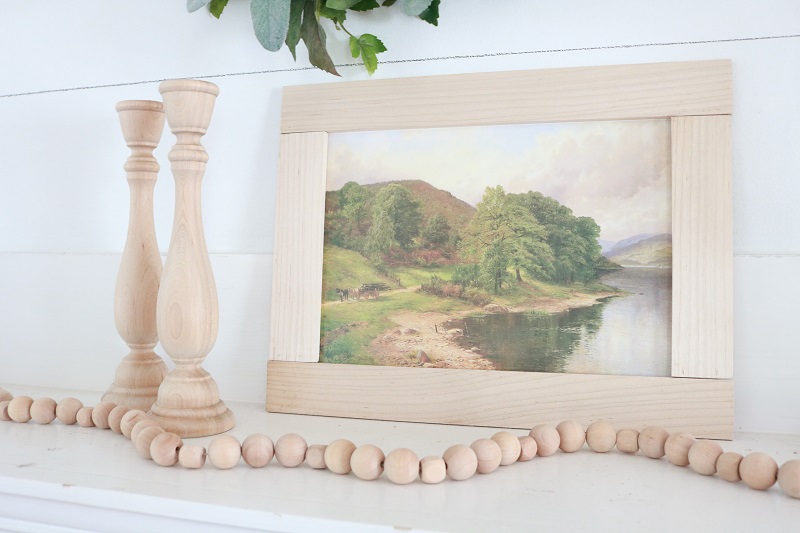
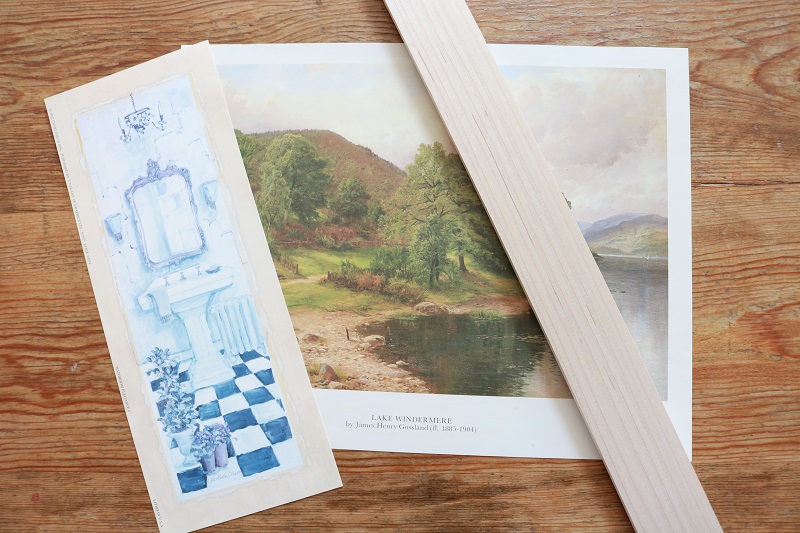
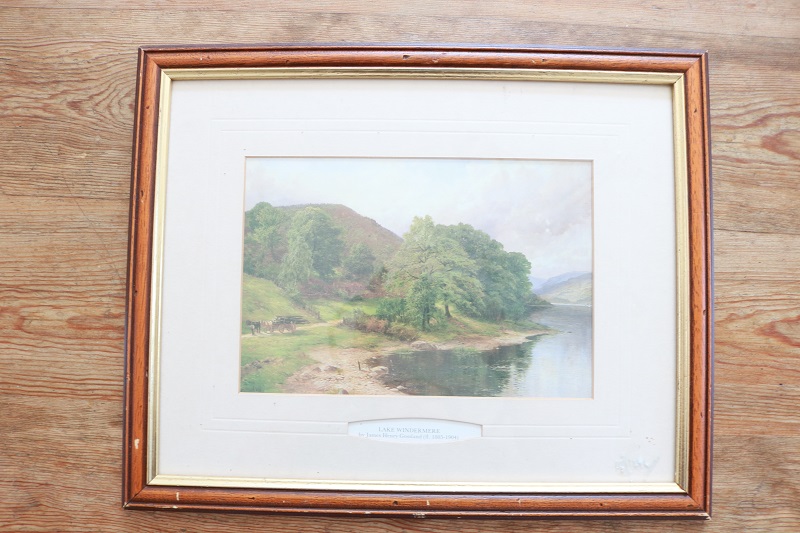
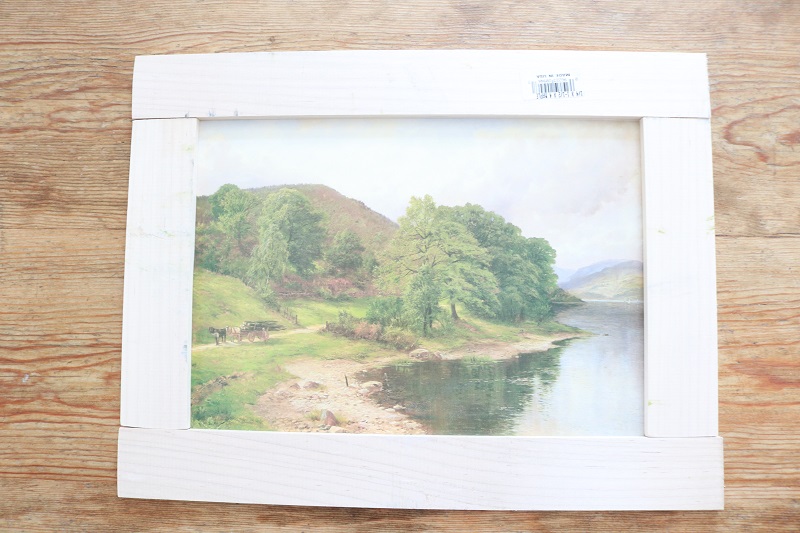
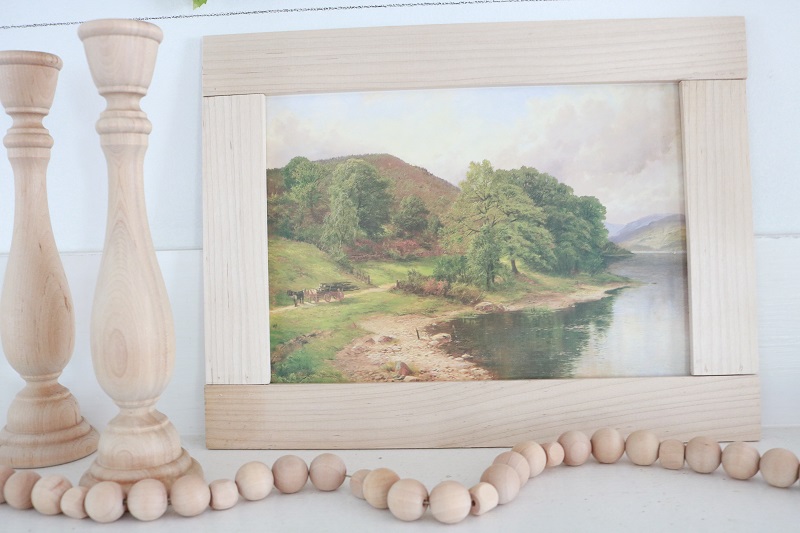
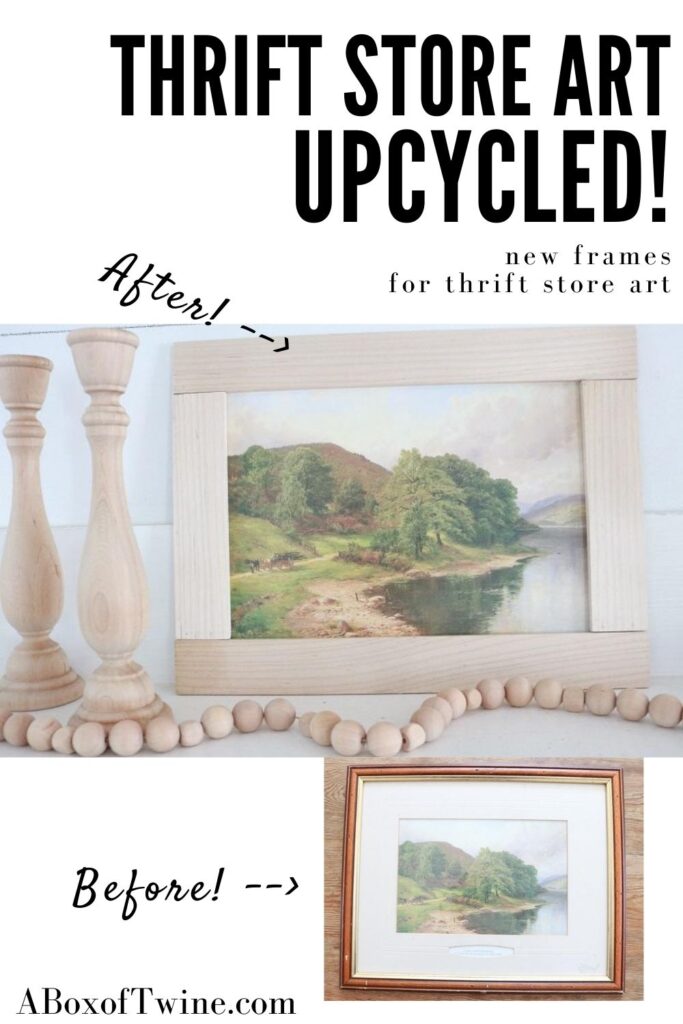
For instance, I found a lovely country scene not too long ago, but I really wasn’t crazy about the dark wood frame. I wanted a lighter wood look. I found some thin wood pieces at the hardware store that I knew could be cut to make a simple rustic frame.
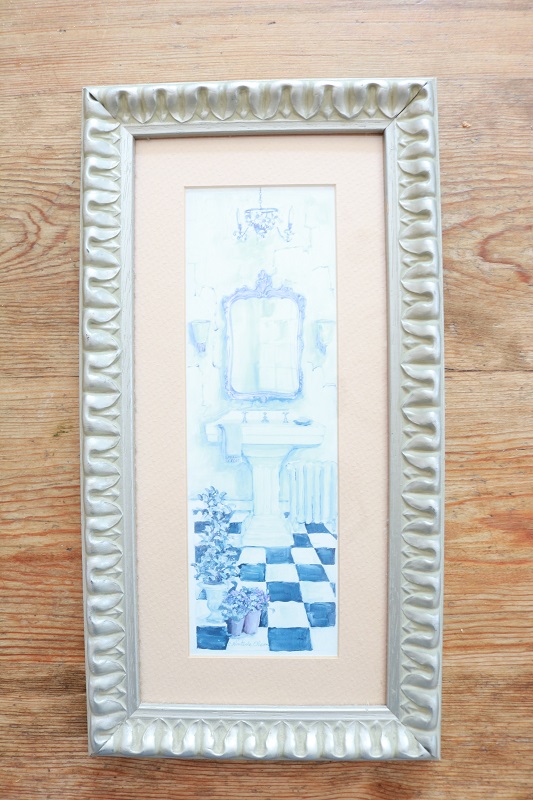
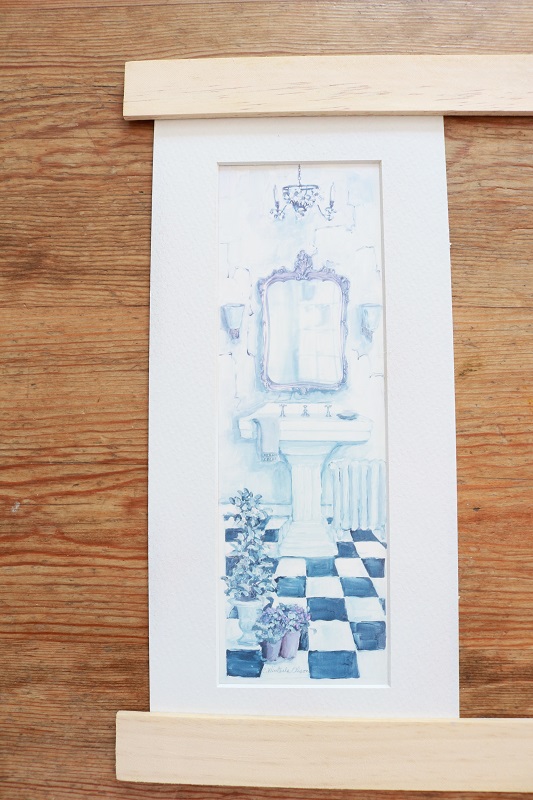
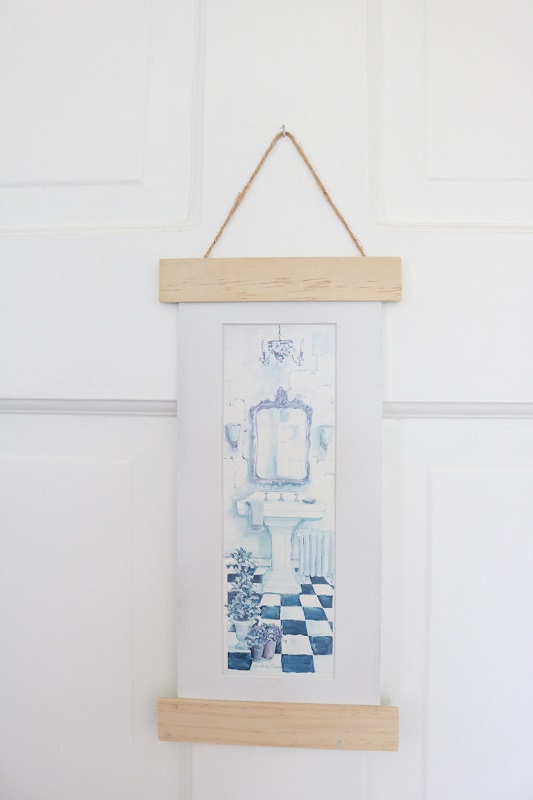
Also, I had this sweet bathroom print in our first floor powder room, but I wanted to update the frame a bit. Paint sticks came to the rescue! You know, the free paint stir sticks that you can grab in the paint section of the hardware store. They make fabulous lightweight art hangers!
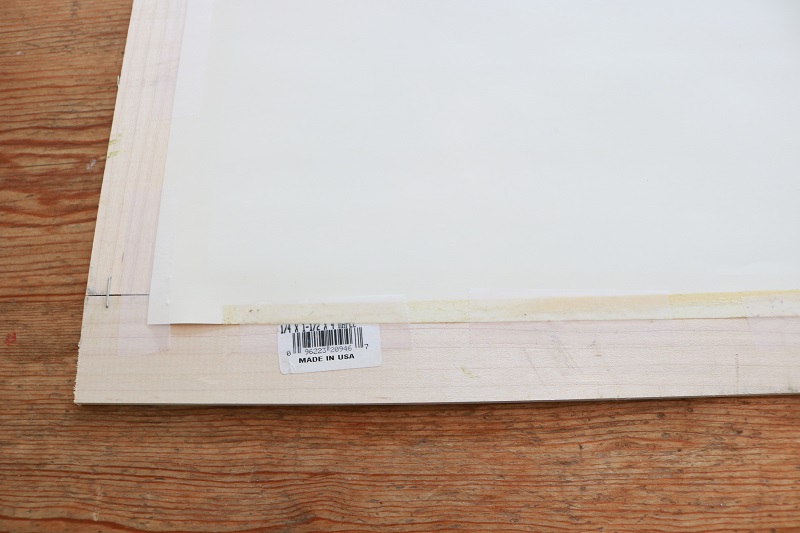
Measure and Cut Wood Trim
You’ll need to trim the 4′ length of wood into 4 pieces for your frame. For my larger framed country scene, I simply removed the print and matting from the frame and measured where I wanted to place the wood trim around the scene. I chose not to miter the corners, as I wanted a more rustic look and didn’t want to have to be precise with the angled cuts.
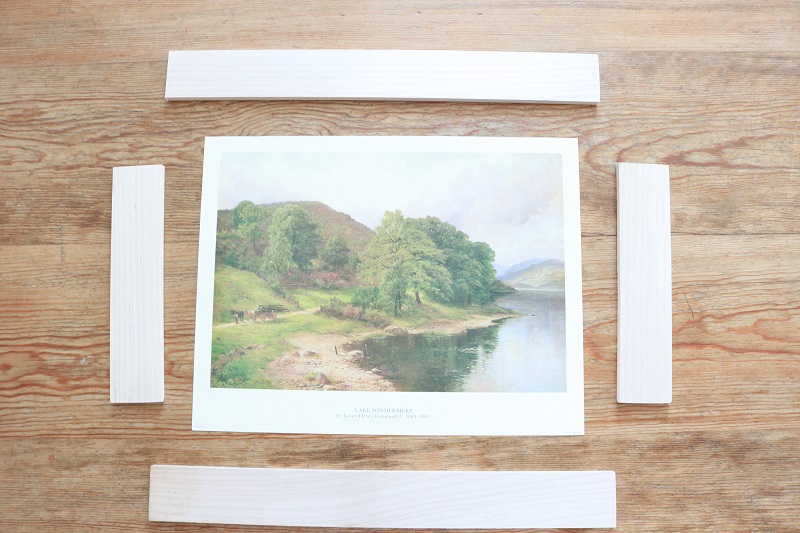
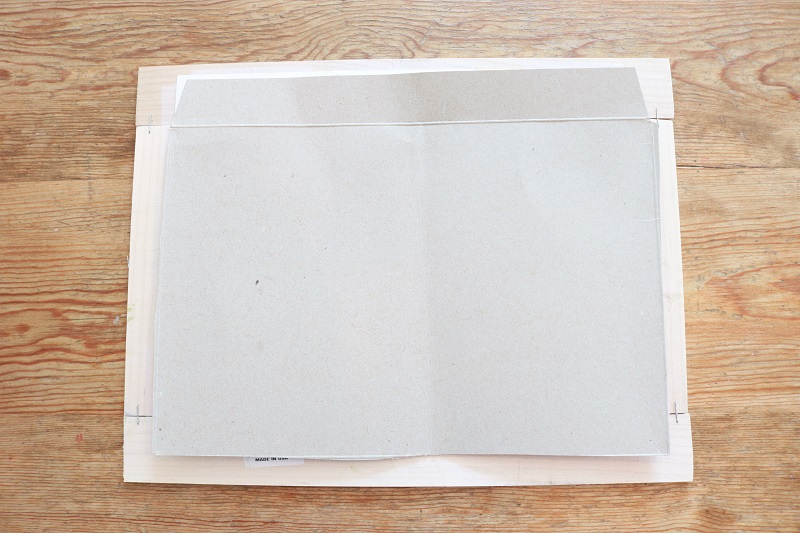
Here is how the pieces look placed loosely on the art print:
Measure and Cut Paint Sticks
If you’d rather use thin paint sticks for your wood frame, these work best with lightweight small art prints.
When I took my small bathroom print out of the original frame, I realized how narrow it was without the matting and frame. I decided to keep the matting, but paint it white.
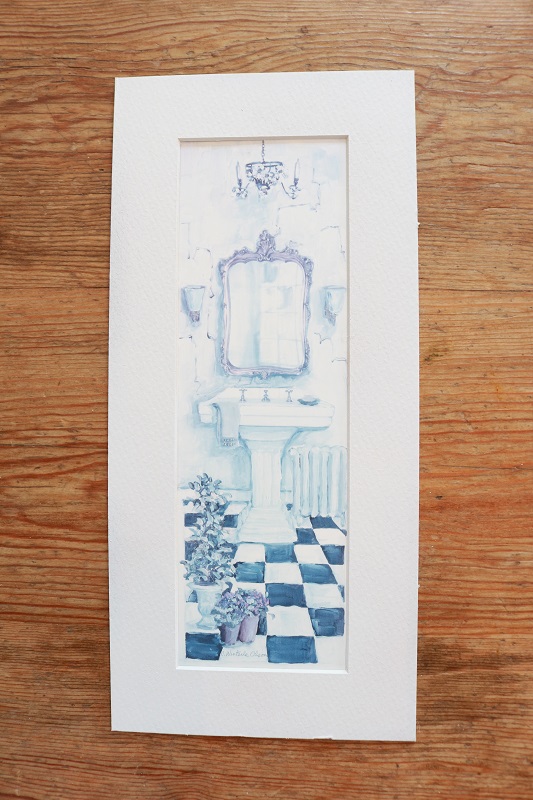
I also chose to hang this narrow art with two small wood pieces at the top and bottom, rather than a full frame. Paint sticks to the rescue!
I happened to have two unused paint stirring sticks from the hardware store to use for this project. They are lightweight and the perfect natural wood coloring. Thankfully, the sticks only have print on one side.
First, I aligned the paint sticks at the top and bottom of the bathroom print and decided how much overlap I wanted for the side edges. I decided on a 1/2″ overlap and trimmed the paint sticks to that length.
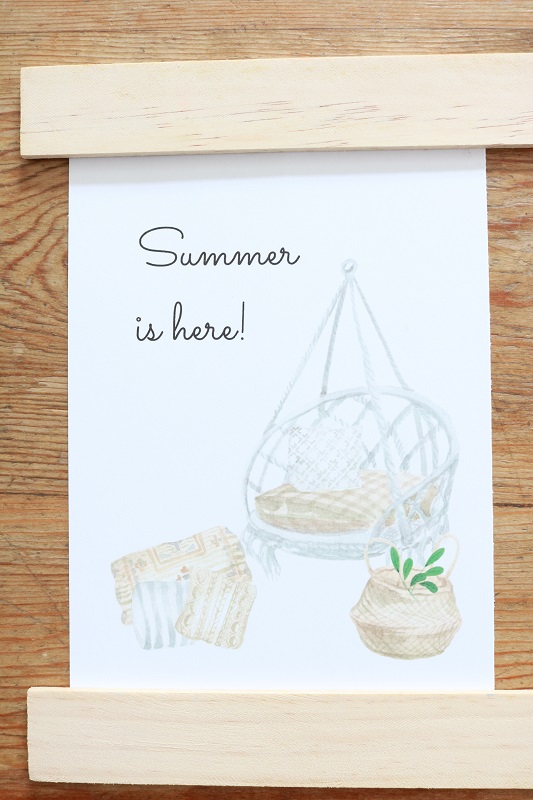
While I was experimenting with the placement of the paint sticks on this bathroom print, I also grabbed my Summer Wall Art printables to see how they would look with this wood, too. If only I had more paint sticks on hand!
Join wood trim pieces
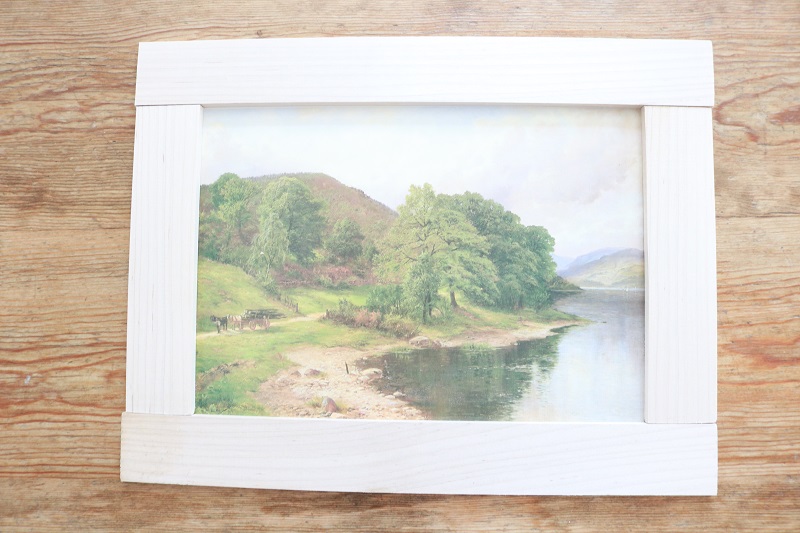
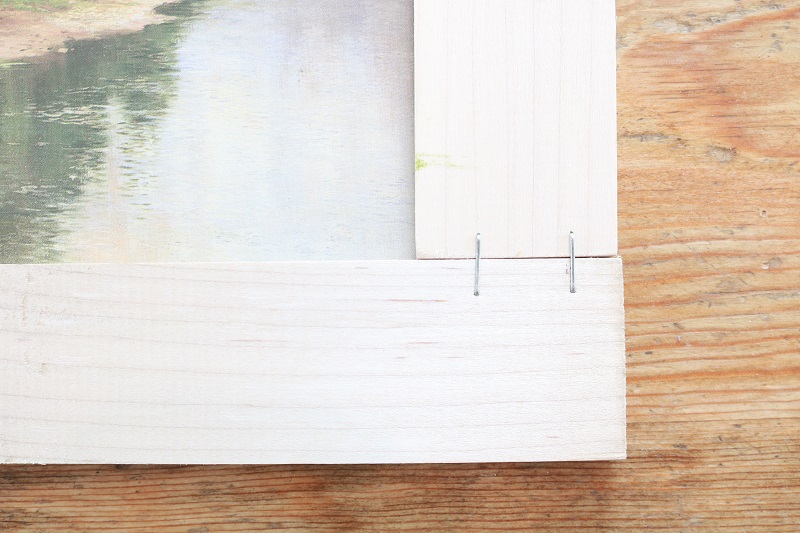
If you plan to make a full frame for a print, you will need to join the 4 wood trim pieces together. There is a quick and easy way to do that with this lightweight & thin trim. Staple them!
You’ll need to turn over your 4 wood pieces and align them with the print. The back sides of the frame will now be facing up:
Next, carefully staple the wood pieces together using a staple gun. Try to ensure your staples are not longer than the depth of your wood piece so they don’t pop through the front:
I didn’t need to staple my wood pieces for my bathroom print, since I wasn’t making a full frame.
Attach art print to frame
Lastly, you’ll need to attach the art print to your new frame of wood pieces.
For my country scene, I aligned the print at the back of the frame and simply taped it to the frame:
And because I planned to lean this art on my mantel, I also added a cardboard backing behind the print to make it more sturdy. You could use the original backing from your art print for this.
Finished! At this point you could also attach a picture hanger to the back if you plan to hang the art.
For my narrow bathroom art piece, I simply taped the art to the back of the two wood paint sticks I had trimmed, then taped twine for hanging. I used durable FROG TAPE to ensure the print would be stable.

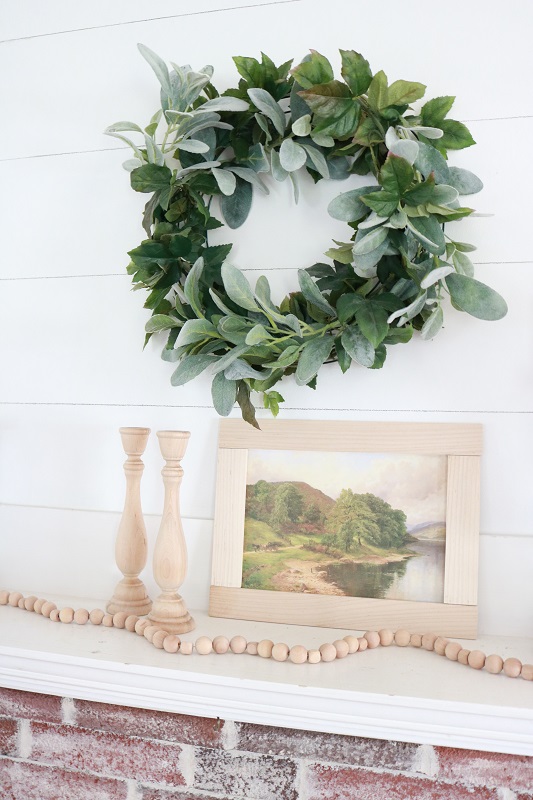
Voila! Updated wall art that didn’t cost me a dime…
Transformed Thrift Store Wall Art
Here you have it – the before and after photos of my art prints. I love their new look!
How would you transform a thrift store piece of art? I’d love to see!
Want to remember this idea? Post this upcycled thrift store art to your favorite Pinterest board!


2 Comments
Michelle
You clever…clever girl! Adore these! Off to the thrift store…….as always, thanks for the amazing inspiration i always find here.
Susan
Thank you Michelle! I know how much we both love thrift stores (wink). 🙂