How to Make Felt Dahlia Flowers
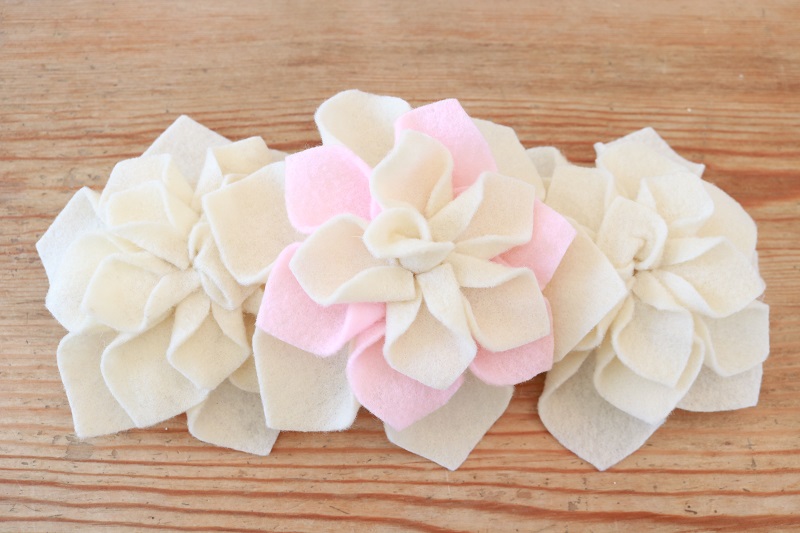
Dahlias are one of my favorite flowers – especially the gorgeous dinner plate Cafe au Lait. Those creamy pink colored variety are soft and subtle in their beauty. With Valentine’s Day on the horizon, I decided to create similar felt dahlia flowers to spruce up our home (and to also dream of spring). It didn’t take me long at all to put these flowers together, and I’m sharing the simple steps here with you.
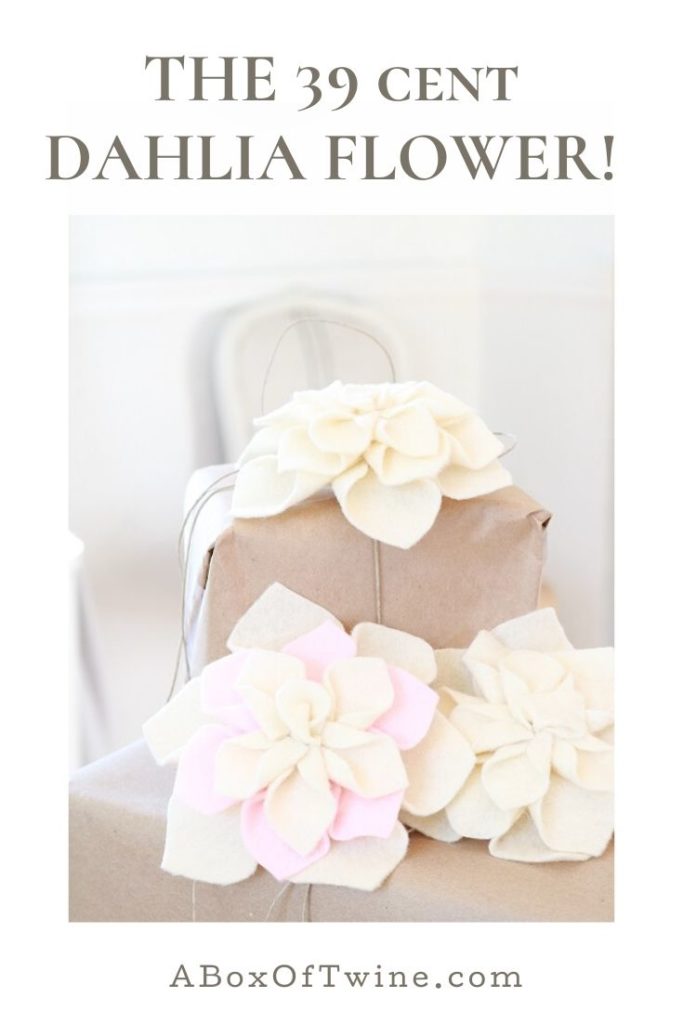
Another bonus of these felt dahlia flowers? It only costs 39 cents to make one! (assuming you already own a hot glue gun) Easy and affordable. Keep reading to get the supply list and simple steps…
This post may contain affiliate links. That means if you click and buy, I may make a commission at no cost to you. Please see my full disclosure policy for more details.
Supplies
- 9″ x 12″ sheet(s) of felt in your desired color scheme. I bought mine at Michael’s for only 39 cents per sheet! The colors I chose were Baby Pink and Antique White. You can find similar felt sheets on Amazon.
- I also found 3″ felt circles on Amazon that you could use for your flower base.
- poly-fill stuffing for the flower base (polyester fiberfill). This is optional, but will give your flowers more depth.
- hot glue gun and glue (hopefully you already own these, but they’re not expensive if not)
- fabric scissors, fabric pen (optional)
- template to cut out flower base and petals (see the bottom of this post on how to access the template)
Steps to Make Felt Dahlia Flowers
Cut flower base and petals
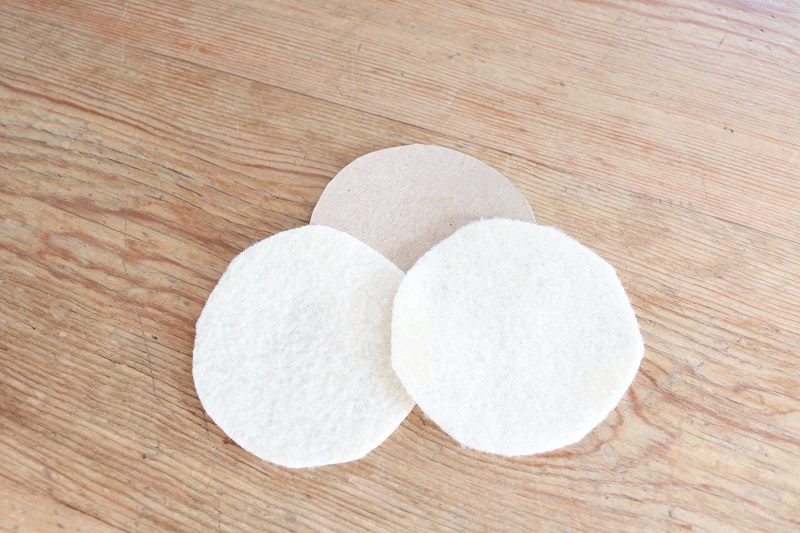
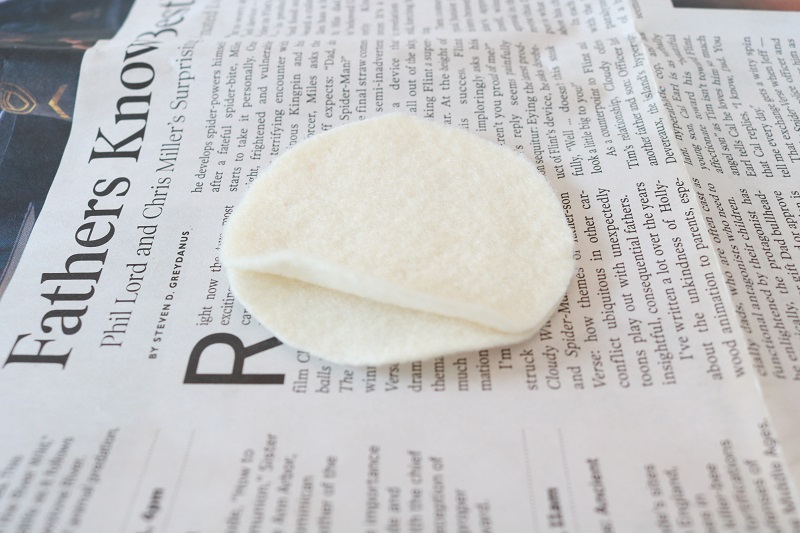
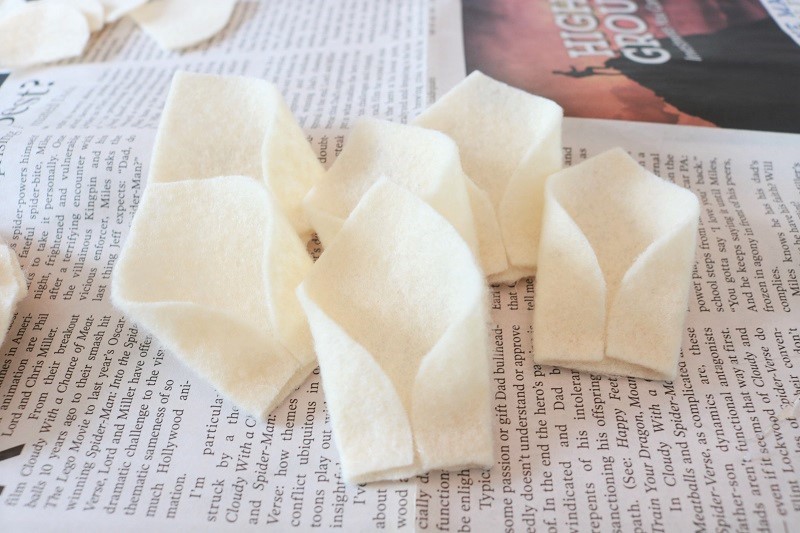
Using the 2.5″ circle template, cut out two circles from the sheet of felt. I copied the circle template onto cardboard, then used that to trace the circles onto felt with a fabric pen. The circles don’t have to be cut perfectly.
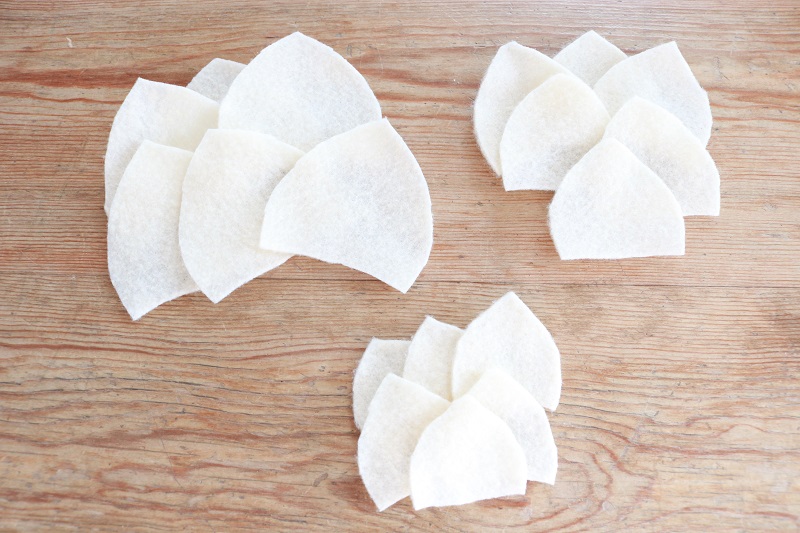
Using the petal templates, cut out 6 Large, 6 Medium, and 6 Small petals from the felt. (You will be folding your felt sheet to get 2 layers, then placing the half-petal template against the fold. This will ensure petal symmetry).
Assemble flower base
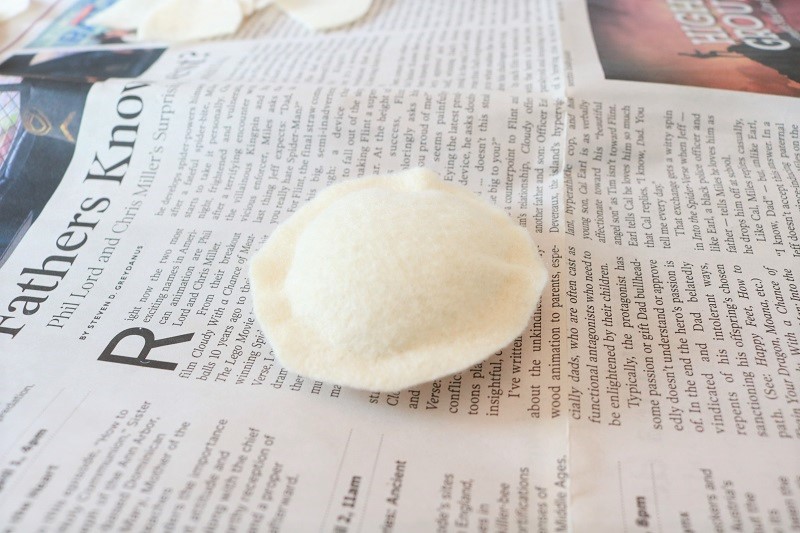
Next, place hot-glue along the outer edges of one of the felt circles, leaving a gap that is unglued. Place the other felt circle on top to secure together.
Tuck a bit of poly-fill into the gap to stuff the circle. This will be the base of your flower, and will give it some depth. Optionally, you could leave out the stuffing and just have a flat flower base.
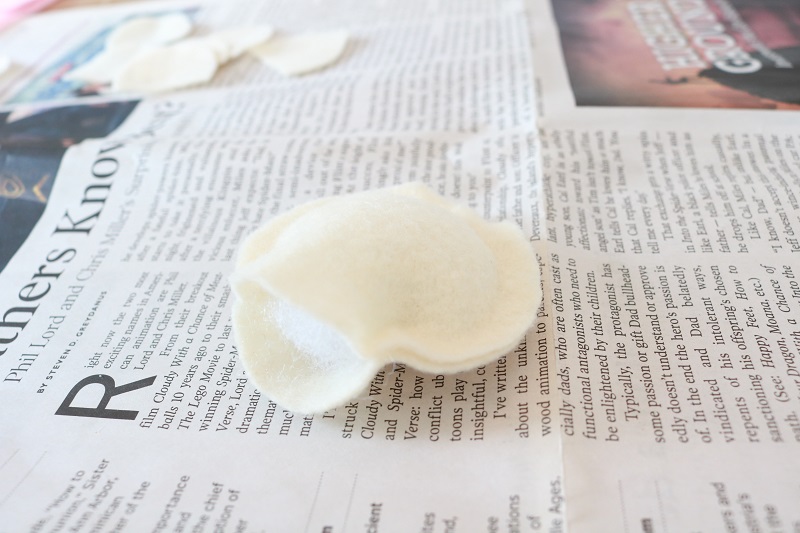
Apply hot glue to fasten the gap shut. (Before closing the gap, you could also insert a faux stem here if you want your flowers to gather in a vase).
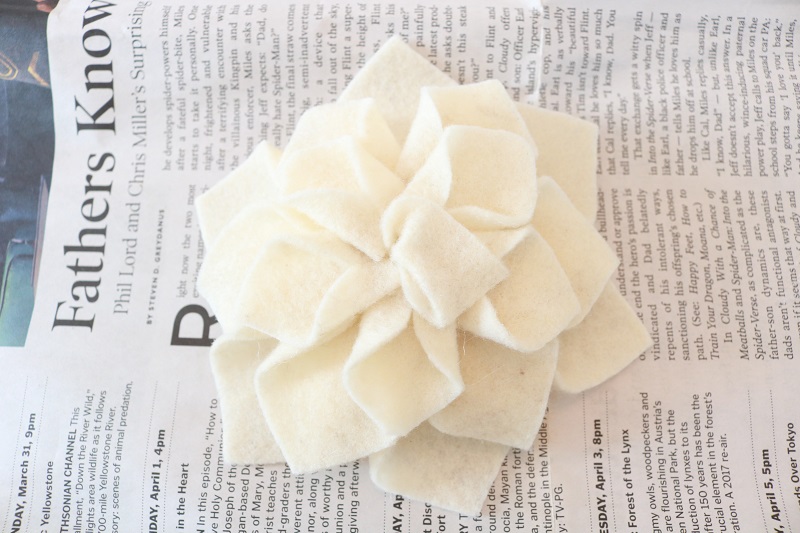
Attach petals to flower base
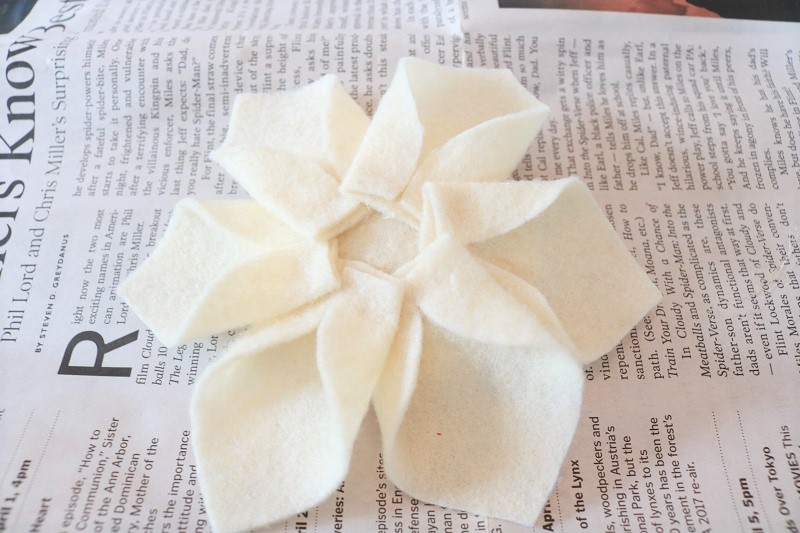
Bottom layer – Large petals:
Next, apply hot glue across the bottom of one of your large felt petals.
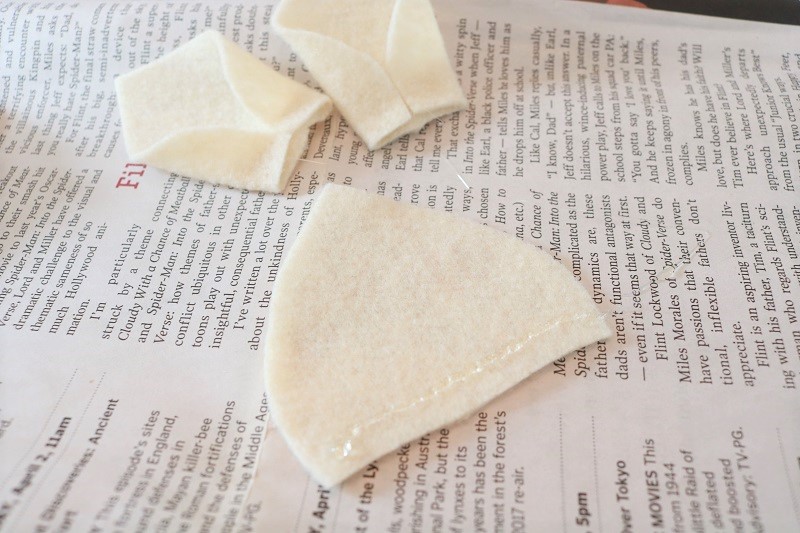
Fold each side of the petal inward to secure to the center. Repeat these steps for all petals.
Apply a small amount of hot glue to the back right bottom corner of a large petal, and attach it near the center of the flower base. (This is the only petal you’ll apply glue to half the back corner. You can apply glue across the back bottom of the rest of the 5 petals on this layer).
Working evenly around the base, continue to glue the remaining 5 large petals to the base. You will be overlapping the petals a bit, and tucking the last petal under the left half of the very first petal you attached. Glue this last petal under that left half. You’ll also want to leave a small opening in the center of the flower.
Middle layer – Medium petals:
Repeat the same steps for the Medium sized petals, placing them in between the large petals.
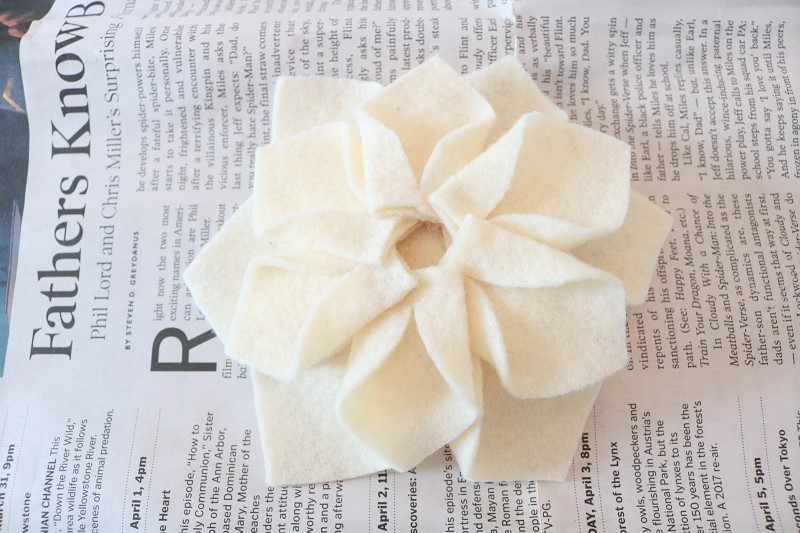
Top layer – Small petals:
You will follow the same steps for the top layer using just 5 of the small petals.
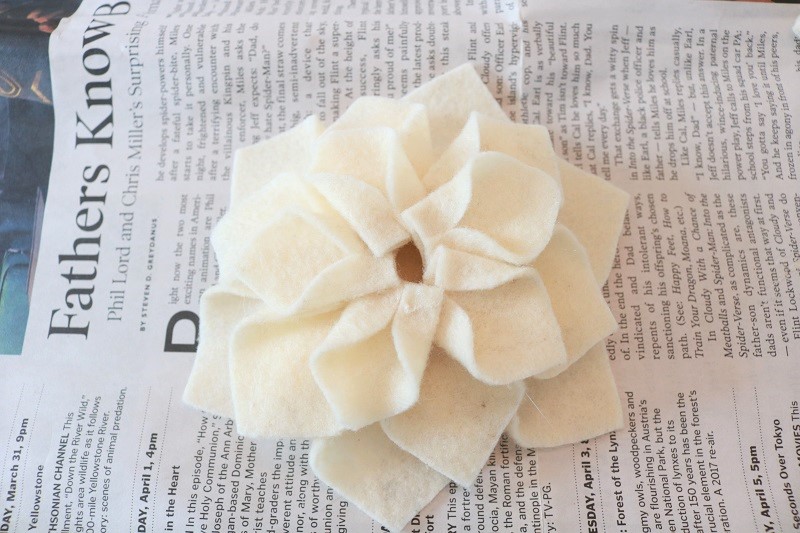
Lastly, dab some hot glue inside the center hole of the flower, and tuck the bottom of the last small petal inside.
Flatten out this center petal, and hot glue in place. Done!
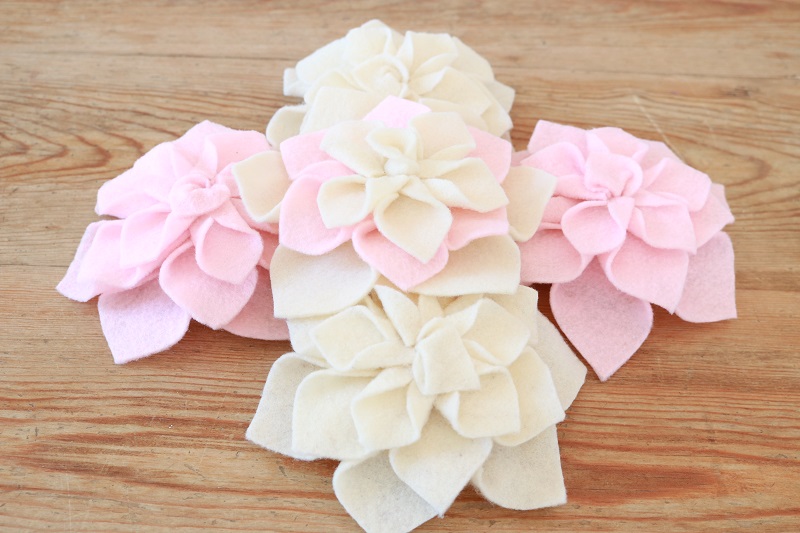
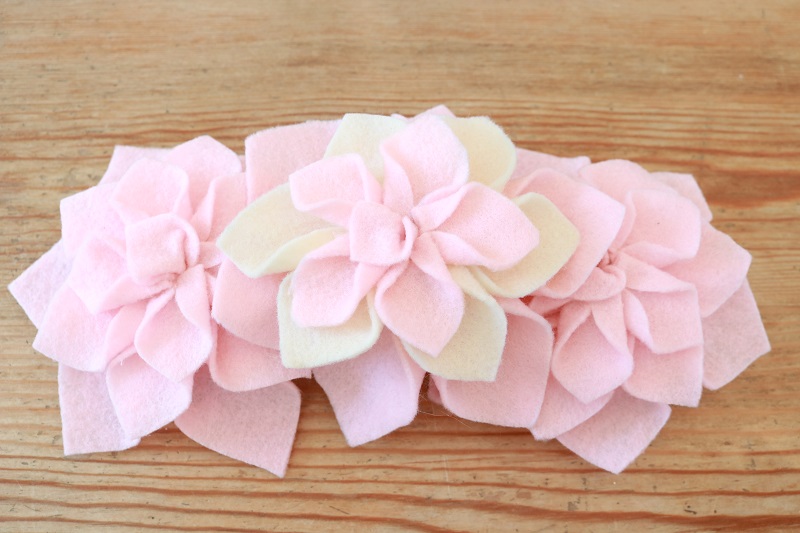
Showcase your dahlias!
After you’ve made a few of these pretty dahlia flowers, it’s time to show them off. They would look lovely grouped together. Notice how I chose to layer some of my flowers with both pink and cream petals:
You could also sew them together with twine or thread to make a garland.
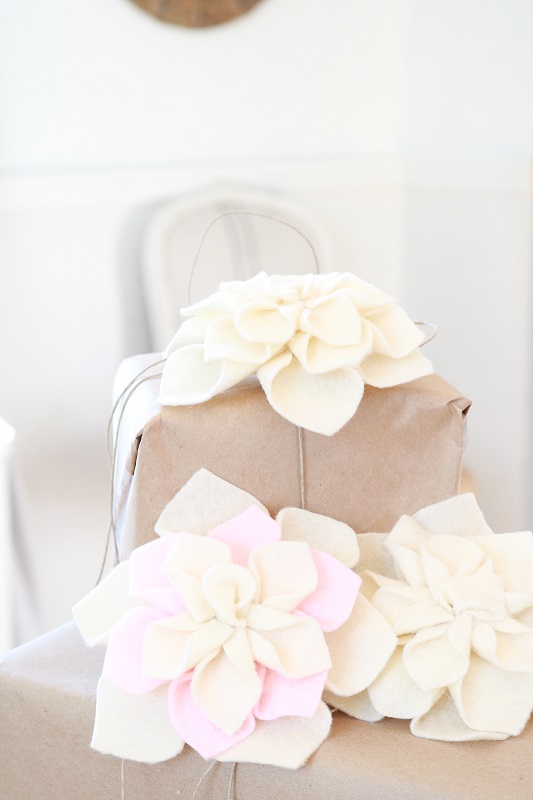
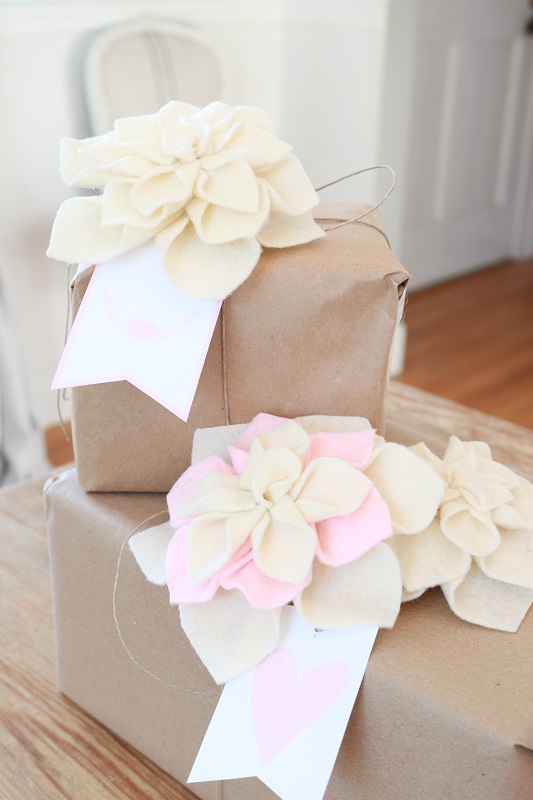
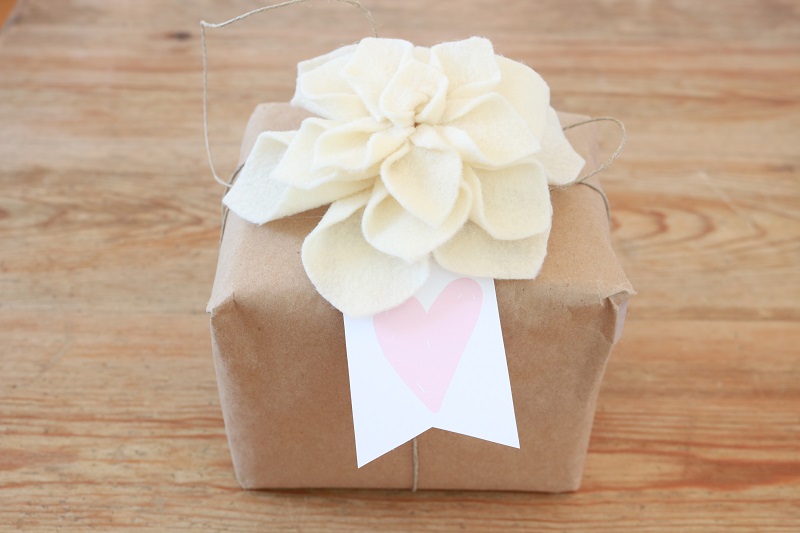
The flowers could top a special gift for someone…

Pair them with my Valentine gift tags for the holiday of love!
Gain access to the template for the felt dahlia flower base and petals by downloading below…
Want to remember this craft? Post these felt dahlia flowers to your favorite Pinterest board!


10 Comments
Theresa A Decker
love them
Susan
Thanks so much!
Carol anne grant
Thank you l will try my best to make something.🤞
Susan
Thanks for visiting – good luck with the flowers!
Julie Briones
These felt dahlia flowers are lovely, Susan! I could see these in so many colors, and maybe used as a garland swag over a baby girl’s crib! So glad your blog was introduced to me by Shabby Art Boutique… Congrats on your feature! We’d love to have you party with us at Tuesday Turn About… We close the party today at 12 midnight CST! Hope to see you each week! (Pinned to two boards!… I may even do these to accent my window pane for spring!)
Susan
Thanks Julie – I hope you give the flowers a try!
Kerryanne
I love making my own flowers for crafting Susan and these little felt dahlias are so sweet.
Thank you for sharing your tutorial at Create, Bake, Grow & Gather this week. I’m delighted to be featuring your felt dahlia flowers at tomorrow’s party and pinning too.
Hugs,
Kerryanne
Susan
Thank you Kerryanne! I always enjoy your link party.
Allyson
Your flowers are so pretty ~ Pinned and followed you. Thanks for the detailed tutorial. I’m visiting from Create Bake Grow Gather. If you need Valentine ideas, I shared abstract heart gift bags. Have a nice weekend!
Susan
Thanks so much Allyson! So glad to meet you via Kerryanne’s party. I’ll take a look at your bags. 🙂