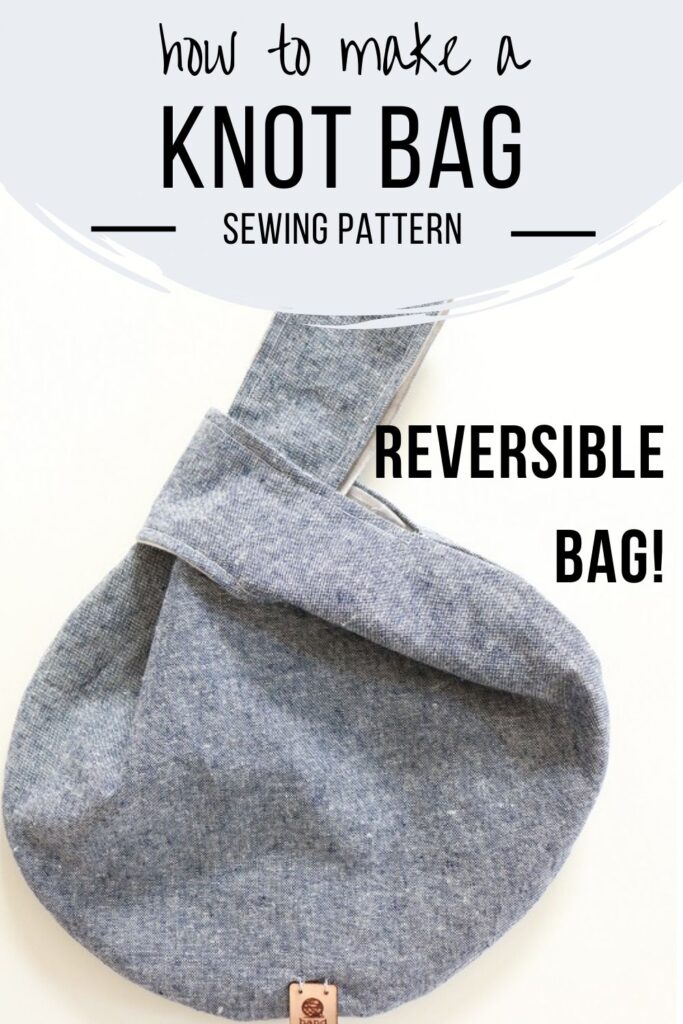
How to Make a Knot Bag
There are those days when you just want a quick bag to grab when you’re on the run. Spring and summer are perfect seasons for casual bags, especially a knot bag. Knot bags are so easy to bring along on any simple errands, considering how lightweight and transportable they are.
I’ve designed my own version of a small Japanese knot bag for you, with a farmhouse style look. You know I always love farmhouse style fabrics, so this version of a knot bag showcases that classic style. It is always fun to take a design and make it uniquely yours, don’t you agree? Never be afraid to put your own stamp on a craft. You will love the result!
This post may contain affiliate links. That means if you click and buy, I may make a commission at no cost to you. Please see my full disclosure policy for more details.
Japanese Knot Bag Tutorial
What is a Japanese knot bag?
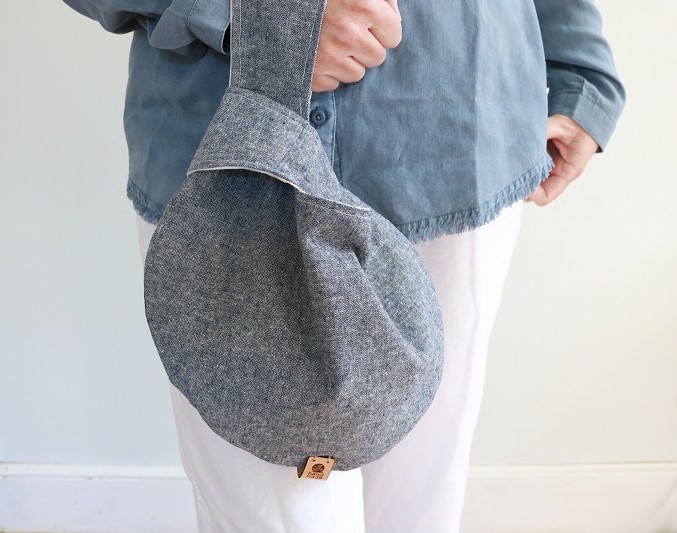
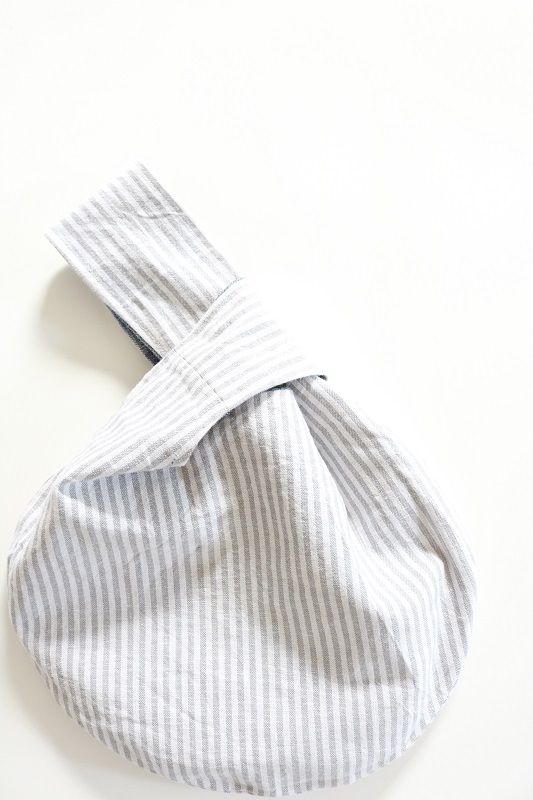
Have you heard of a Japanese knot bag? The design refers to the simple way the handles are held, like a knot. The two bag handles are different sizes. The longer bag handle fits through the shorter handle, making the bag easy to hold and close. The result is the closure appears like a knot:
The Japanese Knot Bag pattern I designed will result in a small sized bag, perfect for carrying crafts supplies (like small skeins of yarn) or essentials for a quick trip downtown.
Here is what you will need to make your own reversible knot bag:
Skills Needed
- Basic machine sewing skills
- Hand sewing
Supplies
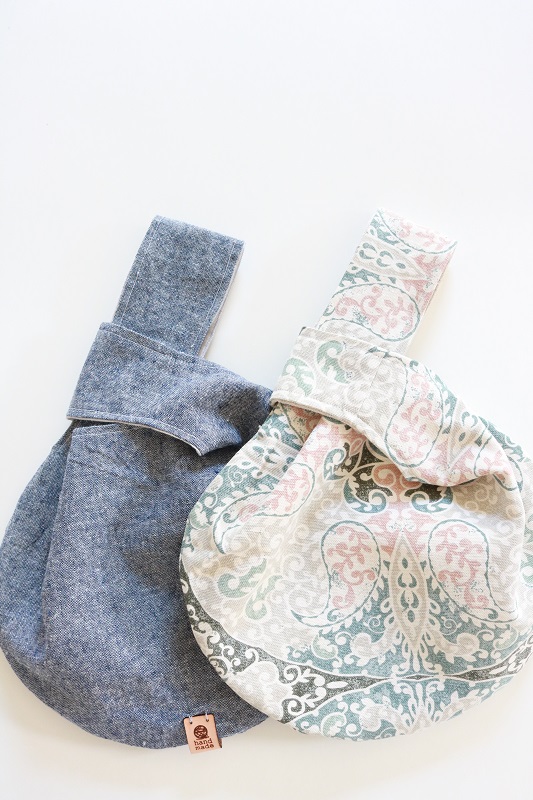
- ½ yard of fabric (from same bolt or ½ yd each of two contrasting fabrics). It is best to use a sturdy weight cotton or linen fabric. I used Robert Kaufman Essex Yarn Dyed Linen Blend in Denim Blue and TICKING STRIPE in color STEEL)
- Sewing machine
- Coordinating thread
- Fabric marker
- Iron
- Bag template (available for email subscribers)
- Optional: small leather ‘handmade’ tag to embellish your bag with, sewing needle and thread
PATTERN INFORMATION
How to sew a knot bag
The first step to take is to access the knot bag template.
You can download the template below:
Cut Fabric
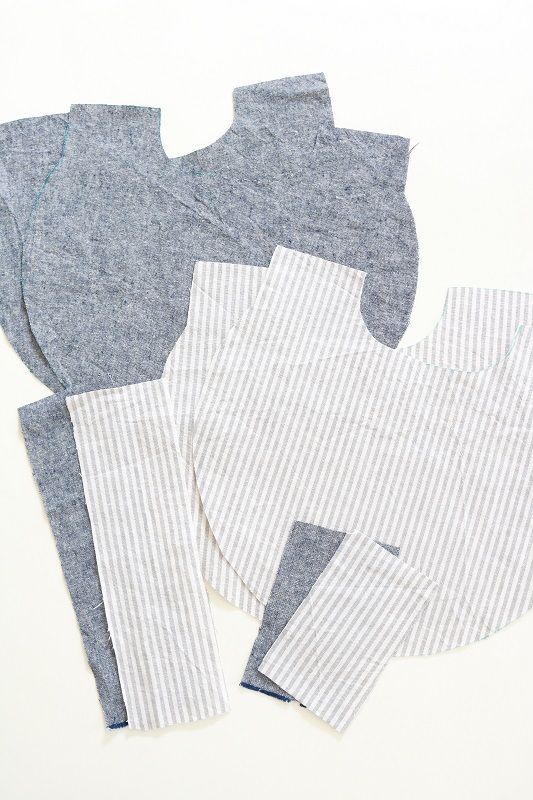
Print the bag template on paper, then cut it out. The template represents half of the bag.
Fold your fabric in half, Right sides together and place on a surface. Pin together.
Place the template on top of your fabric, with the dashed line aligned with the fold.
Trace around the pattern with a fabric marker on the Wrong side of the fabric.
Cut out one bag piece along the traced lines, through both layers of fabric.
Repeat the above steps to cut out three more bag pieces. Two pieces will be for your outer fabric, and two pieces will be for your lining. (Use a complimentary fabric here for two of the pieces if you would like a reversible bag).
For the long strap, simply cut two pieces of fabric 10” long by 3” wide (use your two different fabrics for the optional reversible look).
For the shorter strap, cut two pieces of fabric 5” long by 3” wide. (use your two different fabrics for the optional reversible look).
Sew each bag piece
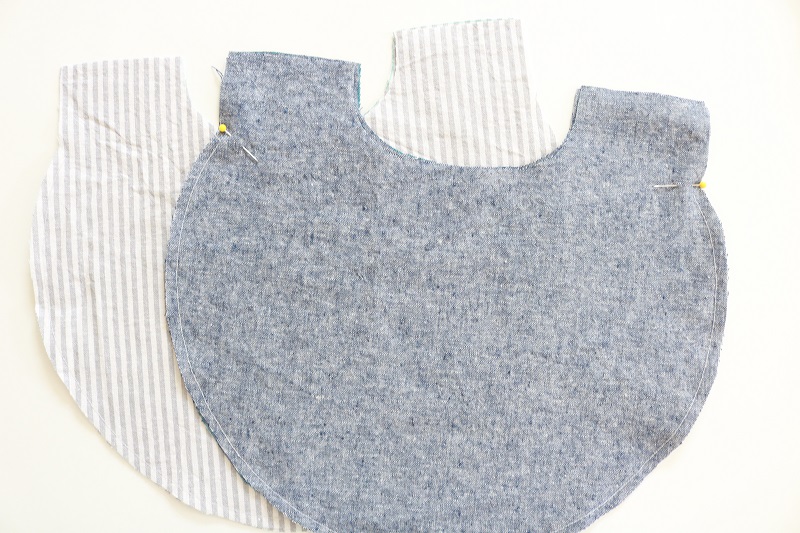
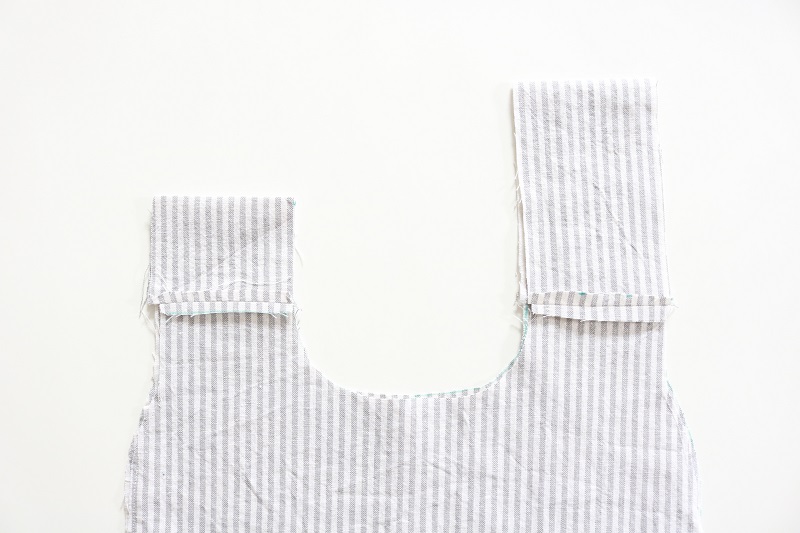
Pin the two pieces of your lining bag pieces Right sides together. (I chose the ticking stripe as the lining fabric for my reversible bag).
Beginning at the top of the outer curve (not the strap parts), sew a ¼” seam along the sides and bottom of the bag lining, ending at the top of the other side’s curve. Do not sew along the top strap parts, just the curve of the bag.
Repeat the same steps above for your outer bag pieces, Right sides together.
Using small scissors, clip along the curves of the sewn bag pieces.
Sew straps onto each bag piece
Now it is time to add the short and long straps to the 3” wide top strap parts on each bag piece.
For the lining, pin the 3” ends of the short and long lining straps to the top strap part of each side of the lining bag piece, Right sides together.
Sew a ¼” seam to join the straps to each side of the lining bag piece.
Press the ¼” seams flat to the Wrong side with an iron.
For the outer fabric, pin the 3” ends of the short and long outer fabric straps to the top strap part of each side of the outer fabric bag piece, Right sides together.
Sew a ¼” seam to join the straps to each side of the outer fabric bag piece.
Press the ¼” seams flat to the Wrong side with an iron.
Sew bag pieces together
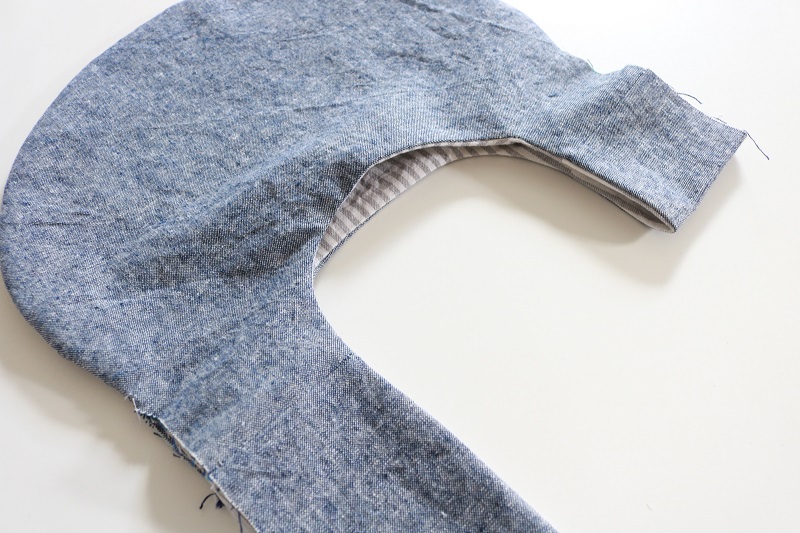
Turn the sewn lining bag piece Right side out and press seams with iron.
Tuck the lining piece inside the sewn outer bag piece (which is still Right sides together). Align the straps, being sure to align the short strap pieces together and the long strap pieces together.
Pin the lining bag piece to the outer fabric bag piece, all along the inside ‘U’ curve of the two pieces.
Sew a ¼” seam all along the inner ‘U’ curves of the bag and the inner sides of the straps.
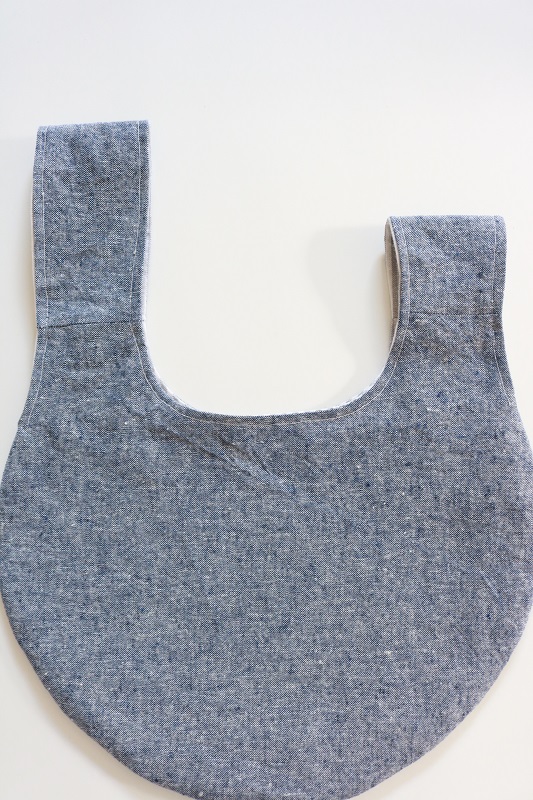
Using an opening in the outer edge of the straps, turn entire bag Right side out by pulling out the lining piece.
Tuck the lining piece inside the outer fabric piece.
Press seams flat.
Sew outer edges of straps and top-stitch top of bag
Lastly, tuck the outer edges of the straps under ¼” and press.
Sew ¼” top stitch all around the outer edges of the straps, as well as the inner edges of the straps and the inner ‘U’ curves of the bag.
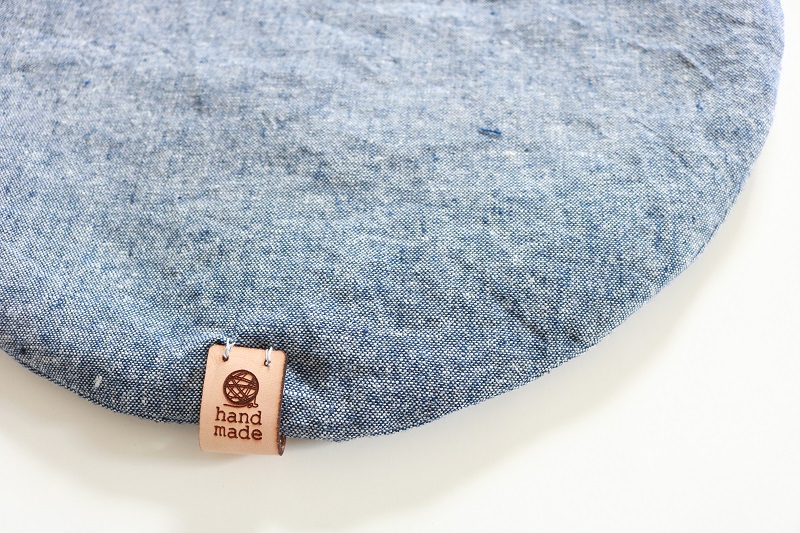
Optional – add a handmade tag
Hand sew a ‘HANDMADE’ LEATHER TAG to the bottom of your bag to give it a unique touch.
Tip: if you plan to use the bag as reversible, try to stitch the leather tag to the outer layer of the fabric only. That way you won’t see the stitching when you turn the bag inside out to reverse the look.
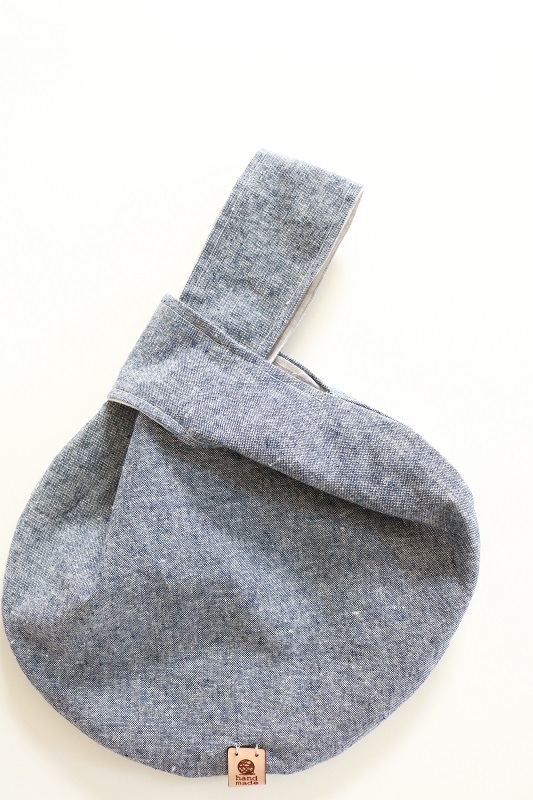
You are done! The finished bag measures approximately 11.5” wide by 8” length (without straps). The straps measure about 5” and 2” length from the bag.
Showcase your Knot Bag
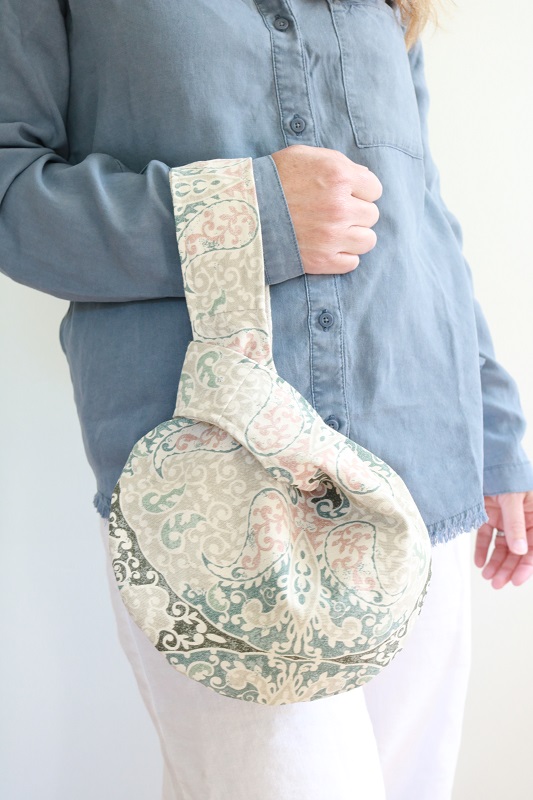
How do you carry a knot bag?
Now that you have finished your small Japanese knot bag, it is time to try it out. This is the fun part…
Just tuck the longer strap of your bag through the shorter strap and wrap this around your wrist. You are good to go!
The items inside your knot bag shouldn’t fall out since the bag gets ‘closed’ by this technique. The straps form a ‘knot’ to hold things in.
The bag is reversible, too, so you can turn it inside out to have the lining on the outside:

The bag is both functional and super cute!
I couldn’t stop at making one, so here is another version of the knot bag with a pretty patterned print on the outside:
Now that you know how to make a Japanese knot bag, how would you customize your own? Perhaps use a completely different fabric for the long strap? Add a pocket? The sky is the limit – unleash your creativity!
Looking for more bag or purse ideas? Check out THESE SEWING PATTERNS FOR BAGS or THESE CROCHET PATTERNS FOR BAGS.
===> Remember to PIN for later! <===


2 Comments
Violeta
Your bag turned out so cute and I’m absolutely loving your tutorial! In fact, I loved it so much that I featured it on Crafts on Display, a growing community of fellow crafting enthusiasts. You can check it out right here – https://craftsondisplay.com/sewing/diy-knot-bag-tutorial-35582/ I hope you enjoy it, and please keep up the amazing work!
Susan
Terrific! I’m glad you like the pattern.