How to Make a Faux Topiary
Spring is coming, friends! It’s just around the corner….well, maybe in your neighborhood. I’ll probably have to wait 2 more months for decent weather, but that won’t stop me from dreaming of all things greenery & floral. Speaking of greenery, I adore topiaries. There’s something so refined and yet rustic about them. Topiaries remind me of vintage French garden rooms and glorious greenhouses.
All that being said, I do not have a green thumb. Wish I did, but there it is. So what’s a girl who loves topiaries to do? Make a faux topiary! The trick is to make one that looks realistic and doesn’t scream FAUX. That can be a difficult challenge. But here at A Box of Twine, I’m always up for a craft challenge. Join me in making your own pair of faux topiaries. Follow the steps below and get your faux green thumb on!
(And if you love this craft, be sure to check out more DIY ideas on the blog!)
This post may contain affiliate links. That means if you click and buy, I may make a commission at no cost to you. Please see my full disclosure policy for more details.
Supplies
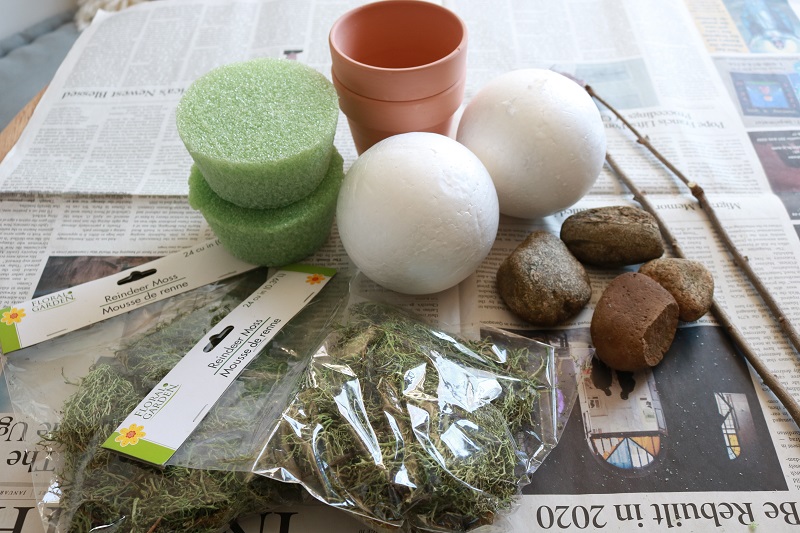
For this project, you’ll need to gather the following supplies to make a pair of topiaries. I found most of my supplies at the Dollar Tree store, but below you’ll find similar product links to Amazon.
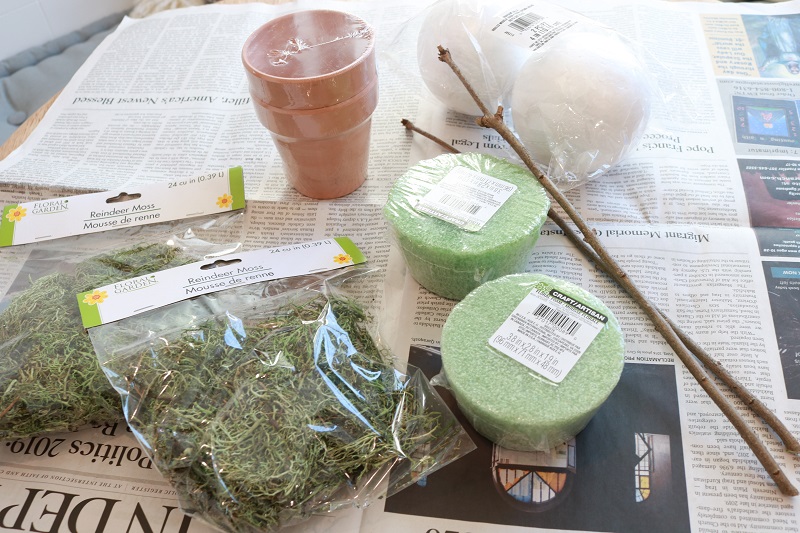
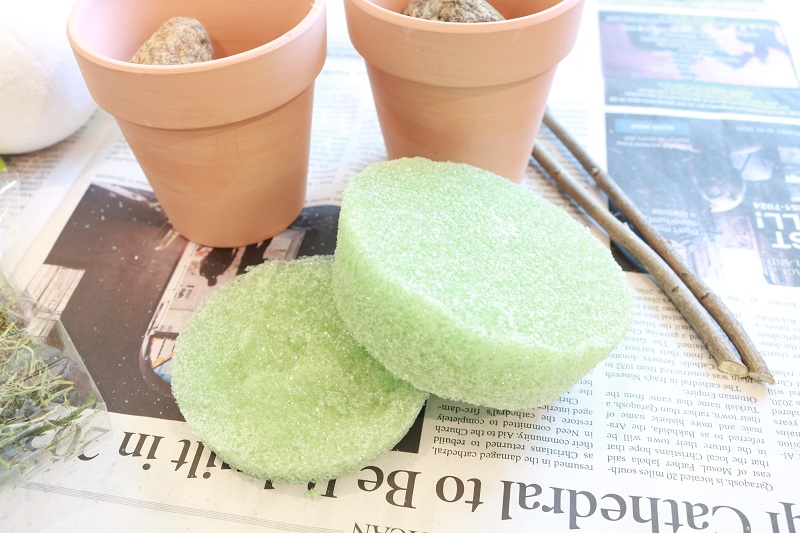
- pair of clay pots (mine were the small size with 3.5″ diameter)
- 2 small floral foam pieces (I got 3.8″ by 2.8″ by 1.9″, but they’re too big)
- a pair of styrofoam balls, 4″ diameter
- 2 bags of Reindeer Moss, 24 cu in.
- handful of Spanish moss
- 2 sticks from the yard, approx. 12-15″ long each
- handful of pebbles or rocks from the yard
- hot glue gun & glue sticks, pen/pencil or screwdriver
Steps to make topiaries
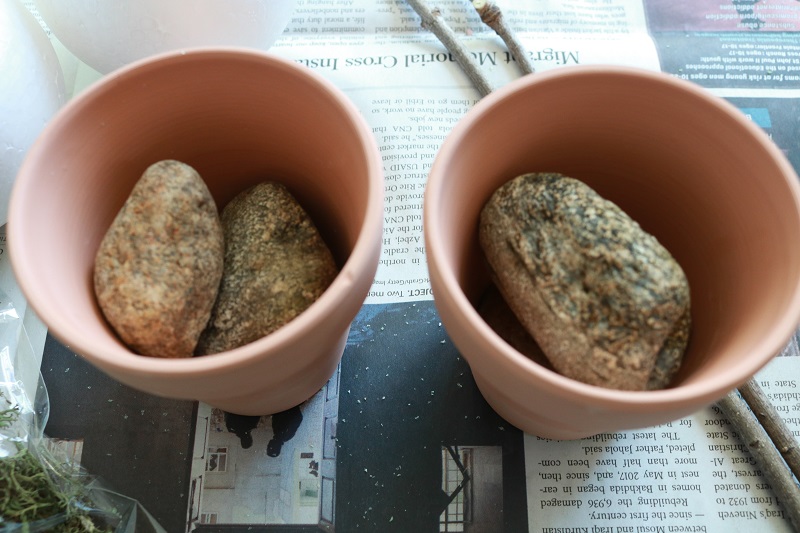
First you’ll want to put rocks or pebbles inside your clay pot. This will help anchor the pot and keep it from toppling over with the weight of the ball.
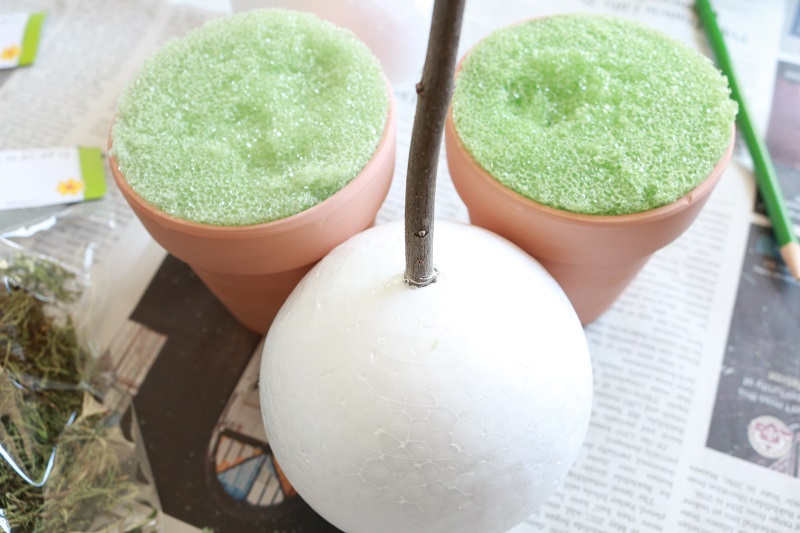
Next, you’ll need to place the floral foam piece inside the pot. Since my clay pots were pretty small, I had to trim my floral foam piece to fit inside. I used a serrated knife to do this:
Secure the floral foam inside the pot with hot glue so that it stays put. Allow time for glue to dry.

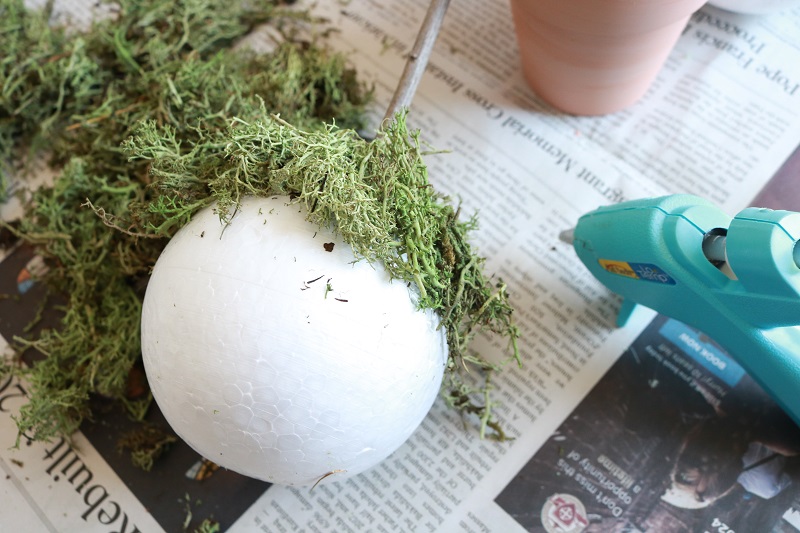
Meanwhile, make a hole in the styrofoam ball using a sharp pen, pencil or screwdriver. Insert one end of the stick into this hole and secure with hot glue.
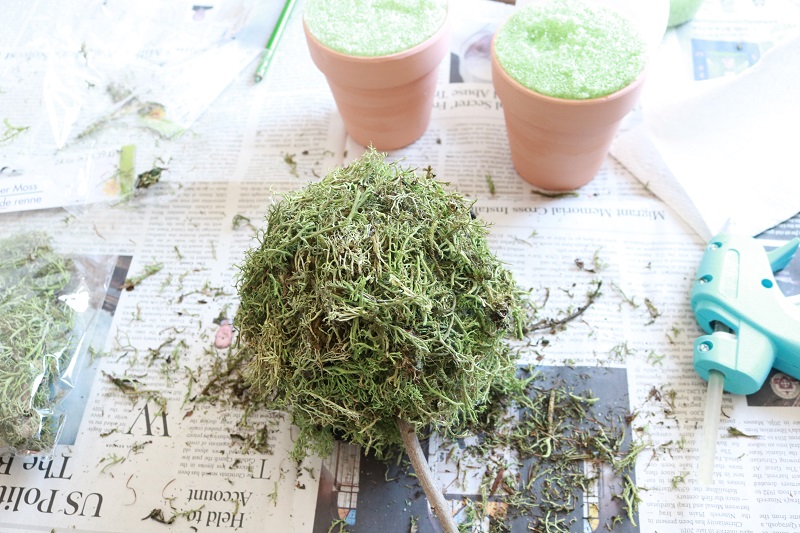
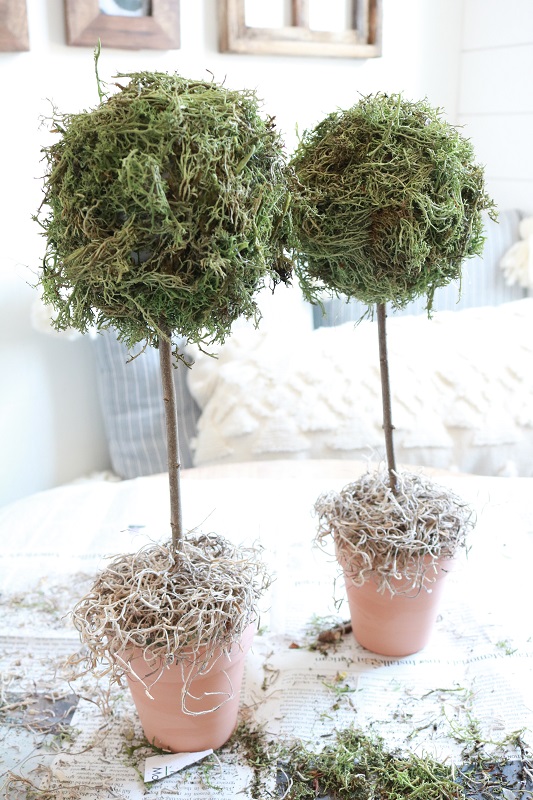
Apply hot glue on the ball in sections, and wrap Reindeer Moss on it to secure (be careful not to burn your fingers – apply the moss gently!). As you apply the moss, try to give it a ‘wilder’ look versus a neat patted down look. This will help keep the faux topiary feeling realistic.
When you’re finished, allow time for glue to dry.
Make another hole in the center of the floral foam using the pen/pencil or screwdriver. Trim your stick to the desired length if necessary (you don’t want the faux topiary too tall so that it topples over). Next, gently insert the bottom end of your stick into this hole and secure with hot glue.

Lastly, cover the top of the floral foam piece with Spanish moss (or more Reindeer Moss if you prefer), securing with hot glue.
Done!
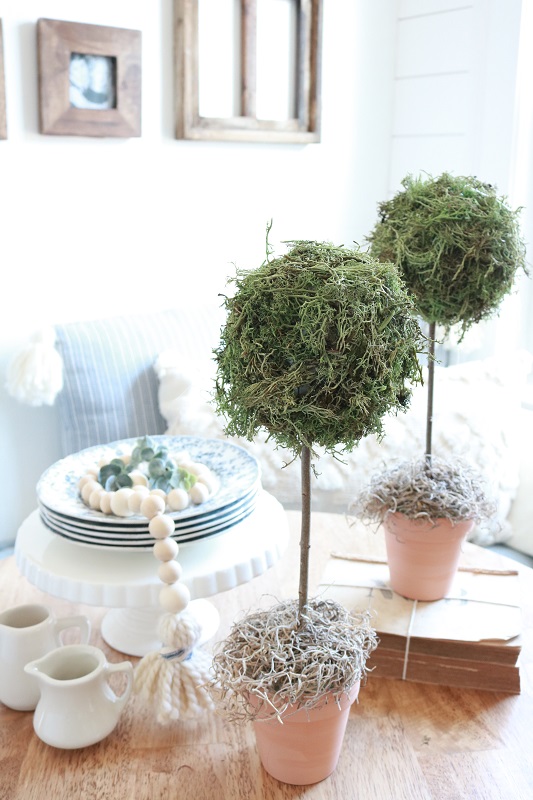
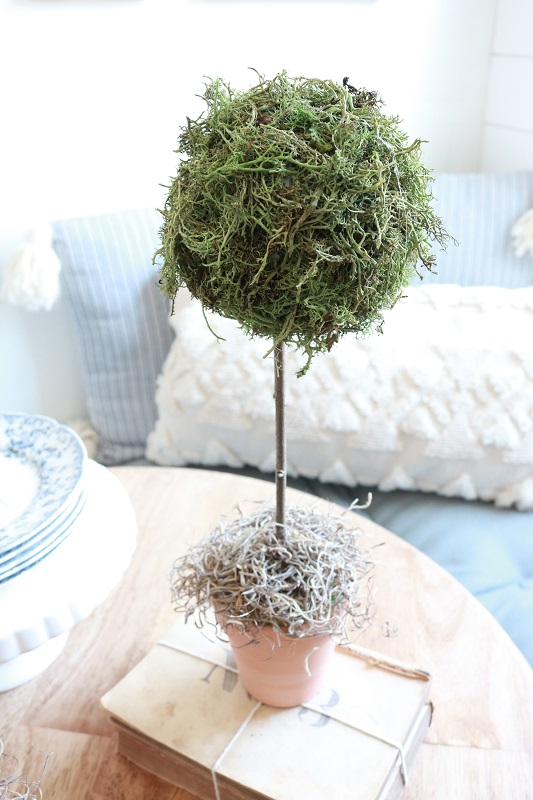
Faux Topiary on Display
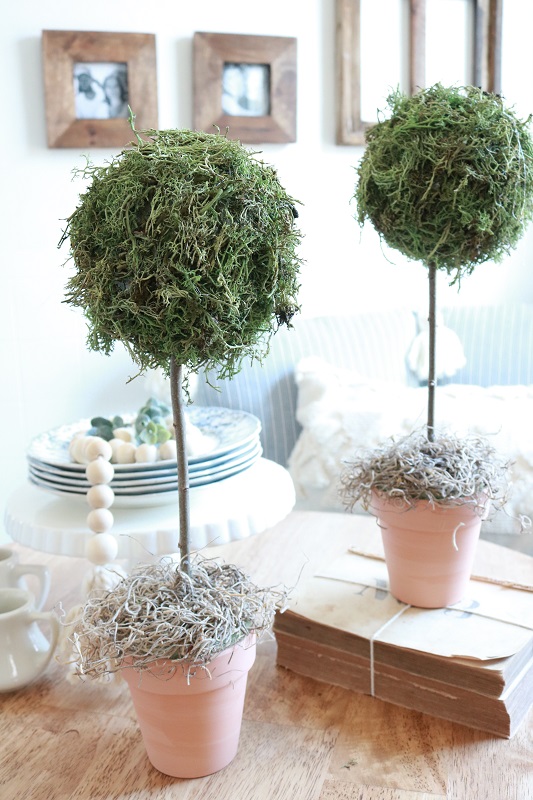
You’re ready to showcase these faux topiaries for spring! I placed mine in our modern farmhouse kitchen, along with other farmhouse style accessories.
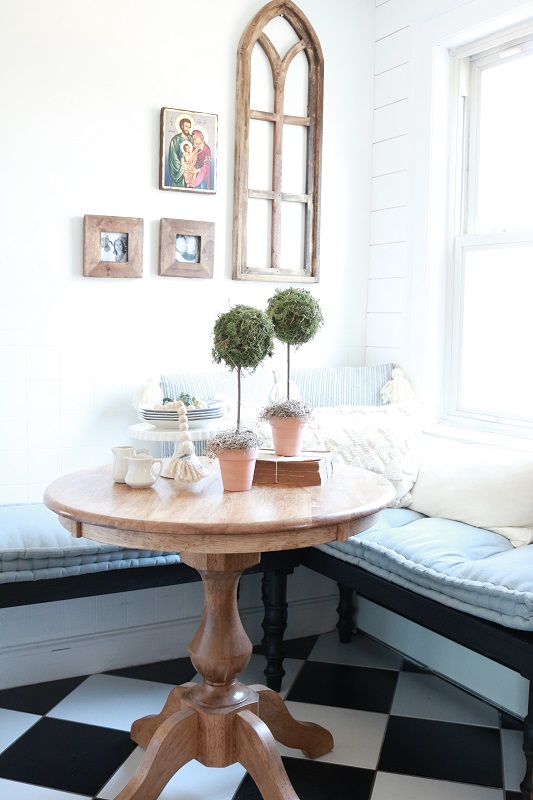
One faux topiary was placed on vintage books to give it a bit of height.
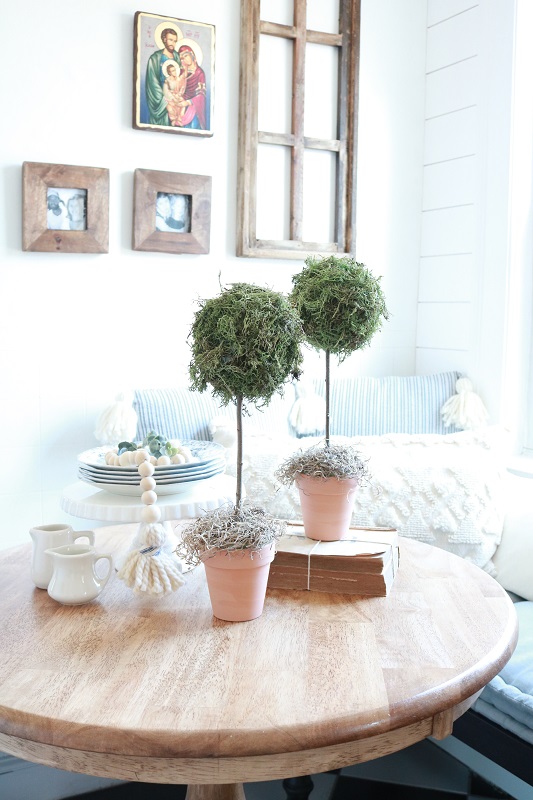
I love how the topiaries look with my handmade farmhouse style wood bead garland.
This project took less than 45 minutes and was so inexpensive! I think the moss and real stick help it to appear more realistic than if I used a faux greenery ball. What do you think? Would you give it a try?
If you like this craft, you may also enjoy a free guide to a dozen Farmhouse Style crafts. Gain access by subscribing to our email list…
Want to remember this craft? Post this faux topiary to your favorite Pinterest board!