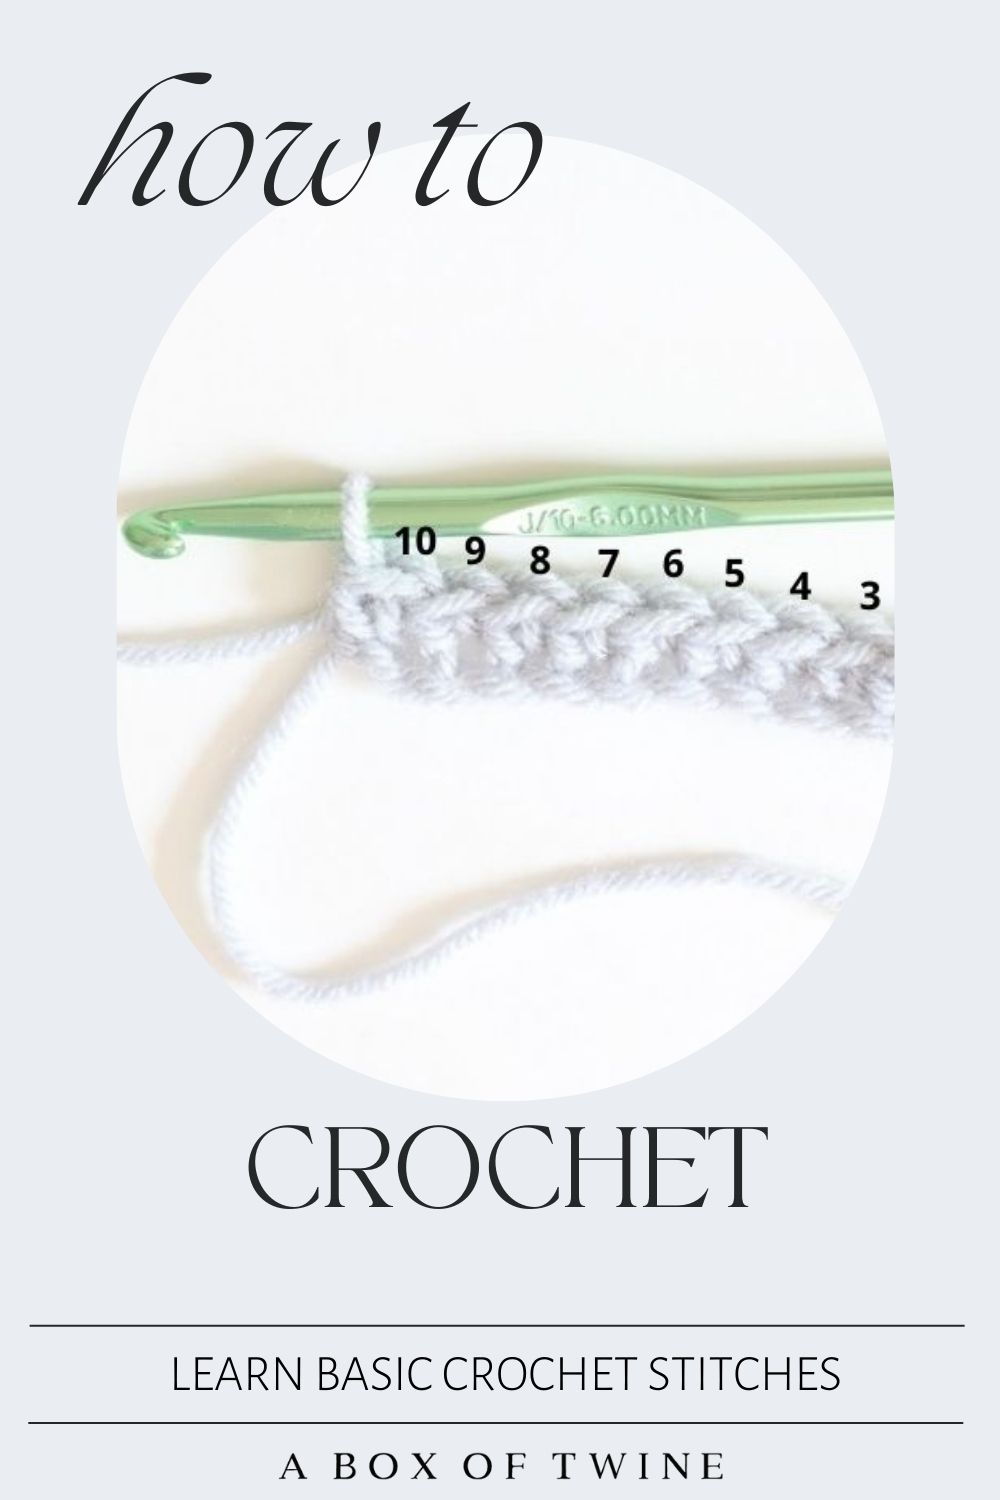
How to Crochet 5 Basic Crochet Stitches {free guide!} – dc and hdc stitches
Have you ever tried to crochet? It may seem intimidating at first, but you can start by learning 5 basic crochet stitches. Wondering what are the most common crochet stitches? The 5 simplest crochet stitches to learn are the chain, single crochet, half double crochet, double crochet, and slip stitch. Once you get the hang of these few stitches, you can make a plethora of projects!
In this post I will share step-by-step tutorials for 2 of these most common crochet stitches to learn – double crochet and half double crochet stitches. Check out my separate post for the chain stitch, single crochet stitch and the slip stitch, which are the remaining 3 most basic crochet stitches.
I’ll explain the best uses for each stitch, as well as how to crochet them. Whether you are a crochet beginner or have some experience, I hope you will learn something interesting. I have also packaged all 5 crochet stitch tutorials into a FREE GUIDE! Grab it below…
Get the FREE crochet guide for beginners – you will receive photo tutorials for all 5 stitches in this ‘basic crochet stitches pdf’ file:
This post may contain affiliate links. That means if you click and buy, I may make a commission at no cost to you. Please see my full disclosure policy for more details.
You can use the following supplies to practice these crochet stitches:
Supplies
- Crochet hook (any size you are comfortable with). I am using a size J (6mm) hook in the photos.
- Yarn (size 4 medium weight is a good size to practice with)
Here are some ideas for hooks and yarns for beginners:

Bright Hooks (various sizes)
Vanna’s Choice Yarn

Lion Brand Pound of Love Yarn
Crochet Abbreviations (in US Terms)
ch – chain
st – stitch
yo – yarn over
dc – double crochet
hdc – half double crochet
5 Basic Crochet Stitches
How to crochet for beginners
When you are beginning to learn how to crochet, the first few stitches you will need to learn are the chain and single crochet. These are the most common stitches in crochet projects and are simple to get the hang of. You can find TUTORIALS FOR the CHAIN, SC AND SL stitches in my separate post. This post will show you how to work the double crochet and half double crochet stitches. These stitches add more height to your work, and are more open-weaved than the single crochet. They provide wonderful texture and interest to your projects.
My instructions are written for right-handed crocheters, but you can reverse the instructions for left-handed work.
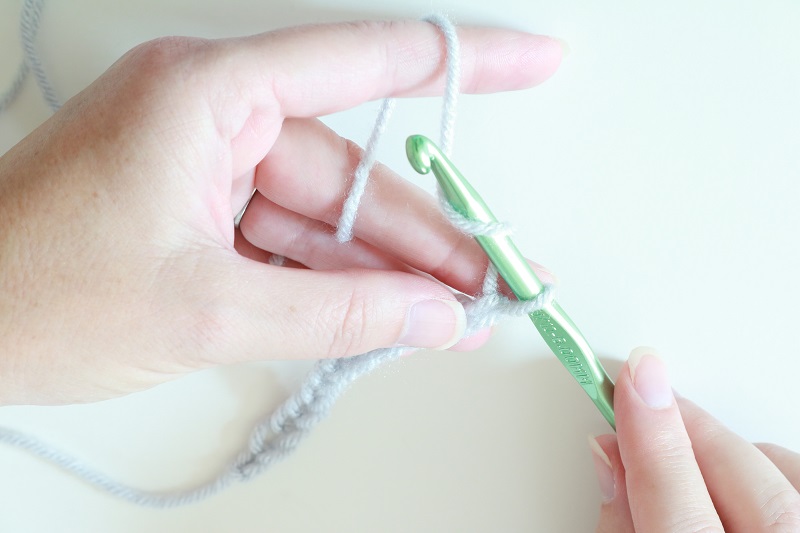
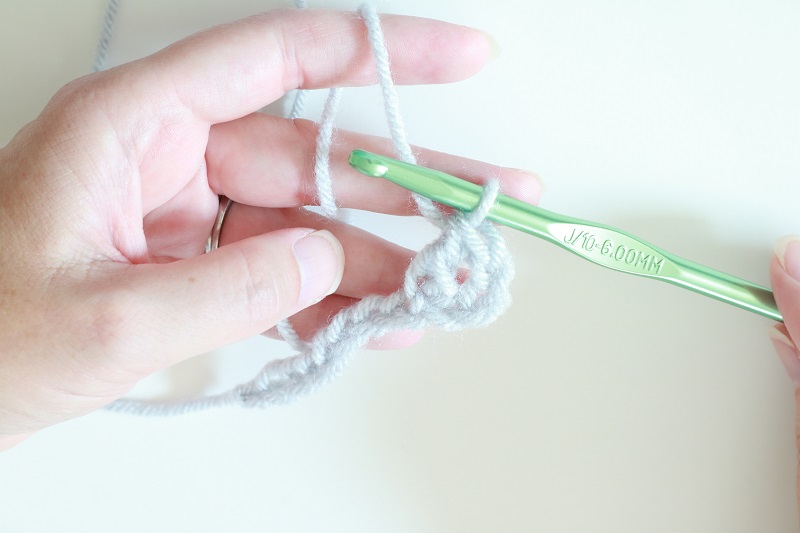
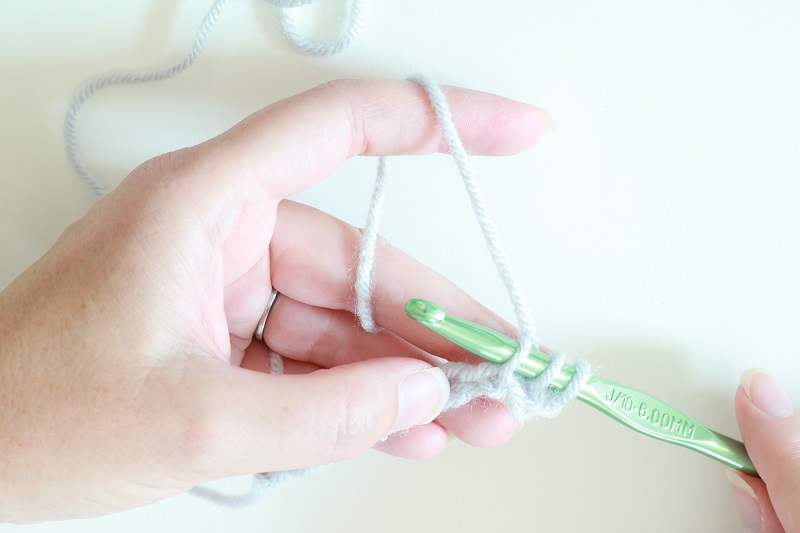
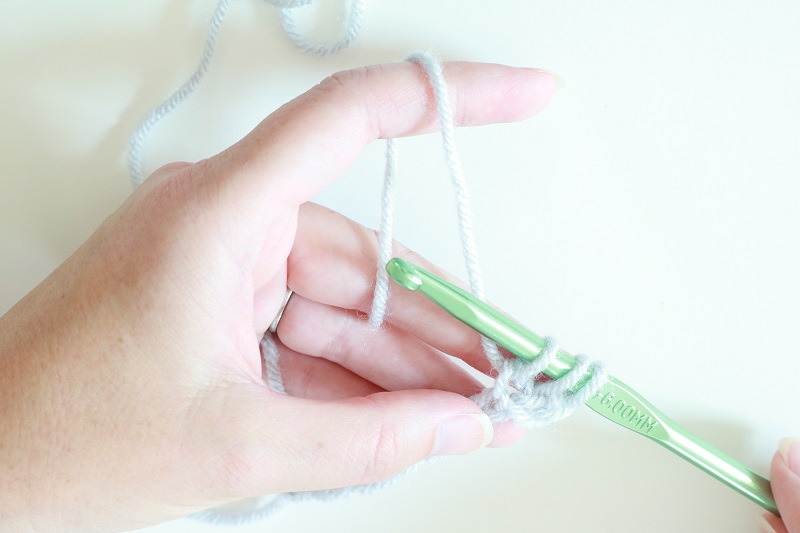
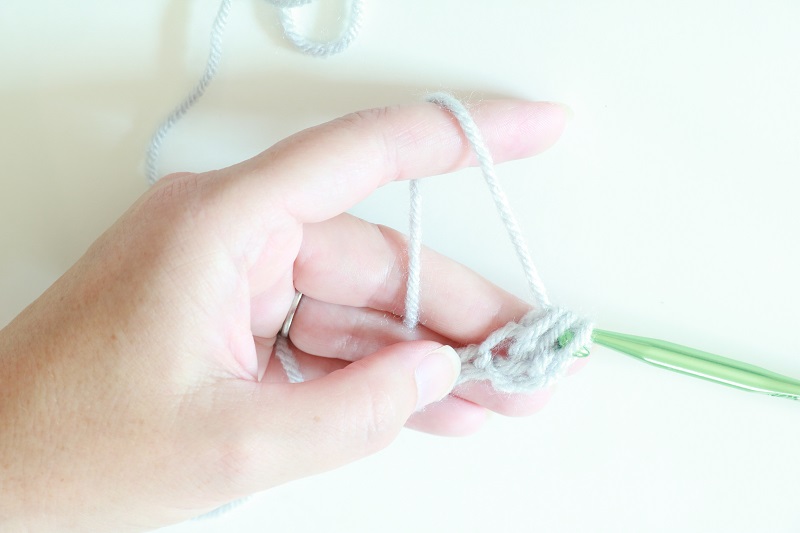
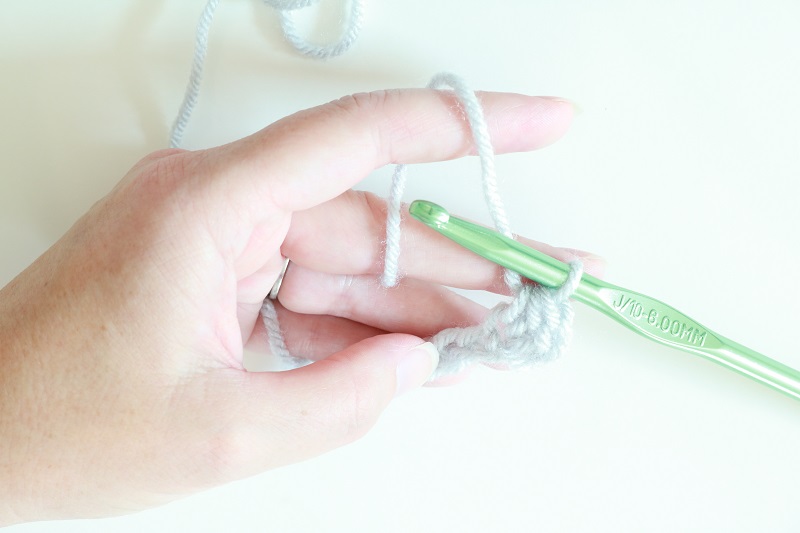
Before I show you these basic crochet stitches for beginners, I want to explain how to hold your working yarn. The ‘working’ yarn is the strand that is continually coming from your yarn ball (or skein) as you crochet. The ‘tail’ is the small strand that hangs from your initial slip knot.
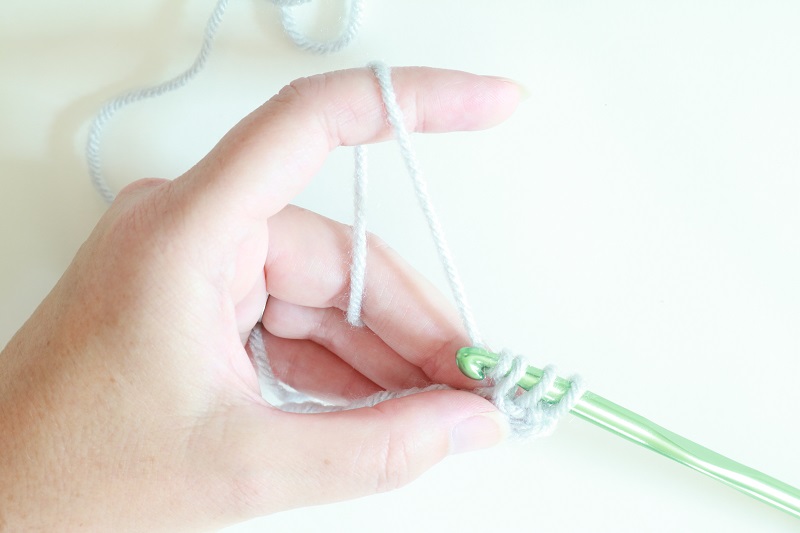
You want an even tension in your working yarn as you crochet. If you let the working yarn hang loosely from your work, it will be difficult to manage in a consistent way. It is better to keep the working yarn between your fingers as such:
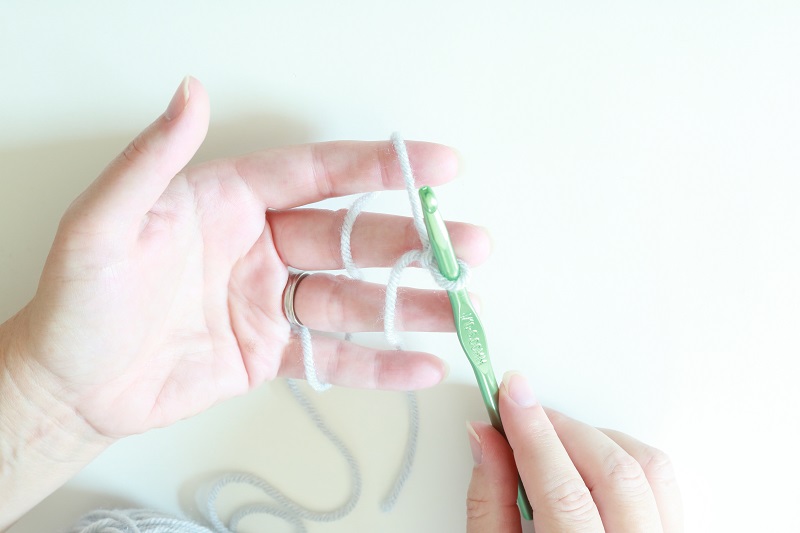
This way the yarn will flow better from the ball (or skein), through your fingers, to the hook.
How to crochet the Double Crochet stitch (dc)
The double crochet stitch is a popular crochet stitch. It appears as a higher, more open weave. Double crochet is often used in many open stitch patterns – those where there is more gap between stitches.
It is very helpful to remember that the double crochet stitch is taller than the single crochet. When commencing a row with a double crochet stitch, you will usually chain ‘three’. This will help begin the row at the proper taller height to match the subsequent double crochet stitches in the row.
Let us walk through the DOUBLE CROCHET STITCH step by step:
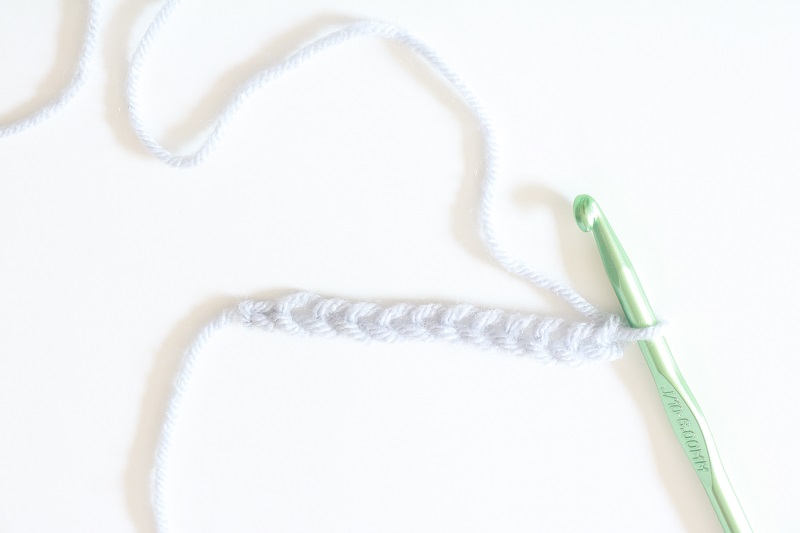
Make chain stitches for foundational row
First, you will need to create a chain of any number of stitches for a foundational row. See THIS CROCHET STITCH TUTORIAL on how to chain stitches.
Here I chained 12 stitches:
Create first row of dc stitches
Step 1 – wrap yarn over the hook from back to front (also known as ‘yo’, yarn over):
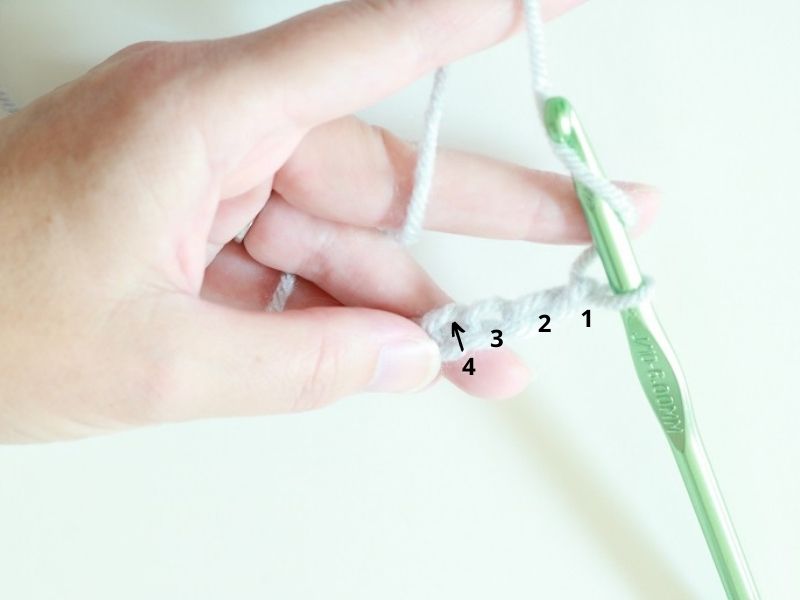
Step 2 – insert crochet hook into the fourth chain from the hook (see photos below), from front to back and grasp yarn with the chin of the hook. The 3 skipped chains are counted as the first dc st and are called the turning chain – tch.
(note – when beginning the first row of a project from a foundational chain, there are several options on where to insert the hook into a particular stitch, appearing as a ‘V’. For our purposes, simply insert the hook into the back part of the ‘V’. It is easier to do this on a foundation row chain than attempt to insert your hook into both parts of the ‘V’.)
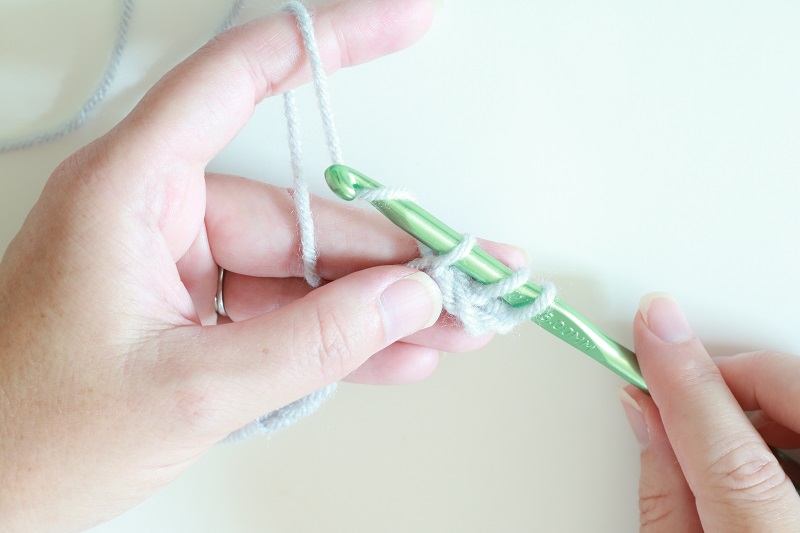
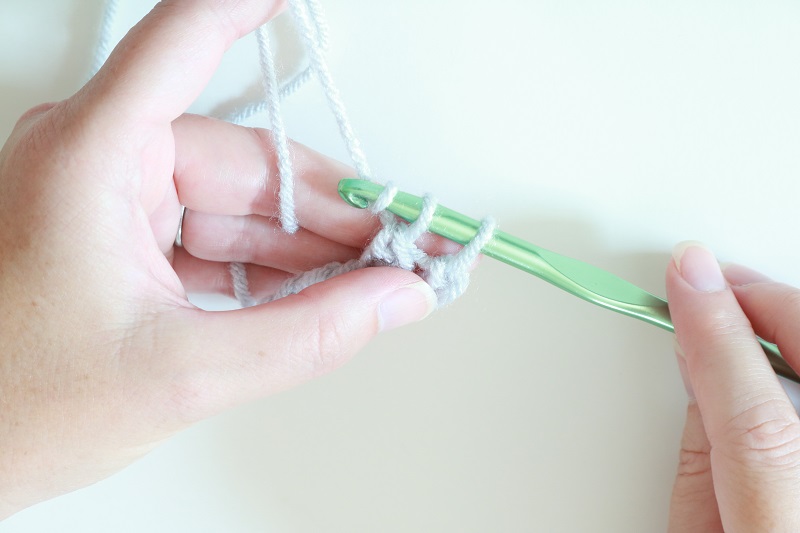
Step 3 – using the hook, pull the yarn through the loop of the stitch.
You will notice that three loops are on your hook:
Steps 1-3 are often referred to as ‘yo, insert hook, and draw up a loop’
Step 4 – wrap yarn over the hook from back to front and grasp it with the chin of the hook.
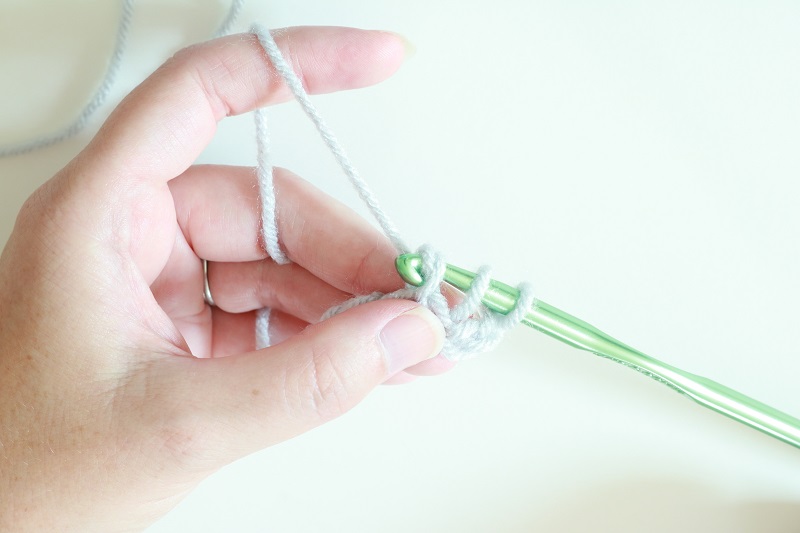
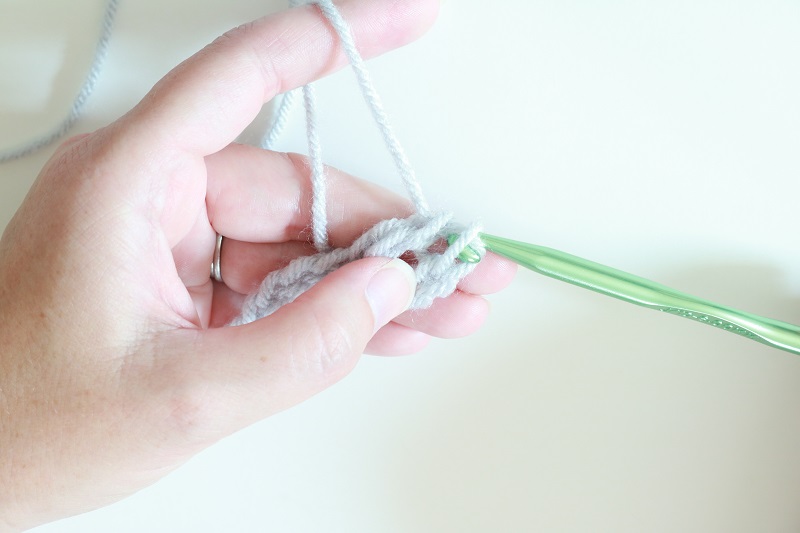
Step 5– using the hook, pull the yarn through the first two loops on the hook:
(steps 4 and 5 are often referred to as ‘yo and pull through 2 loops’ where yo = yarn over)
There are 2 loops left on the hook.
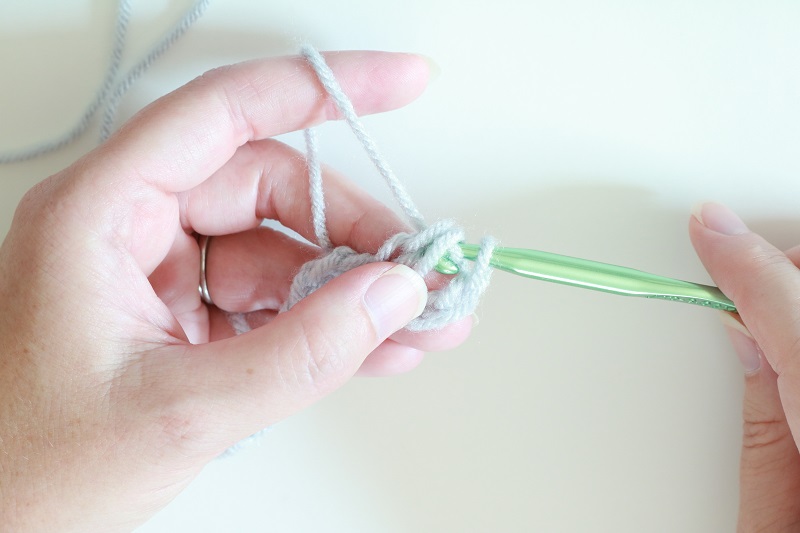
Step 6 – wrap yarn over the hook from back to front and grasp it with the chin of the hook:
Step 7– using the hook, pull the yarn through both loops that are left on the hook:
One DOUBLE CROCHET STITCH has been made:
Repeat these steps to continue making double crochet stitches into each chain to the left across your row:
Yo, insert hook, draw up a loop
Yo and pull through 2 loops
Yo and pull through 2 loops
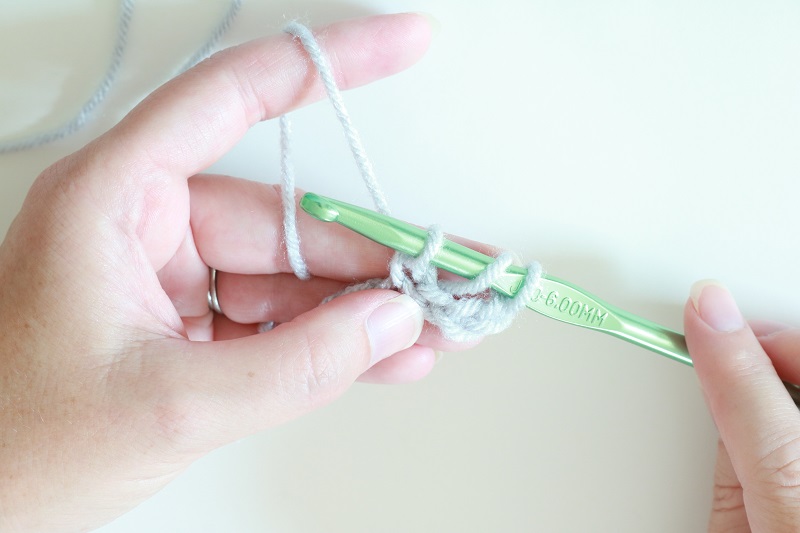
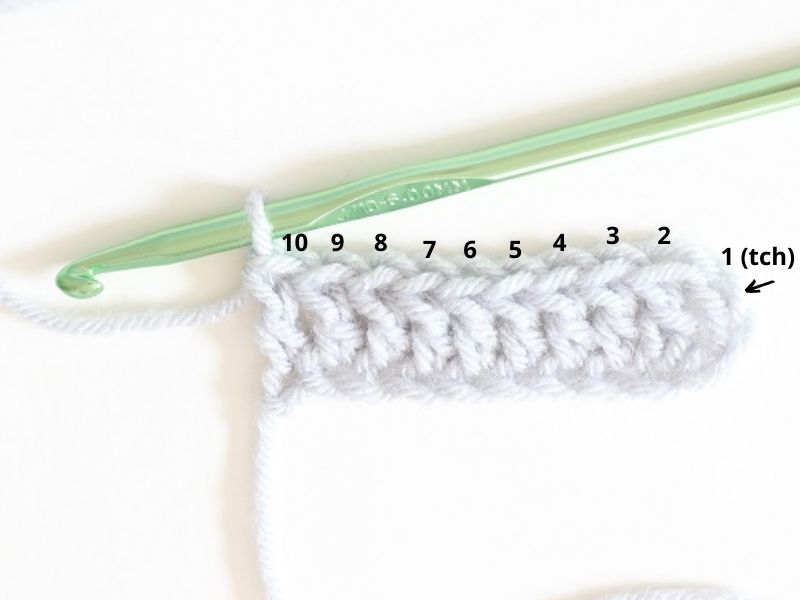
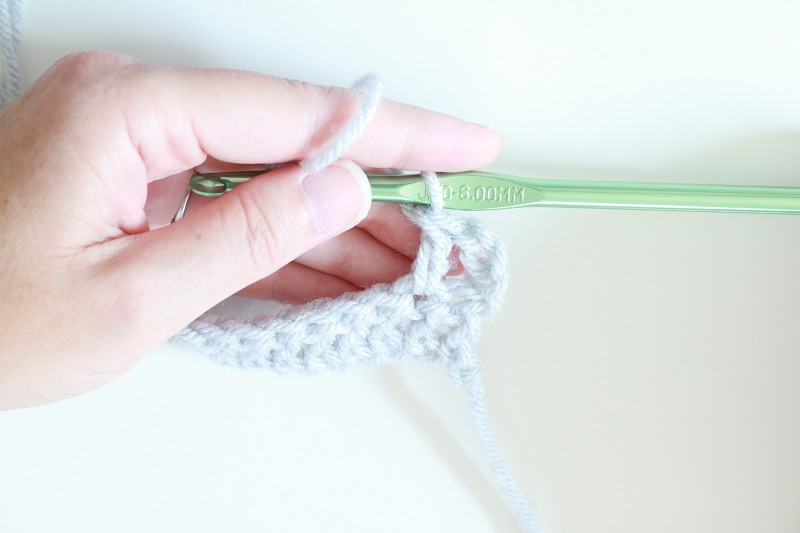
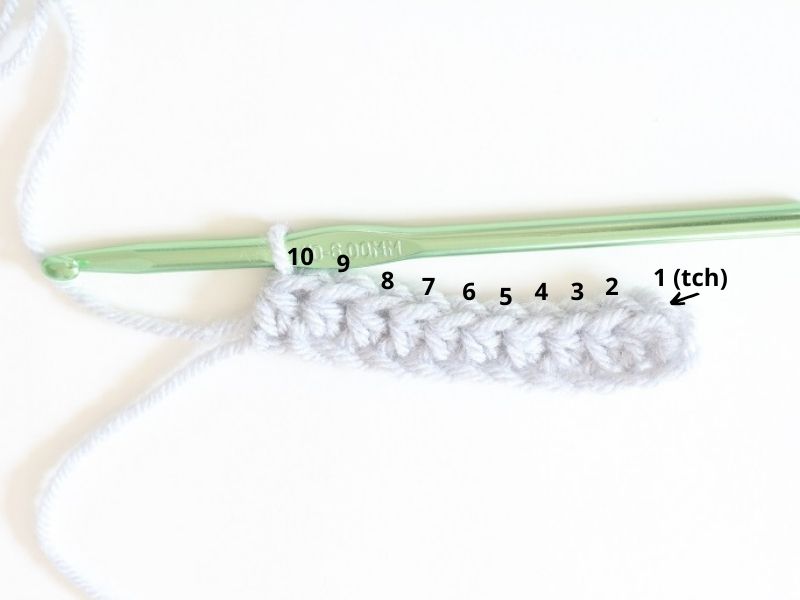
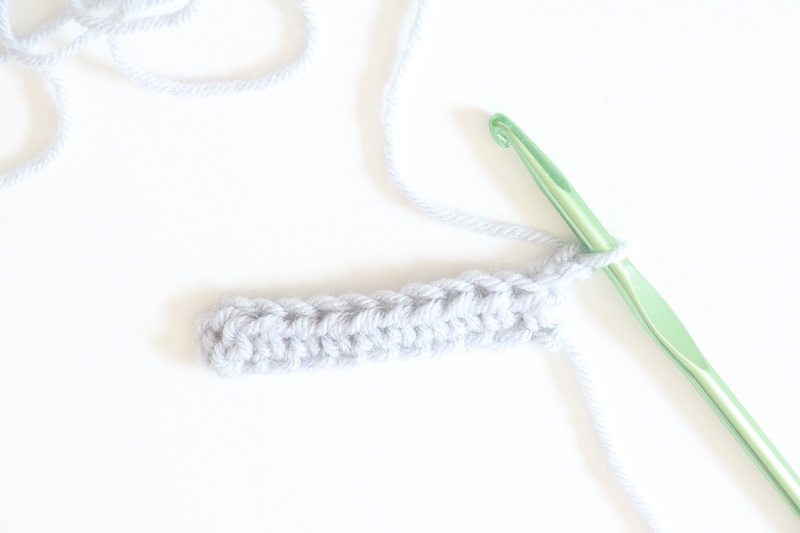
Here I have worked 10 total double crochet stitches. You’ll notice that the turning chain (tch) is counted as the first dc stitch:
Create next row of dc stitches
Once you reach the end of your row, you will turn your work from right to left so that your hook is once again at the right-most end of your row. (Turn your work as you turn pages in a book).
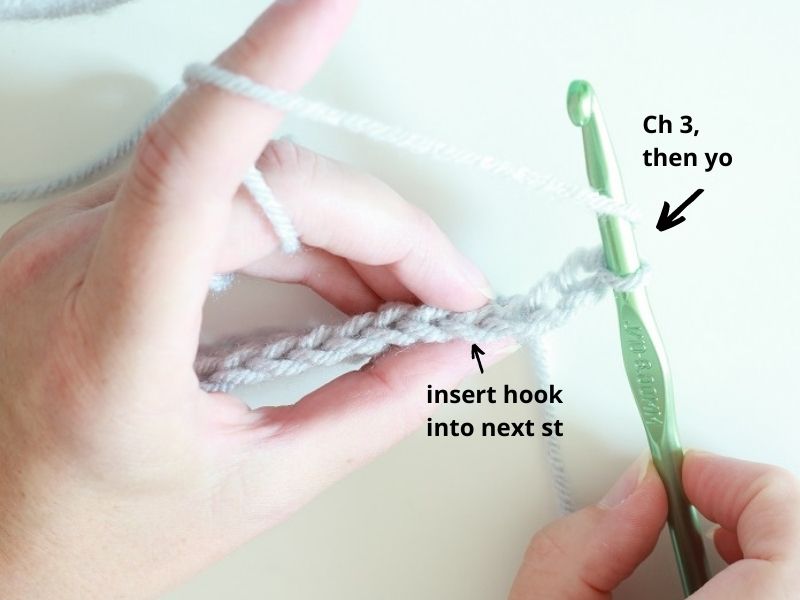
Next you will need to Ch3 (chain 3) to begin a new row of dc stitches. This chain is called the ‘turning chain’ (tch) and it is usually counted as the first dc stitch in the next row since it has height (unlike the tch in the sc rows).
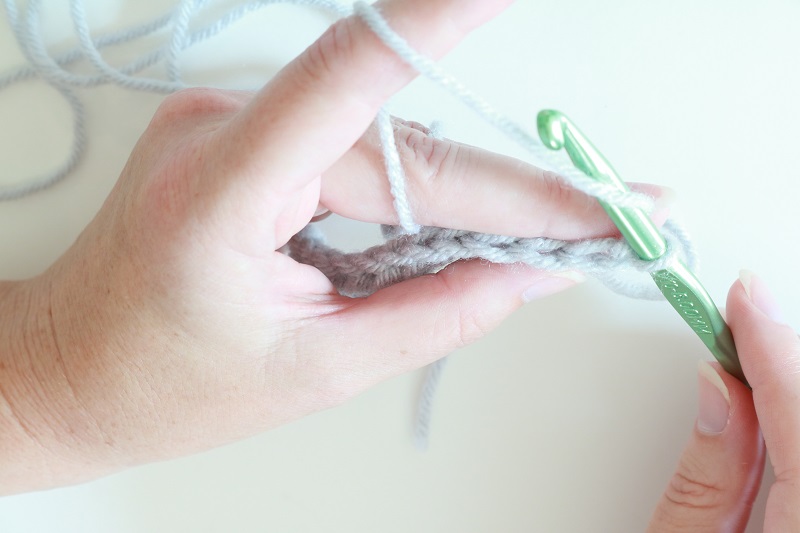
To continue the double crochet stitch in the 2nd row, you will follow the steps above. The difference is that you will begin with the second stitch (to the left of the tch), and you will be inserting your hook into both loops of the ‘V’ on each stitch:
Here is what it looks like to insert the hook into both loops of the ‘v’ on the 2nd st:
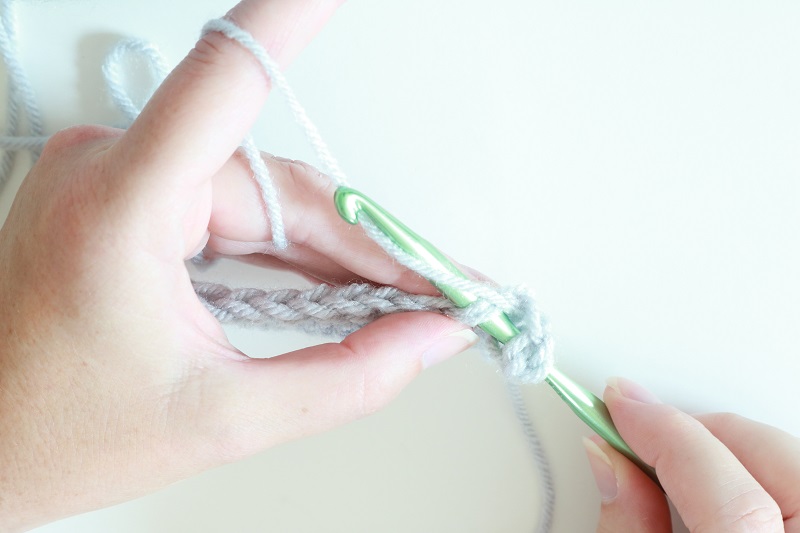
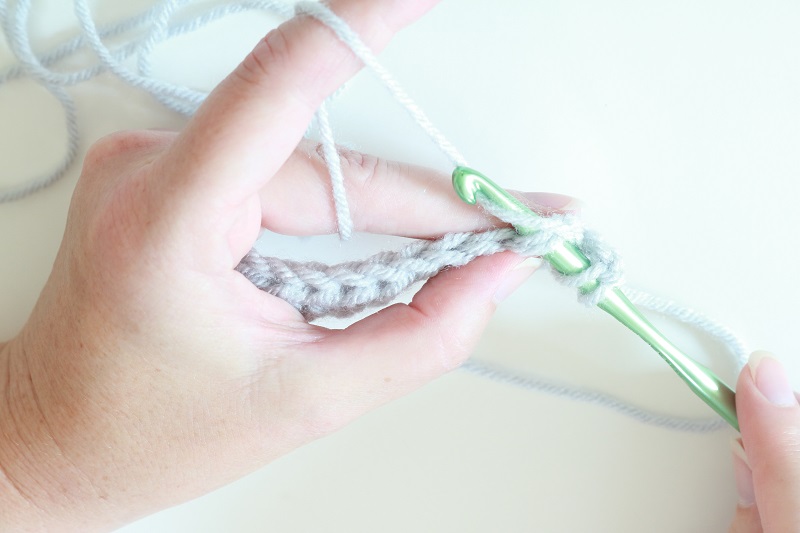
Here you will see one new dc st has been made next to the ‘ch 3’ turning chain (tch):
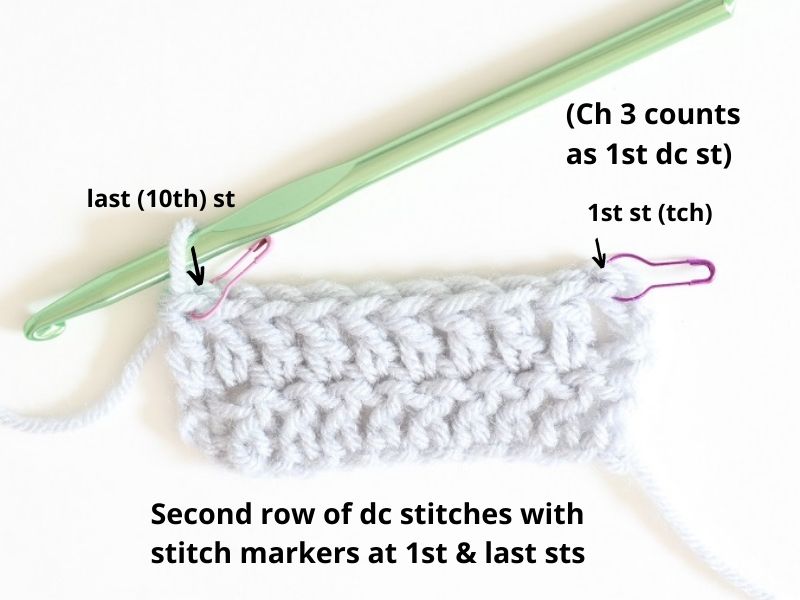
Practice many rows of double crochet stiches to get the feel for it. The work will progress faster since these rows will have more height. It is a great idea to put a stitch marker in the very first (tch) and last stitches of each row. That will help you determine where to begin and end each dc stitch in the next row.
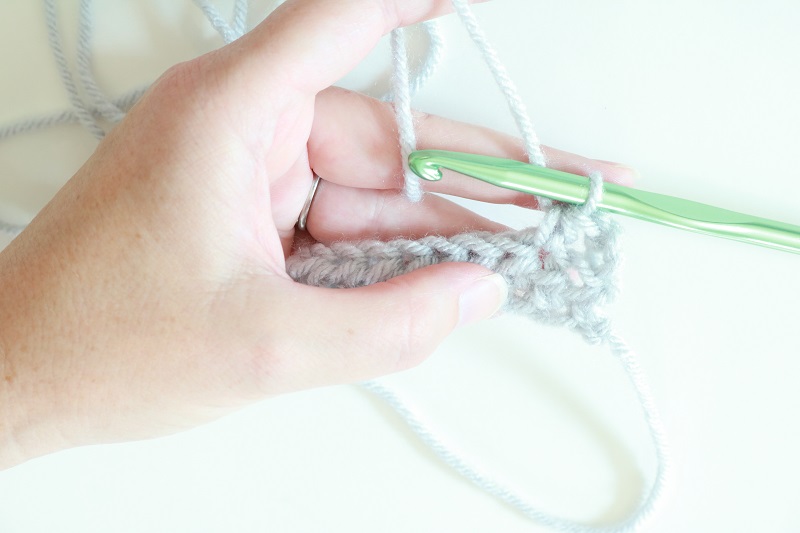
Here I have placed stitch markers in the 1st and last dc stitches of the 2nd row:
IMPORTANT – regarding counting stitches, you will need to understand how many stitches you are meant to have after each row on any given pattern. If the pattern begins with a row of 30 dc stitches, for instance, it will usually instruct you to Chain 32 to start because double crochet rows need height for the first stitch. Count the stitches in each row by each ‘V’ on top (although it may be harder to see on the tch) or you can count each ‘post’ that is created by the dc stitch.
How to crochet the Half Double Crochet stitch (hdc)
The half double crochet stitch is a great alternative crochet stitch if you want something slightly thicker than the single crochet stitch, but not as high as the double crochet stitch.
When commencing a row with a half double crochet stitch, you can chain ‘two’. This will help begin the row at the proper height to match the subsequent half double crochet stitches in the row. Since this ‘ch2’ creates more height, it is usually counted as one hdc stitch.
Let us walk through the HALF DOUBLE CROCHET STITCH step by step:
Make chain stitches for foundational row
First, you will need to create a chain of any number of stitches for a foundational row. Here I chained 12 stitches:
Create first row of hdc stitches
Step 1 – wrap yarn over the hook from back to front (also known as ‘yo’, yarn over)
Step 2 – insert crochet hook into the third chain from the hook (see photo below) from front to back, and grasp yarn with the chin of the hook.
(note – when beginning the first row of a project from a foundational chain, there are several options on where to insert the hook into a particular stitch, appearing as a ‘V’. For our purposes, simply insert the hook into the back part of the ‘V’. It is easier to do this on a foundation row chain than attempt to insert your hook into both parts of the ‘V’.)
Step 3 – using the hook, pull the yarn through the loop of the stitch:
You will notice that three loops are now on your hook:
Steps 1-3 are often referred to as ‘yo, insert hook, and draw up a loop’
Step 4 – wrap yarn over the hook from back to front and grasp with the chin of the hook.
Step 5 – using the hook, pull the yarn through all three loops on the hook:
One HALF DOUBLE CROCHET has been made:
(steps 4 and 5 are often referred to as ‘yo and pull through 3 loops’ where yo = yarn over)
Repeat these steps to continue making half double crochet stitches into each chain to the left across your row:
Yo, insert hook, draw up a loop
Yo and pull through 3 loops
Here I have worked 10 total half double crochet stitches. You’ll notice that the turning chain (tch) is counted as the first hdc stitch:
Create next row of hdc stitches
Once you reach the end of your row, you will turn your work from right to left so that your hook is once again at the right-most end of your row. (Turn your work as you turn pages in a book).
Next you will need to Ch2 (chain 2) to begin a new row of hdc stitches. This chain is called the ‘turning chain’ (tch) and it can be counted as the first hdc stitch in the next row since it has some height:
To continue the half double crochet stitch in the 2nd row, you will follow the steps above. The difference is that you will begin with the second stitch (to the left of the tch), and you will be inserting your hook into both loops of the ‘V’ on each stitch.
Here is what it looks like to insert the hook into both loops of the ‘v’ on the 2nd st:
Here you will see one new hdc st has been made next to the ‘ch 2’ turning chain (tch):
Practice many rows of half double crochet stiches to get the feel for it. It is a great idea to put a stitch marker in the very first (tch) and last stitches of each row. That will help you determine where to begin and end each hdc stitch in the next row.
Here I have placed stitch markers in the 1st and last hdc stitches of the 2nd row:
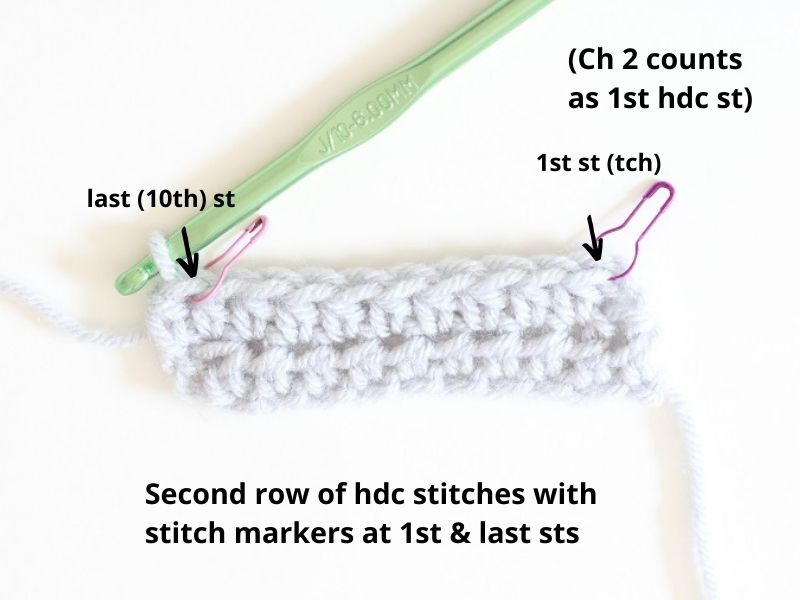
IMPORTANT – regarding counting stitches, you will need to understand how many stitches you are meant to have after each row on any given pattern. If the pattern calls for a row of 30 hdc stitches, for instance, it will usually instruct you to Chain 32 to start because half double crochet rows need height for the first stitch. Count the stitches in each row by each ‘V’ on top (although it may be harder to see on the tch) or you can count each ‘post’ that is created by the hdc stitch.
What is the easiest thing to crochet for a beginner?
Some of the simplest projects to begin crocheting are:
- dish cloths
- scarves
- pot holders
- baby blankets
- cup cozies
These types of projects are normally square or rectangular in shape, and would require the same amount of stitches per row. Beginning with these shapes allows you to practice counting your stitches, which is a critical skill to learn in the beginning.
I have a compilation of over 25 CROCHET PATTERN FOR BEGINNERS if you’d like beginner-friendly patterns. And check out THIS CROCHET CUP COZY PATTERN BUNDLE – they’re a great set for beginners!
Be patient with yourself, and enjoy the process. You will have a wonderful hobby in no time!
===> Remember to PIN for later! <===


2 Comments
Lynn Katz
this was so helpful…thank you..everything i have done is wrong and this step by step with close up pictures was GREAT
Susan
I am so happy to hear that the tutorial helped you! Happy crocheting!