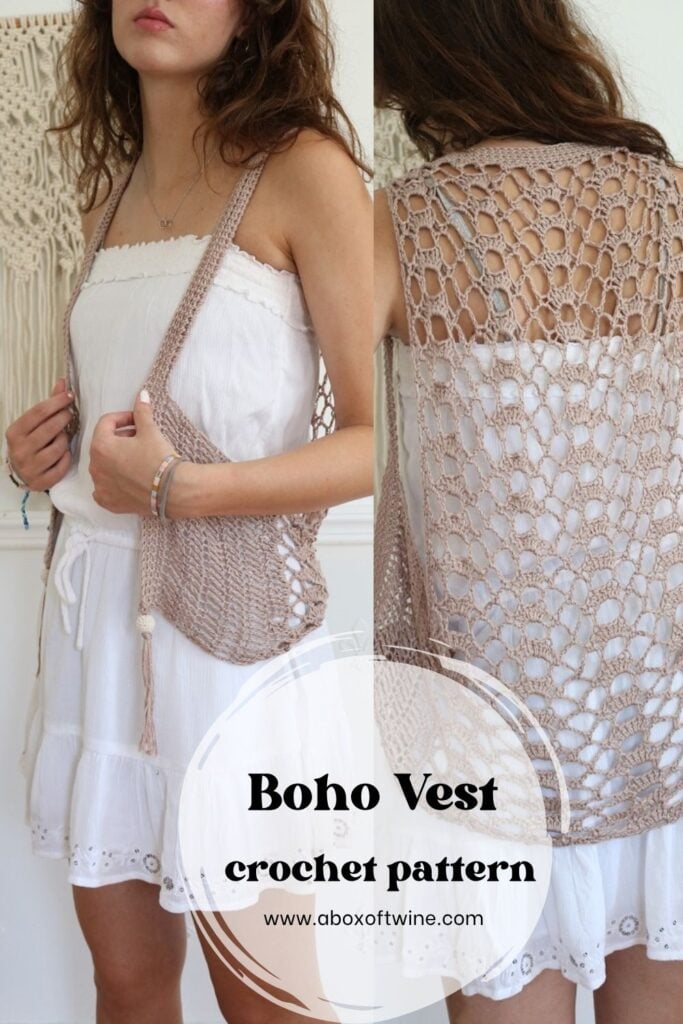
Boho Crochet Vest Pattern {FREE!}
If you’re looking for a light, stylish layer to add to your handmade summer wardrobe, this boho crochet vest pattern is the perfect project. Designed with an airy lace crochet stitch pattern, this summer crochet vest is breathable, elegant, and easy to wear over your favorite warm-weather outfits. The relaxed bohemian style pairs beautifully with dresses, tanks, and casual jeans, making it a versatile piece you’ll reach for all season long. If you love creating timeless handmade garments or want a fresh crochet summer pattern to add to your collection, this lace crochet vest is a satisfying project that blends comfort, texture, and effortless boho charm.

A Light and Airy Crochet Vest for Summer Style
The Crochet Tops Aesthetic is having a moment that will last – enjoy Hippie Crochet! Summer is a perfect season for open-lace crochet patterns with Boho vibes and lightweight yarn. Do you love Bohemian Crochet Patterns and Cute Crochet Tops?
With its Boho-inspired tassels and flowy drape, this Hippie Crochet Top brings effortless style to your wardrobe—perfect for beach days, evening walks, or music festivals under the stars.
The Lace Stitch That Makes This Vest So Special
This delicate vest top features simple stitches with beautiful texture, inspired by the graceful shell designs in the pattern. It’s lightweight enough for warm weather, adding just the right touch of coverage over a swimsuit, tank top, or sundress.
Designed for easy construction and a relaxed fit, this is a calming project you’ll love to wear often!
This post may contain affiliate links. That means if you click and buy, I may make a commission at no cost to you. Please see my full disclosure policy for more details.
FREE BOHO CROCHET VEST PATTERN
How to crochet a vest
The free crochet pattern is not too difficult if you are comfortable with working ‘shells’ (groups of stitches in one stitch). For this Crochet Openwork Vest With Fringe, the crochet vest main rectangular panel is worked in repetitive rows, bottom up. Short sides are added, as well as a border to form the armholes. BASIC CROCHET STITCHES are needed to work this piece. The Crochet Boho Vest is made with DK (light) cotton yarn.
You will need the following supplies to make the crochet vest:
Supplies
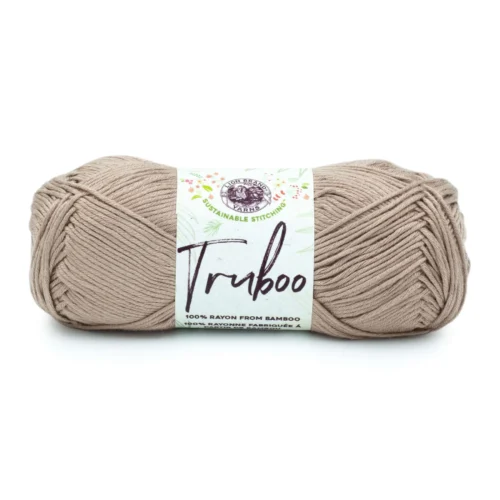
- Lion Brand Truboo Size 3 cotton (241 yds per skein)
- Color: Sand
- or similar size yarn, approx 300 yds total
- Size H/8 (5.00 mm) hook (or size to meet gauge)
- Optional: crochet beads to add to tassels


Crochet Notions
Crochet Abbreviations
US Crochet terms are used.
Ch – chain
Ch- – refer to chain or space previously made, e.g., ch-1 sp
dc – double crochet
sc – single crochet
sl st – slip stitch
sk – skip
st(s) – stitch(es)
sm – stitch marker
tr – treble
PATTERN INFORMATION
The crochet vest FREE pattern is provided below, but you can also get the ad-free, printable pdf Boho vest pattern in my pattern shop:
SUMMER CROCHET VEST PATTERN
Gauge: 1.5″ (4 CM) SQ in ROW 1 panel STITCH PATTERN: (7 dc in a ch-5 sp) sts by 2.5 rows
How to crochet a Boho vest
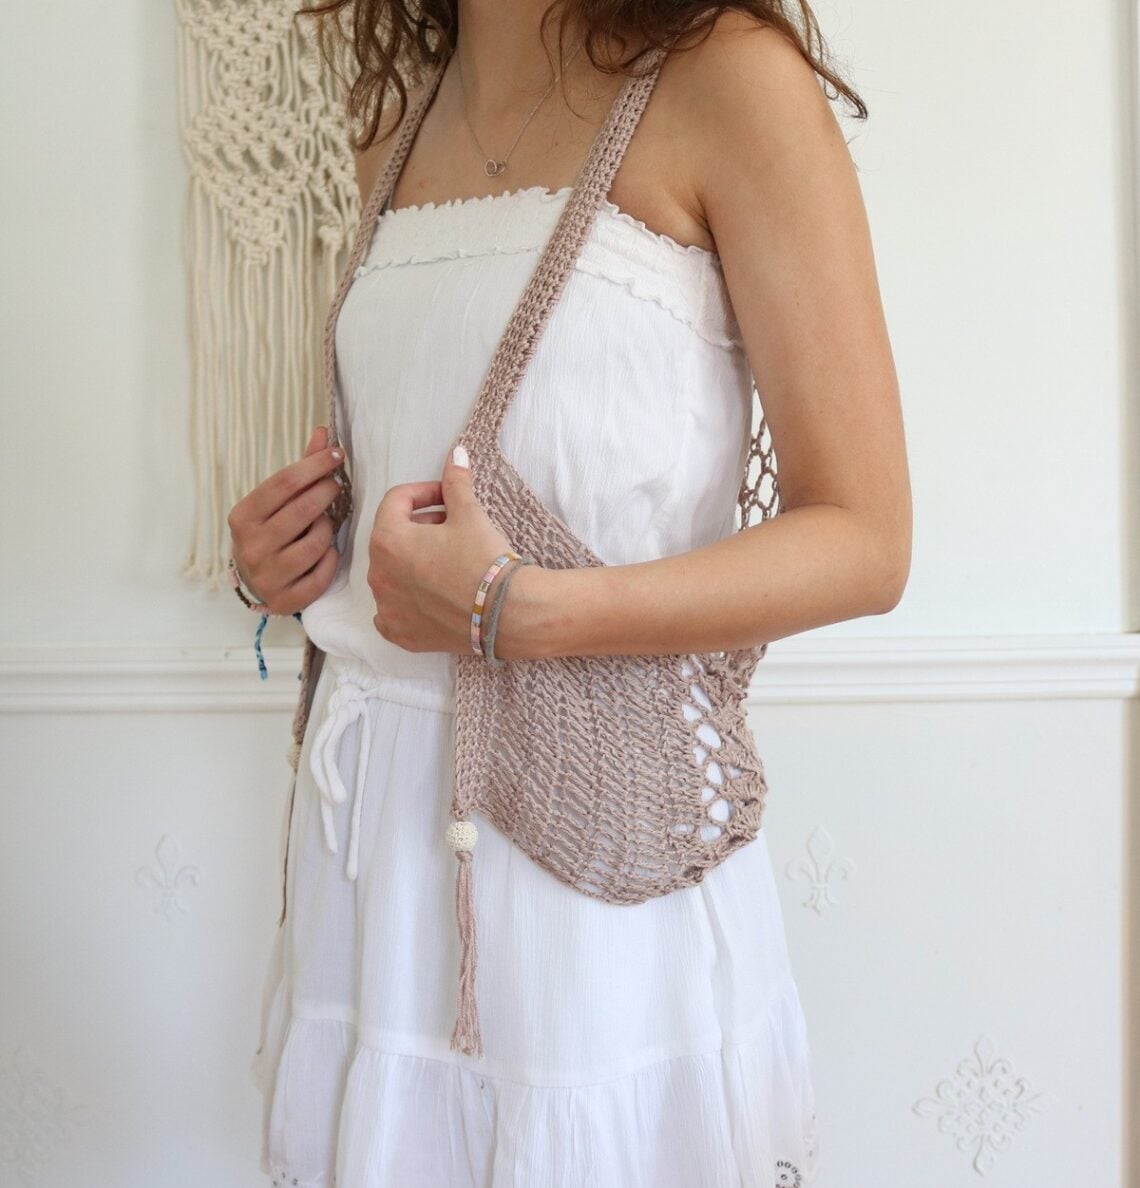
There are different types of crochet vests, and this one features one main back panel with short sides added. Hit the coast or streets with this airy, seaside summer vest. With festival vibes, the tasseled vest is perfect for a stylish layer in your summer wardrobe.
NOTES: You will be crocheting the back panel of the vest in one piece, bottom up. Next, you will block the panel to 16″ width by 23″ length. Next, you will add two sides at the bottom of the vest by joining yarn & working rows outward at the lower edges. Lastly, you will add a border to create the armholes. (You can also optionally add tassels or fringe at the bottom once complete)

What yarn is best for a crochet vest for summer?
Light cotton yarn is the best choice for a summer vest, as are linen or bamboo yarns. You want the top to be lightweight & breathable for summer, and these natural fibers are great for that purpose.
Instructions to make the vest are as follows…
Vest Crochet Pattern
Follow the instructions below in the order indicated.
NOTE – Ch 1 does not count as a st, Ch 4 counts as one tr st throughout pattern.
It’s highly recommended to place a stitch marker in every row to keep track of the first st.
Vest Back Panel
Using size H/8 crochet hook, ch 60 with your yarn.
(The foundation row forms the bottom row of the vest).
Foundation Row (WS): 1 sc in 2nd ch from hook, *ch 5, sk next 3 ch, sc in next ch; rep from * across until last 2 chs, ch 2, sk 1 ch, dc in last ch. Turn.
Pattern Repeat:
Row 1 (RS): Ch 1, sc in 1st st, sk ch-2 sp, *7 dc in next ch-5 sp, sc in next ch-5 sp, **ch 5, sc in next ch-5 sp; rep from * across, ending last rep at **, ch 2, tr in last st. Turn.
Row 2: Ch 1, sc in 1st st, *ch 5, sc in 2nd dc of next 7 dc group, ch 5, sc in 6th dc of same 7 dc group,**ch 5, sc in next ch-5 sp; rep from * across, ending last rep at **, ch 2, tr in last st. Turn.
Rep Rows 1-2 nineteen more times.
You will have a total of 41 rows.
Fasten off.
Blocking/Adding Sides
Block the long back panel 16″ wide by 23″ long to form a straight rectangle.
Add 1st (Right-wearing) side:
With RS facing, join yarn to bottom edge corner at Foundation Row of your panel using the H hook.
Use a sm to keep track of 1st st in each row.
Side Row 1 (RS): Ch 4 (counts as 1st tr), work 2 tr into each row edge for approx 8-9″. Turn.
(approx 28 tr sts – the number of sts is not critical)
Side Row 2 : Ch 4 (counts as 1st tr), tr in next st and in each st across. Turn.
Rep Side Row 2 until length reaches approx 6” (or your desired length for side coverage), making sure to work an even number of rows total.
For reference, I worked 6 rows.
Fasten off.
Add 2nd (Left-wearing) side:
With WS facing, join yarn to the other bottom edge corner at Foundation Row of your panel using the H hook.
Use a sm to keep track of 1st st in each row.
Follow steps as above, working Side Row 1 and repeating Side Row 2 for the same even number of rows that you worked for the first right-wearing side.
DO NOT FASTEN OFF after working last row.
WS should be facing.
Adding Border to Vest
Now you will create the border that joins the 2 sides to the top of the back panel.
This will form large armholes for the vest.
Border Row 1 (WS): Ch 1, sc into each tr across (of left-wearing side). Do NOT turn.
Chain to your desired length (10-12″) from this side to the top back panel corner.
For reference, I chained 35 sts to approx 10”.
*Tip – try on the vest here to see if this length creates the armhole you desire when joining the chain to the top back panel corner. Adjust if necessary.
Next, begin working across the top back panel of vest as follows:
Work 3 sc into each ch-5 sp across top of back panel, as well as into the ch-2 sp (approx 45 sc sts total).
Continue Border Row 1 by chaining to the same length as you chained on the left-wearing side.
Lastly, sc into each tr across the right-wearing side. Turn.
For reference, the sample has a total of 171 sc sts: 28 sts per bottom side, 35 ch sts per armhole, 45 sts across back panel.
Border Row 2 (RS): Ch 1, sc into each sc across right-wearing side, sc evenly across the long chain length, sc into each sc across back panel, sc evenly across the next long chain length, sc into each sc across left-wearing side. Turn.
*Tip – you can choose to work the sc sts under the long (armhole) ch spaces instead of into each individual ch if desired. Just try to ensure the # of sc sts worked match the # of ch sts.
Border Row 3: Ch 1, sc into each sc across the entire row. Turn.
Rep Border Row 3 until border reaches approx 1” (or your desired width for coverage).
Fasten off.
Finishing Your Crochet Vest
It’s a good idea to block the right-wearing and left-wearing bottom sides of the vest at this point.
Weave in loose ends to WS.
If desired, you can add fringe to the entire bottom row of the vest, or a tassel to each front bottom corner.
I added a tassel to each corner by:
- cutting 4 pieces of yarn approx 14″ length each
- pairing two pieces together and folding them in half
- using crochet hook to loop each pair through the bottom front corner
- weaving the 8 hanging pieces of yarn through a crochet bead
- tie a knot with the yarn at bottom of bead to secure
- trim yarn to even out

Important Tips for Crocheting your vest
Some things to keep in mind as you crochet the vest are:
- It’s highly recommended that you use a stitch marker (sm) to keep track of the first st in each row.
- Make sure to block the back panel when finished to open up the stitches and form a straight-edged rectangle. (when wearing, gravity may pull the length further to 24″)
- It’s a good idea to also block the lower sides of the vest after adding those.
- Feel free to adjust size of vest sides and border as follows:
- add more rows to each side if you would like more coverage in front
- add more rows to border if you would like it wider
Finished Size
The finished crochet vest back panel measures approximately 16″ width by 23″ length. Measurements are for finished & blocked vest panel prior to adding 2 sides (6” width each) and border (1” width).
How to Style a Boho Crochet Vest in Your Summer Wardrobe
Now it is time to enjoy showcasing your crocheted vest! Wear it for a day by the sea, or evenings out in the warm weather. The airy vest definitely gives Coachella and Boho vibes.
Feature it as a showcased layer your favorite summer outfits…

What do you think of this free crochet vest pattern? If you are a beginner at crochet, you can give this vest a try. The main panel isn’t too hard to work up using the 2-row pattern, and it’s easy to add the sides and border. Be sure to add this crochet vest project to your list this summer. It would make a great weekend project.
Don’t forget that this vest crochet pattern is also available in the pattern SHOP. The pdf includes helpful photos for the vest.
Love easy crochet top patterns and Boho Crochet Patterns? Check out these other FREE crochet patterns…


===> Remember to PIN for later! <===