DIY Advent Calendar
Do you use an Advent calendar to count down the days until Christmas? Our family has been doing this for years with a calendar I made when our children were small. It’s a wonderful tradition and today I’ve got an easy DIY Advent Calendar project for you to make your own!
The calendar I made years ago consisted of a canvas-covered bulletin board and 24 tags hung on nails. Each night the kids took turns picking an ornament to hang on the calendar that represented the story of the first Christmas. Once the ornament was hung, we would clap and cheer, “One day closer to Christmas!!!”. The cheering was a tradition passed down from my husband’s family. He was one of 7 children, so the clapping and cheering made quite a ruckus!
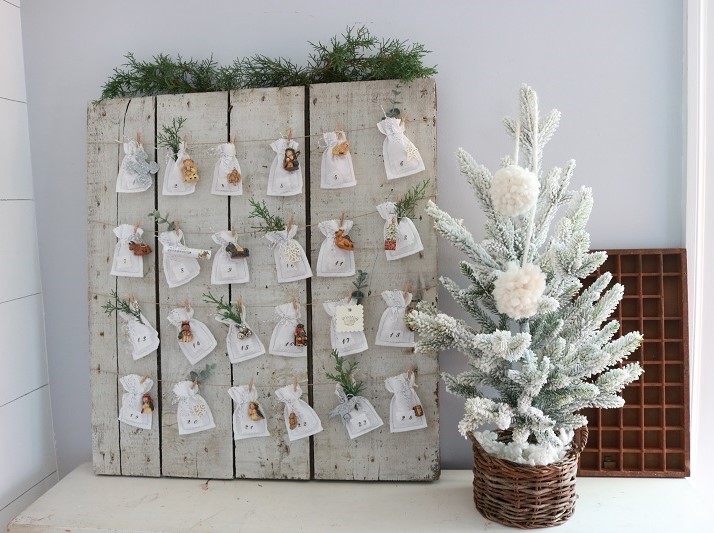
This year I thought I’d update the calendar by adding sweet handmade bags. I also replaced the tattered bulletin board with a unique vintage wood piece. I’ve got all the steps below to make a similar one. You’ll need…
Supplies for handmade bags
Muslin fabric (approx. 15″ by 32″)
sewing scissors, thread, pinking shears, fabric pen
Number stamps, stamp ink
Colored baker’s twine
Mini clothespins
Supplies for calendar
Large frame or rustic wood piece
Brown twine
Strong tape or stapler to attach twine to back
Instructions for DIY Advent Calendar
How to make calendar bags
I’ve got instructions below to make your own calendar bags out of inexpensive muslin. However, you could always pre-purchase muslin bags and embellish them like these.
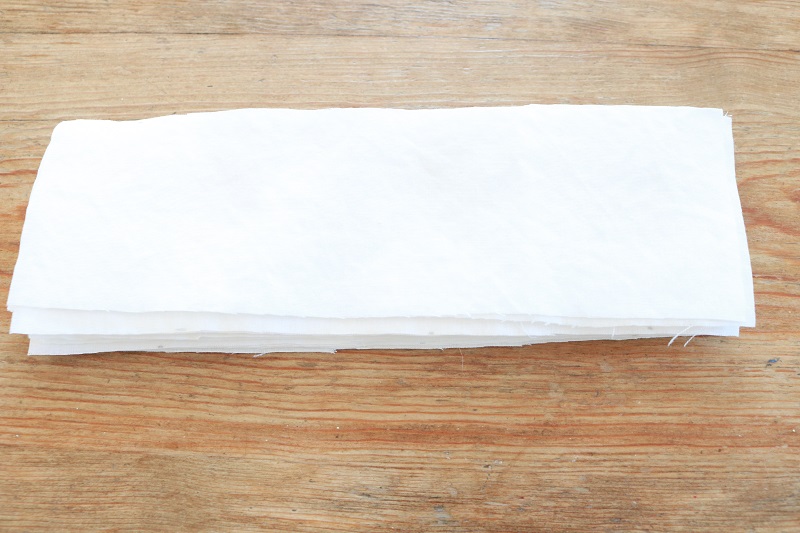
Cut muslin fabric to make bags
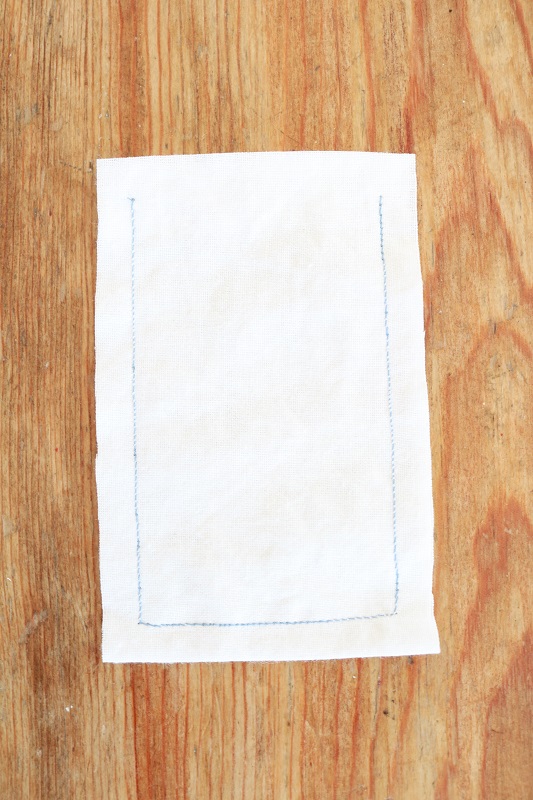
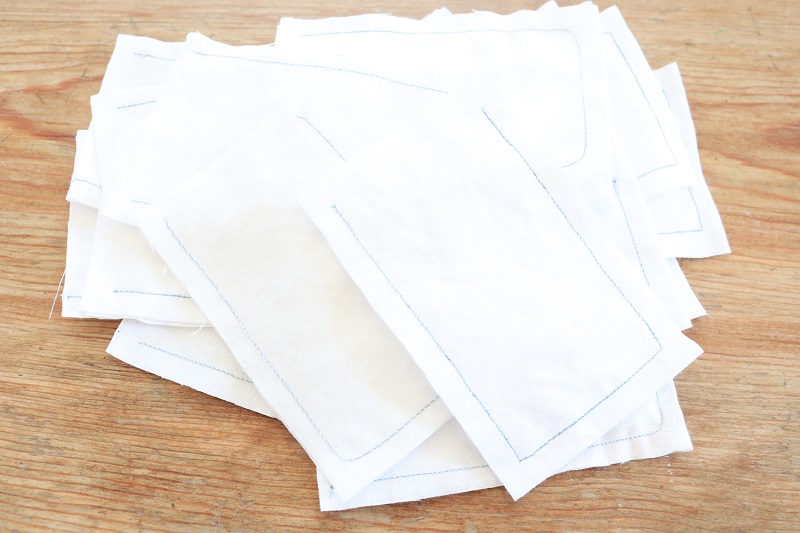
First gather your muslin fabric piece, and mark up lines to cut 24 pieces of fabric that are 2.5″ by 8″ each. I measured a 15″ by 32″ piece and placed marks 2.5″ apart along the 15″ edge (for 6 total segments) using a fabric pen. Next I folded the piece twice along the 32″ edge, so that the folded pieces were 8″ long each. I simply cut at those folds, and then at my 2.5″ marks to have a pile of 24 total pieces, 2.5″ by 8″ each.
Sew calendar bags
Next, fold each 2.5″ by 8″ piece in half to measure 2.5″ by 4″. These will be your calendar bags.

Sew a seam along the long sides and folded edge, leaving the top open. Use a contrasting thread color if you’d like, as I did here.
Sew up all 24 bags:
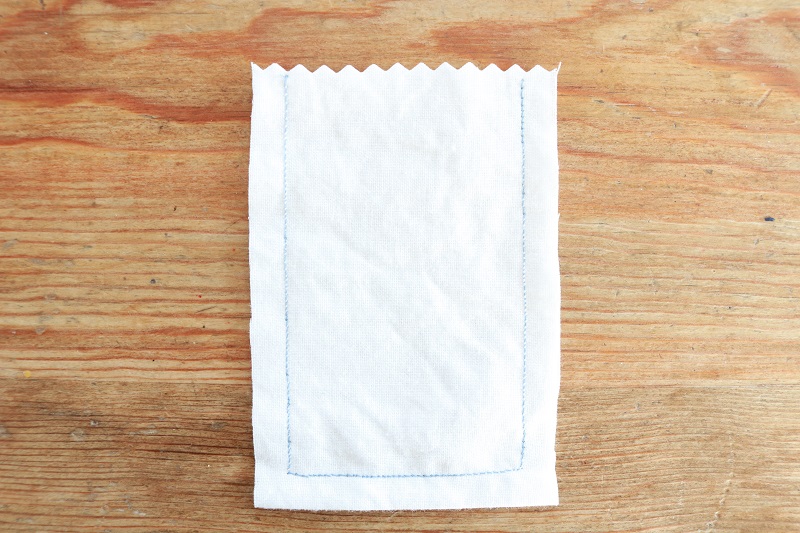
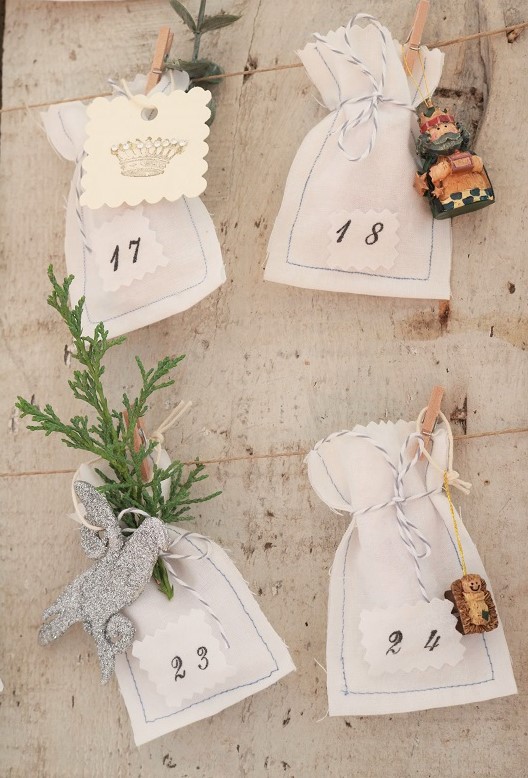
For each bag, trim the open top edge with pinking shears.
Stamp numbers for bags
At this point you could stamp your bags directly with the numbers 1-24 (if you are a neat stamper).
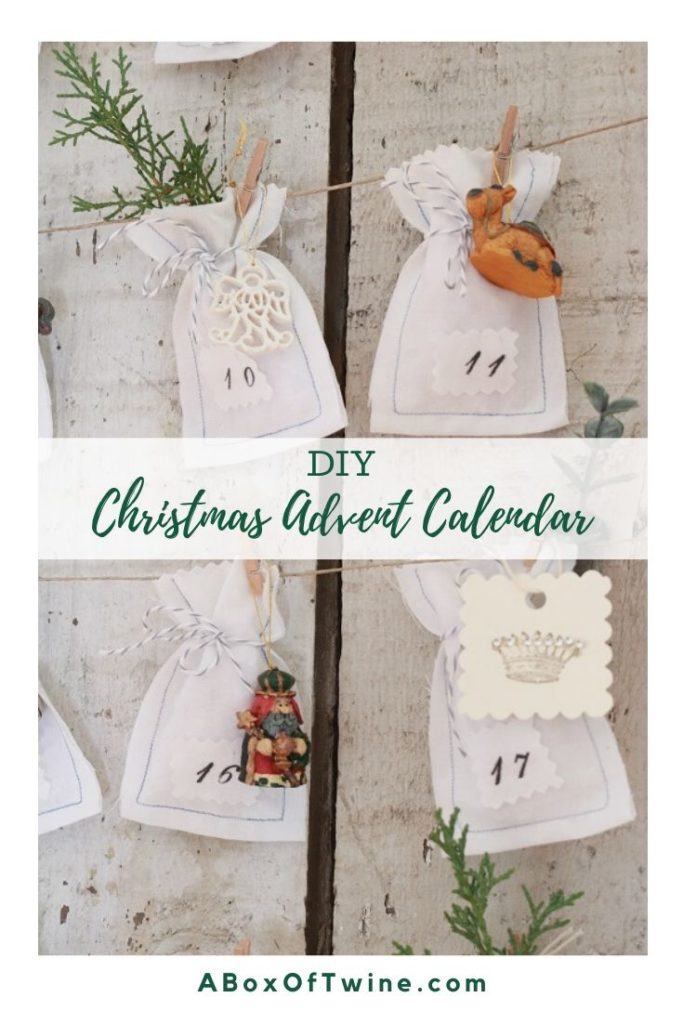
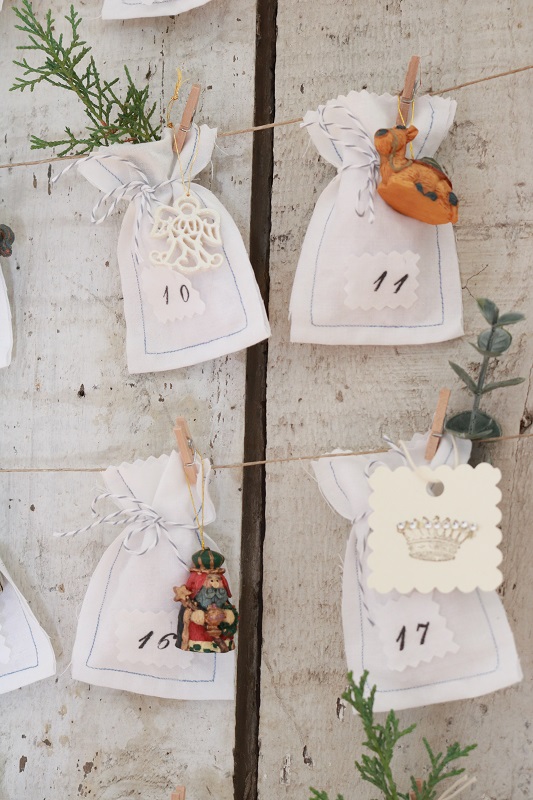
I’m not always confident my stamping will be perfect on a finished product. Therefore, I decided to stamp muslin fabric scraps to attach to the bags instead. Any mistakes get scrapped! I stamped numbers 1 through 24 on a scrap of muslin and cut the numbers out using pinking shears. I taped the back of these numbers to my bags, but you could hot glue them.
Fill your advent calendar bags
This is the fun part – filling your calendar bags with goodies!
Tuck tiny candies, Scripture verses, or love notes inside the bags for each day of Advent. Be creative with your tiny gifts!
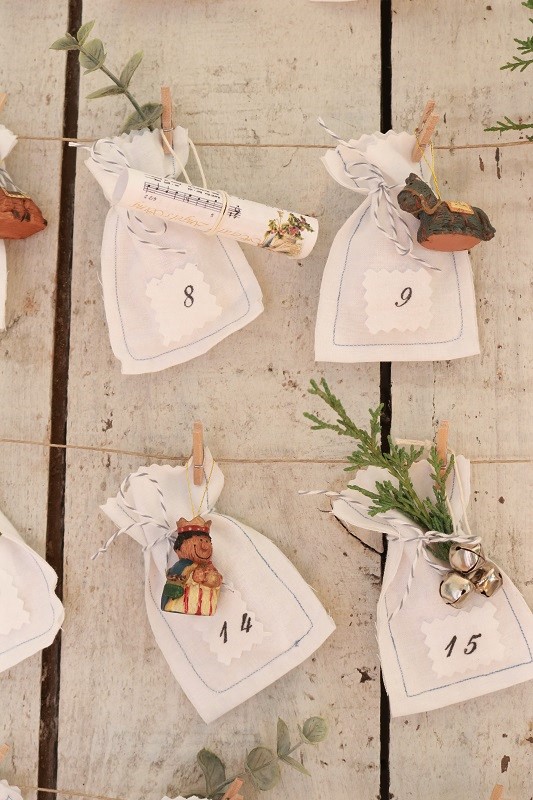
When everything is inside, tie up the bag opening with colored baker’s twine.
How to display your Advent calendar
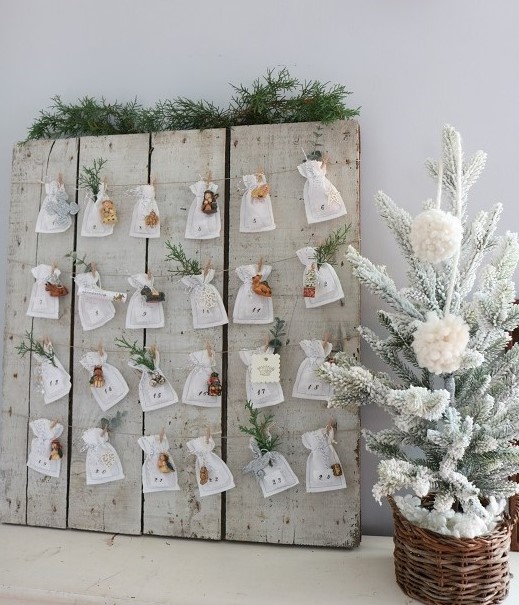
Once you have all of your 24 bags ready, it’s time to display the DIY Advent calendar!
I love the look of an old frame or chalkboard to serve as a backdrop for the bags.
Here I used a vintage wood piece (perhaps once a cupboard door?) as my background.
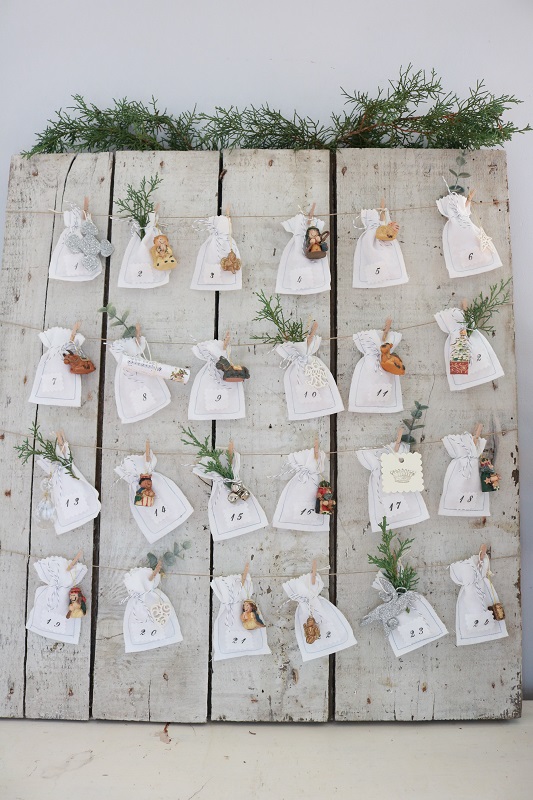
Hang 4 rows of brown twine across the frame or wood piece. I stapled & tied the twine to the back, but you could also use strong tape if the bags will not be holding heavier treasures. You could also use this pretty hand-dyed ribbon.
Clip 6 Advent calendar bags to each of the 4 rows of twine using mini clothespins.
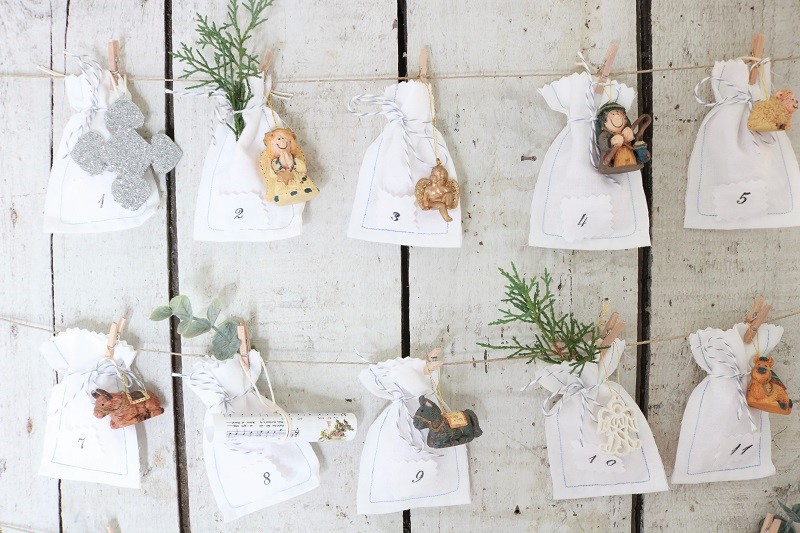
Tuck in sprigs of greenery and fun embellishments or Christmas tags, and you’re ready to count down Advent! We have always hung an ornament to our calendar each night which represents the story of the Nativity.
I hope you enjoy a beautiful Advent, which I can’t believe begins next weekend!!

